Miele HS23 Operating Instructions Manual
Cordless vacuum cleaner
Hide thumbs
Also See for HS23:
- Operating instructions manual (164 pages) ,
- Operating instructions manual (40 pages) ,
- Operating instructions manual (104 pages)
Table of Contents
Advertisement
Quick Links
Advertisement
Table of Contents

Related Manuals for Miele HS23


Summary of Contents for Miele HS23
- Page 1 Operating instructions Cordless vacuum cleaner en-GB HS23 M.-Nr. 12 382 010...
-
Page 2: Table Of Contents
Contents Warning and Safety instructions..............Warning and safety notes for the AP10/AP11 battery and LG02 charger... Guide to the appliance ..................12 Sustainability and environmental protection ..........14 Commissioning....................16 Assembling the vacuum cleaner ................. 16 Connecting the PowerUnit and the suction tube ..........16 Connecting the suction tube and the electrobrush.......... - Page 3 Contents Troubleshooting....................31 Service........................ 34 Contact in case of malfunction ................34 Warranty ......................34 Optional accessories ..................34 Purchasing accessories ..................34...
-
Page 4: Warning And Safety Instructions
“Commissioning” section as well as the warning and safety notes. Miele cannot be held liable for injury or damage caused by non- compliance with these instructions. Keep these operating instructions in a safe place and pass them on to any future owner. - Page 5 Warning and Safety instructions The vacuum cleaner can only be used by people (including chil- dren) with reduced physical, sensory, or mental capabilities, or lack of experience or knowledge, if they are supervised whilst using it or have been shown how to use it in a safe way and understand and re- cognise the consequences of incorrect operation.
- Page 6 Miele authorised service technician. Otherwise the warranty will be invalidated. Repairs should only be carried out by a Miele authorised service technician. Repairs and other work by unqualified persons can cause considerable danger to users.
- Page 7 Warning and Safety instructions Correct use Do not use the vacuum cleaner without the pre-filter and fine dust filter fitted. Keep the vacuum cleaner away from naked flames or other heat sources. Do not heat the vacuum cleaner. Do not expose the va- cuum cleaner to direct sunlight.
-
Page 8: Warning And Safety Notes For The Ap10/Ap11 Battery And Lg02 Charger
The AP10/AP11 battery, the LG02 charger and the wall bracket are designed for use with the Miele HS23 vacuum cleaner. For safety reasons, the vacuum cleaner must not be used with another battery, charger or wall bracket produced by another manufacturer. - Page 9 The function and operation of the protective measures provided in the domestic electrical installation and in this Miele product must also be maintained in isolated operation or in operation that is not synchronised with the mains power supply, or these measures must be replaced by equivalent measures in the installation.
- Page 10 The user is permitted to transport the AP10/AP11 battery by road without having to observe any further requirements. Please contact the Miele Customer Service Department before send- ing the AP10/AP11 battery. Only send AP10/AP11 batteries that are undamaged and have been fully run down. Insulate the metal con- tacts with adhesive tape to prevent short circuits.
- Page 11 The manufacturer cannot otherwise guarantee the safety of the product. Miele can only guarantee the safety of the appliance when genu- ine Miele replacement parts are used. Faulty components must only be replaced with genuine Miele replacement parts.
-
Page 12: Guide To The Appliance
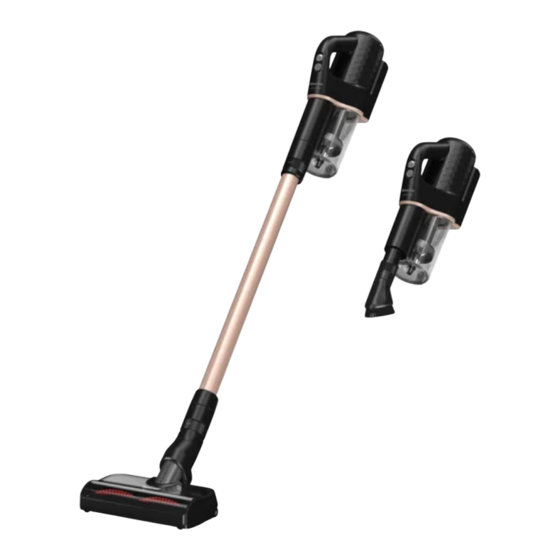
Guide to the appliance ... - Page 13 Guide to the appliance a Screw cap for the ComfortClean self-cleaning function b Release catch for removing the fine dust filter c Fine dust filter d Battery charging state indicator e Battery compartment f Charging socket (at the bottom) g Attachment device for wall bracket h Dust container i Pre-filter j Release catch for dust container flap...
-
Page 14: Sustainability And Environmental Protection
Miele, free of charge. By law, you are solely responsible for deleting any personal data from the old appliance prior to disposal. You are legally obliged... - Page 15 Sustainability and environmental protection Disposing of old batteries In many cases, electrical and electronic appliances contain batteries which must not be disposed of with house- hold waste after use. You are legally ob- liged to remove any old batteries which are not securely enclosed by the appli- ance and take them to a suitable collec- tion point (e.g.
-
Page 16: Commissioning
Connecting the PowerUnit and the Commissioning suction tube Assembling the vacuum cleaner Push the PowerUnit connector into position in the suction tube until it audibly clicks into place. Assemble the vacuum cleaner. Slide the sliding ring on the suction tube down to separate the individual sections from each other. -
Page 17: Connecting The Suction Tube And The Electrobrush
Connecting the suction tube and the General battery information electrobrush The rechargeable battery is supplied not fully charged. Charge the battery completely before using it for the first time. Allow approx- imately 3.5 hours for this. Once the battery is fully charged, the battery charging state indicator at the top of the PowerUnit switches off to conserve energy. -
Page 18: Charging The Battery (Without Wall Mounting)
Charging the battery (without wall mounting) You can charge the battery directly. Before charging the battery for the first time, you must read the information in “Commissioning” – “General battery information”. Before charging the battery for the first time, you must read the information in “Commissioning”... -
Page 19: Attaching The Charging Cable To The Wall Bracket
Attach the wall bracket to the wall. Place the vacuum cleaner into the wall bracket from above. Attaching the charging cable to the Plug the charger into the power wall bracket socket. Push the charging plug of the char- The charging process will start. -
Page 20: Battery Charging State Indicator (While In Use)
Using the supplied accessories Charged capacity Left, middle and Miele offers a range of suitable ac- approx. 91–99 % right indicators cessories for many special applica- light up tions (see “Optional accessories”). 100 % Switches off ... -
Page 21: Accessories Holder For The Suction Tube
Accessories holder for the suction MultiFloor electrobrush (HX-EB 20) tube Follow the flooring manufacturer’s cleaning and care instructions. Damage caused by trapped ma- terial. Risk of the flooring getting scratched. Make sure that there is no coarse dirt or debris trapped in the bottom of the electrobrush, e.g. -
Page 22: Electro Compact Handheld Brush (Hx-Ec 20)
Electro Compact handheld brush AllFloor floorbrush (HX-AF 20) (HX-EC 20) (depending on the model) (depending on the model) Follow the flooring manufacturer’s Follow the flooring manufacturer’s cleaning and care instructions. cleaning and care instructions. Damage caused by trapped ma- terial. Risk of the flooring getting scratched. -
Page 23: Extendable Flexible Xl Crevice Nozzle (Hx-Cnxl)
Extendable flexible XL crevice nozzle Operation (HX-CNXL) Removing the vacuum cleaner from (depending on the model) the wall bracket Can reach 60 cm for cleaning hard-to- Remove the vacuum cleaner from the reach areas. wall bracket by pulling it upwards. Hose extension (HX-FSH 20) Switching on and off (depending on the model) -
Page 24: Increasing The Suction Power
Using the PowerUnit solo Press the upper button on the handle . The PowerUnit can be used on its own without the suction tube and electro- The vacuum cleaner will switch on us- brush as a quick way of vacuuming up ing the lowest power level. -
Page 25: Filter System
Filter system Activating the ComfortClean self- cleaning function Always run the interim cleaning function for the fine dust filter before emptying the dust container. You should also run it whenever the suction power begins to drop. This enables the vacuum cleaner to achieve the very best cleaning perform- ance again straight away. -
Page 26: Cleaning The Dust Container And Pre-Filter
Press the release button on the bot- Remove the pre-filter by pulling it tom of the dust container. downwards. The flap will open and the dust will fall Risk of damage caused by incor- out. rect cleaning. The pre-filter can become damaged If dust balls, hair or coarse debris do and be less effective as a result. -
Page 27: Cleaning The Fine Dust Filter
Reinsert the cleaned pre-filter into the Press both release buttons at the side cleaned dust container as far as it will of the fine dust filter lid and remove the fine dust filter by pulling it up- wards. ... -
Page 28: Cleaning The Electrobrush/Handheld Brush (Depending On The Model)
Cut any threads or hairs that have To continue achieving the best pos- wound themselves around the roller sible cleaning results, replace the fine brush with a pair of scissors. To guide dust filter with a new one after approx. the scissors, there are two guide 3 years. -
Page 29: Replacing The Battery
Replacing the battery C Pull lightly on the handle until it is re- An original Miele AP10/AP11 lithium-ion leased. rechargeable battery is required. Remove the soiling. Follow the instructions regarding the ... -
Page 30: Caring For The Vacuum Cleaner And Accessories
Caring for the vacuum cleaner and accessories Risk of injury caused by rotating roller brush. You can injure yourself on the rotat- ing roller brush. Always switch the vacuum cleaner off before caring for it. Use the On/ Off switch on the handle to do this. ... - Page 31 You can save time and money in many cases, as you do not need to call the Miele Customer Service Department. Information to help you remedy faults yourself can be found at www.miele.com/ service. The following tables are designed to help you to find the cause of a malfunction or a fault and to resolve it.
- Page 32 Charge the battery (see “Commissioning” – “Gen- switched on. eral battery information” and “Charging the bat- tery”). An original Miele battery has not been inserted. Insert an original Miele AP10/AP11 lithium-ion re- chargeable battery. The charging plug is still plugged in.
- Page 33 Problem Cause and remedy The operating noise is The airways are soiled. changing during vacu- Clean all the airways. uming. The electrobrush power rating is automatically set to the optimum level based on the type of flooring. The noise is not unusual – the vacuum cleaner is functioning normally.
- Page 34 Original Miele accessories are available problem could have been resolved as from the Miele webshop, the Miele Cus- described in this booklet. tomer Service Department and from your Miele dealer.
- Page 35 Certain models are supplied with one or more of the following accessories as standard. Electro Compact handheld brush (HX-EC 20) For intensive cleaning of car seats and carpeted stairs. AllFloor floorbrush (HX-AF 20) Flat floorbrush for cleaning underneath very low furniture. It is also quiet, light and stands out due to its very good pick-up of coarse dirt.
- Page 36 United Kingdom Miele Co. Ltd., Fairacres, Marcham Road, Abingdon, Oxon, OX14 1TW Tel: 0330 160 6600, Internet: www.miele.co.uk, E-mail: info@miele.co.uk Australia Ireland Singapore Miele Australia Pty. Ltd. Miele Ireland Ltd. Miele Pte. Ltd. ACN 005 635 398 2024 Bianconi Avenue...
Need help?
Do you have a question about the HS23 and is the answer not in the manual?
Questions and answers