
Related Manuals for Xantech D5RH


Summary of Contents for Xantech D5RH
-
Page 1: Installation Instructions
INSTALLATION INSTRUCTIONS D5RH DIGI-5 DDS Digital Distribution System Rack Mount 4 Source, 4 Zone Hub 08905153A - 1 -... -
Page 2: Important Safety Information
Safety Information CAUTION: TO REDUCE THE RISK OF ELECTRIC SHOCK, DO NOT REMOVE COVER (OR BACK). NO USER SERVICEABLE PARTS INSIDE. REFER SERVICING TO QUALIFIED SERVICE PERSONNEL. The lightning flash with arrowhead symbol within an equilateral triangle is intended to alert the user to the presence of uninsulated "dangerous voltage"... - Page 3 Caring For the D5RH Clean only with a dry soft cloth. It is important to properly care for your D5RH Digital Audio Distribution Hub. Follow these guidelines to ensure your device is preserved and protected. • Do not expose the D5RH to rain, liquids or moisture for an extended period of time.
- Page 4 The D5RH 4 Source, 4 Zone Digital Audio Distribution Hub with DIGI-5 Technology and related products from Xantech provides the ability to listen to 4 different audio sources in up to 28 separate zones of the home, all over CAT-5 wiring for total flexibility and convenience. No need to have multiple audio systems in different areas, just select a source from one of Xantech’s premium in-wall...
- Page 5 • Paging/DB Functionality w/ Optional Communications Controller • Compact Single Rack Space Design • Rack Mountable – Optional Rack Ear Kit Available (RM1UKIT) D5RH Accessories • D5XH 6 Zone Expansion Router • D5KP Amplified Keypad • D5IP Source Input Wall Plate •...
-
Page 6: Front Panel
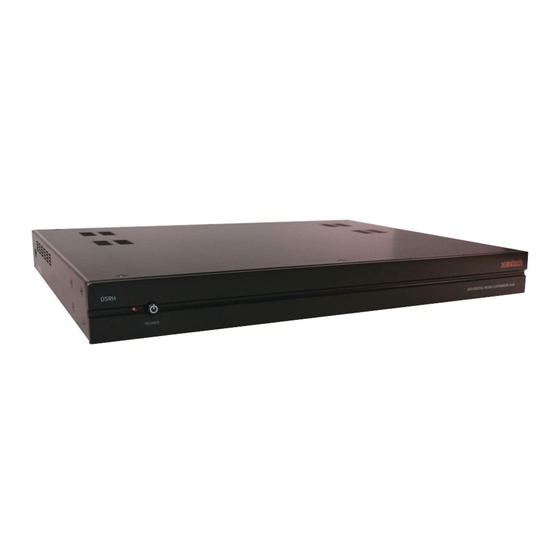
Front Panel The front panel of the D5RH is populated simply by a Power LED and a Power Button. Figure 1.1 and Table 1.1 provide descriptions and locations of Front Panel controls and indicators. -
Page 7: Rear Panel
Rear Panel The Rear Panel of the D5RH has connections for Power, Source Inputs, Zone Outputs, IR Outputs, Page/Doorbell Trigger Input, Auxiliary Power, USB and Expansion capabilities as well as Digital/Analog Source Selection, Source Input Gain and Zone Pairing DIP Switches. - Page 8 Planning Before installing the D5RH, it is essential to have a detailed and accurate system design. The first step to a good design is to map the system. It is advisable to mark up a copy of the house floor plan with speaker, keypad and equipment locations, etc.
- Page 9 Pre-Construction In a pre-construction installation, walls and ceilings are open with no drywall installed. This is desirable and allows the installer greater access than in retro-fit applications. Before actually running any wire or cable, take the time to look around each room or area of the house and plan your wire paths for maximum efficiency.
- Page 10 Local sources are only available within the area that they are installed. They will not be available to other areas of the house as they are not distributed by the D5RH. Run lengths of CAT-5 from any local (in-room) source to the Amplifier Keypad located in that area.
- Page 11 Plates Basic 4 Zone, 4 Source System Figure 2.3 shows a basic D5RH system with four sources and four zones. The system is comprised of a D5RH Digital Audio Distribution Hub, D5KP Amplified Keypad and Xantech XTC Speakers. This configuration provides audio from each source into each zone as well as control of each source from each zone.
- Page 12 Local Sources Connected Using DHIP Local Source Wall Plates Figure 2.4 shows a basic D5RH system with four sources and four zones with the addition of Local Sources in two of the zones. Each zone can have one local source. The system is comprised of a D5RH Digital Audio Distribution Hub, D5KP Amplified Keypad, D5IP Source Input Wall Plates and Xantech XTC Speakers.
- Page 13 Sources in four of the zones. Each zone can have one local source. The system is comprised of a D5RH Digital Audio Distribution Hub, D5XH Expansion Hub, D5KP Amplified Keypad, D5IP Local Source Wall Plates and Xantech XTC Speakers. This configuration provides audio from each source into each zone as well as control of each source from each zone.
- Page 14 Source Audio Inputs The D5RH supports a total of four System Sources which are available to each of four zones and can be sent to up to a total of twenty-eight zones using D5XH Expansion Hubs. There are two types of Source Inputs.
- Page 15 DO NOT connect both coaxial and optical outputs to the D5RH. NOTE: Multi-channel digital audio formats (5.1, 7.1 etc.) are not supported by the D5IP and D5RH. However, many audio/video sources allow you to change the digital output to PCM Stereo. In most cases this will allow multi-channel audio sources to output a “summed” stereo signal through the digital output.
- Page 16 Source Loop Outputs (SOURCE LOOP OUT) The Source Loop Outputs are used only when adding D5XH Expansion Hubs to the D5RH in order to create more than four zones. These connectors carry Audio, Status and IR information between the units and allow seamless functionality in all areas of the home with no complicated cross-wiring, splicing or specialized adapters needed.
- Page 17 This connector is reserved for future implementation of two-way data sources and communication. EXPANSION OUT Connect the CAT-5 Patch Cable from the D5RH ‘EXPANSION OUT’ port to the D5XH ‘EXPANSION IN’ port as shown. Complete connections for expanded systems are described in the section entitled Multi-Chassis Connections.
- Page 18 IR OUT/ALL IR OUT Xantech D5KP Amplified Keypad feature a built-in IR Receiver that is used to control the sources connected to the D5RH using hand-held remotes. The four IR ports labeled 1-4 are Source-Specific. When a particular source is selected in a zone, the corresponding IR port is active and only the selected source receives IR.
- Page 19 T-568A Standard. These connectors carry IR information from the keypad as well as audio information to the D5KP Amplifier Keypad. Status information is also carried between the D5RH chassis and the Amplifier Keypads. While a great deal of information is handled by the ‘ZONE OUT’...
- Page 20 D5KP Speaker Connections The D5RH routes digital audio to connected D5KP Amplifier Keypad where the audio is then amplified and sent to in-room speakers. WARNING!: The D5KP’s amplifier is capable of powering a single pair of 8-6 Ohm speakers. DO NOT connect speakers with a rating of less than 6 Ohms! DO NOT connect more than one speaker to either speaker connector of the D5KP.
- Page 21 300’, 16 AWG/2-conductor wire is required to operate the keypad. The maximum wire run using CAT-5 and 16 AWG/2-conductor is 600’. Make all connections between the D5RH and the D5KP Amplifier Keypad as previously described, then make the aux power connections described below.
- Page 22 RS232 Port Connect RS232 port to an external controller. System Expansion The D5RH is capable of supporting up to four sources to up to four zones. The system may be expanded in two ways: • Local Sources • Adding Zones Local Sources Each zone of a D5RH-based system can have its own “Local”...
- Page 23 A D5IP Source Input Wall Plate is required to add a Local Source to a zone. The wall plate has audio and IR connections similar to the SOURCE INPUT of the D5RH. A run of CAT-5 terminated to T- 568A standard (see Figure 2.2) is required between the D5KP Amplified Keypad and the location designated for the D5IP.
-
Page 24: Side View
Figure 3.10 to Figure 3.12: Local Source to D5IP Connections NOTE: Multi-channel digital audio formats (5.1, 7.1 etc.) are not supported by the D5IP and D5RH. However, many audio/video sources allow you to change the digital output to PCM Stereo. In most cases this will allow multi-channel audio sources to output a “summed”... - Page 25 IR OUT Connect a standard IR Emitter (283D emitter, for example) from the IR OUT port on the front of the D5IP to the IR receiver on the front of the audio source (see Figure 3.14). For sources that have an IR Input port on the back of the unit, use a 3.5mm to 3.5mm mono interconnect cable instead (see Figure 3.14).
- Page 26 Adding Zones – D5XH Digital Audio Distribution Hub A basic D5RH system can contain a maximum of four sources and four zones. By adding D5XH Digital Audio Distribution Expansion Hub, the system can contain a maximum of twenty-eight zones. Each D5XH expands the system by up to six zones, while still maintaining a four source maximum limit.
- Page 27 • SOURCE LOOP OUT/SOURCE LOOP IN EXPANSION OUT/EXPANSION IN Simply connect a CAT-5 patch cable from the D5RH’s EXPANSION OUT port to the first D5XH’s EXPANSION IN port. For multiple D5XH units, connect a CAT-5 patch cable from the first D5XH’s EXPANSION OUT port to the next D5XH’s EXPANSION IN port, and so on.
-
Page 28: Settings & Operation
4. Settings & Operation DIP Switch Settings There are two groups of DIP switches on the rear panel of the D5RH that must be set prior to operation: • SOURCE INPUT GAIN • KEYPAD PAIRING ANALOG SOURCE INPUT GAIN Analog Audio SOURCE 3 and 4 have a corresponding DIP switch to adjust the input level relative to the other sources. -
Page 29: Troubleshooting
5. Troubleshooting Table 5-1 provides troubleshooting information for the D5RH Digital Audio Distribution Hub. Audio Symptom No audio present in a specific zone No audio from specific source No audio present in any zone Hum or buzz through system speakers... -
Page 30: Appendix A: Specifications
Appendix A: Specifications Power Input Sampling Frequency Digital Audio Resolution Signal to Noise Ratio Input GAIN Switches (Input Sensitivity) DIP Switch 3 & 4 UP DIP Switch 3 & 4 DOWN Frequency Response Dimensions H x W x D (w/ feet) H x W x D (w/o feet) Weight 08905153A... - Page 31 You discover such item was not as warranted above and You promptly notify Xantech in writing, Xantech shall repair or replace the items at its option. Xantech may elect which remedy or combination of remedies to provide in its sole discretion.
- Page 32 Document # 08905153A This document is copyright protected. No part of this manual may be copied or reproduced in any form without prior written consent from Xantech Corporation. Xantech Corporation shall not be liable for operational, technical, or editorial errors/omissions made in this document.
Need help?
Do you have a question about the D5RH and is the answer not in the manual?
Questions and answers