Table of Contents
Advertisement
Quick Links
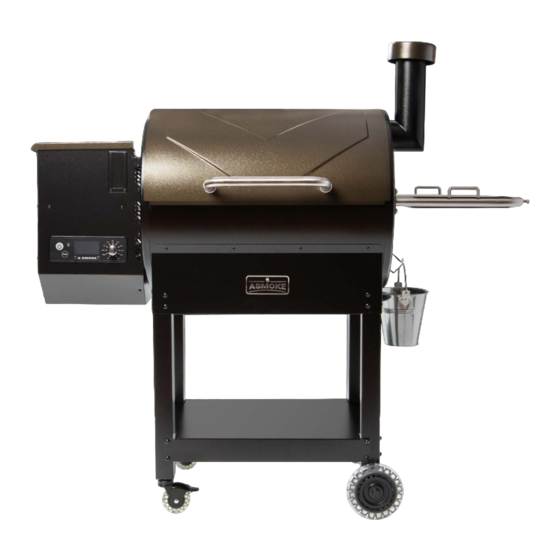
WOOD PELLET GRILL AS660
IMPORTANT, READ CAREFULLY,
RETAIN FOR FUTURE REFERENCE.
MANUAL MUST BE READ
BEFORE OPERATING!
82-260°C / 180-500°F
82-260°C / 180-500°F
ASSEMBLY AND OPERATION
ASSEMBLAGE ET FONCTIONNEMENT
MONTAJE Y OPERACIÓN
WARNING: Please read the entire manual
before installation and use of this electric,
pellet fuel-burning appliance. Failure to
follow these instructions could result in
property damage, bodily injury or even
death. Contact local building or fire officials
about restrictions and installation inspection
requirements in your area.
IPX4
FOR OUTDOOR AND HOUSEHOLD USE ONLY. NOT
FOR COMMERCIAL USE. RÉSERVÉ À L'USAGE
EXTÉRIEUR ET RÉSIDENTIEL UNIQUEMENT. NON
DESTINÉ À UN USAGE COMMERCIAL.
SOLO PARA USO EN EXTERIORES Y EN EL HOGAR.
NO ES PARA USO COMERCIAL.
Advertisement
Table of Contents

Related Manuals for Asmoke AS660


Summary of Contents for Asmoke AS660
- Page 1 IPX4 WOOD PELLET GRILL AS660 IMPORTANT, READ CAREFULLY, RETAIN FOR FUTURE REFERENCE. MANUAL MUST BE READ BEFORE OPERATING! 82-260°C / 180-500°F 82-260°C / 180-500°F ASSEMBLY AND OPERATION ASSEMBLAGE ET FONCTIONNEMENT MONTAJE Y OPERACIÓN WARNING: Please read the entire manual before installation and use of this electric, pellet fuel-burning appliance.
-
Page 2: Safety Information
SAFETY INFORMATION MAJOR CAUSES OF APPLIANCE FIRES ARE A RESULT OF POOR MAINTENANCE AND A FAILURE TO MAINTAIN REQUIRED CLEARANCE TO COMBUSTIBLE MATERIALS. IT IS OF UTMOST IMPORTANCE THATTHISPRODUCTBEUSEDONLYINACCORDANCETOTHE FOLLOWINGINSTRUCTIONS. Please read and understand this entire manual before attempting to assemble, operate or install the product. This will ensure you receive the most enjoyable and trouble-free operation of your new wood pellet grill. - Page 3 Parts of the barbecue may be very hot, and serious injury may occur. Keep young children and pets away while in use. Donot enlargeigniterholesorburnpots.Failuretofollowthiswarningcouldleadtoafirehazardandbodilyharmandwill void your warranty. Product may have sharp edges or points. Contact may result in injury. Handle with care. If the supply cord is damaged,...
- Page 4 COPYRIGHT NOTICE Copyright 2019. All right reserved. No part of this manual may be copied, transmitted, transcribed, stored in a retrieval system, in any formorby anymeanswithoutexpressedwrittenpermissionof, Asmoke USA LLC 72 Three Rivers Dr Newark, DE 19702 support@asmokegrill.com www.asmokegrill.com Customer Service...
-
Page 5: Table Of Contents
TABLE OF CONTENTS Safety Information..........1 Care & Maintenance.......... 16 Parts & Specs............5 Using Wood Pellet Fuel........18 Assembly Preparation..........6 Cooking Guidelines..........19 Assembly Instructions How to Use Meat Probe ........20 Mounting The Wheels ToThe Legs.......6 Tips & Techniques..........21 Mounting The Wheels To The Cart...... -
Page 6: Parts &Specs
DIGITAL FEATURES Main - 3,120 cm² / 484 sq. in. Ten temperature presets, 1,330mmx830mmx1, 3 00mm 82-260°C Total: AS660 Upper Rack - 1,390 cm² / 215 sq. start-up cycle, electric / 52.4" x 32.7” x 51.2” / 180-500°F 64Kg/141.1 lb in. -
Page 7: Assembly Preparation
If any part is missing or damaged, do not attempt to assemble. Shipping damage is not covered under warranty. Contact your dealer or ASMOKE Customer Service for parts: Monday through Sunday, 9am - 5pm PST (EN). -
Page 8: Mounting The Wheels To The Cart
2. MOUNTING THE WHEELS TO THE CART Parts Required: Locking Caster Wheel (#24) Wheel (#20) Wheel Axle Pin (#B) Wheel Axle Washer (#A) Wheel Cotter Pin (#C) Installation: • Attach the wheel to the long support leg by inserting the wheel axle pin through the wheel, long support leg, wheel axle washes then secure using the wheel cotter pin. -
Page 9: Mounting The Hopper To The Main Barrel
4. MOUNTING THE HOPPER TO THE MAIN BARREL Parts Required: The Feeding Box (#4) Heat Insulated Pad (#27) Hexagonal Fixed Bolts (Pre-assembled) Installation: • Remove the four 1/4-20 hexagonal fixed bolts that were pre-assembled on the feeding box, which is shown in Figure 4A. •... -
Page 10: Securing The Chimney
6. SECURING THE CHIMNEY Parts Required: Chimney Cap(#5) Chimney (#6) Chimney Gasket (#7) Screw (Pre-Installed ) Installation: • Dismantle three screws pre-installed on the right side of the principal part. • Locate the chimney hole on the side of the principal part of cylinder. -
Page 11: Installing The Storage Tray
It's ready to catch your grill's grease and oil run off for easy clean up and maintenance. 11. CONNECTING TO A POWER SOURCE NOTE: Before plugging your ASMOKE into any electrical outlet, ensure the temperature dial is in the OFF position. •... -
Page 12: Operating Instructions
With all outdoor appliances, outside weather conditions play a big part in the performance of your grill and the cooking time needed to perfect your meals. All ASMOKE units should keep a minimum clearance of 915mm (36 inches) from combustible constructions, and this clearance must be maintained while the grill is operational. This appliance must not be placed under overhead combustible ceiling or overhang. -
Page 13: Grill Temperature Ranges
• Adjust your cooking temperatures downward. This helps to avoid unwanted flare-ups. • Use a meat thermometer to determine the internal temperature of your foods. This helps in preventing your meat from over cooking and drying out. • Even in hot weather it is still better to cook with the lid of your grill down. •... -
Page 14: Understanding The Control Board
UNDERSTANDING THE CONTROL BOARD... -
Page 15: Understanding The Probes
UNDERSTANDING THE PROBES • TEMPERATURE PROBE Locatedinsidethemainbarrel,ontheleftsidewall,isthetemperatureprobe.Itisasmall,verticalpieceofstainlesssteel.The temperature probe measures the internal temperature of the unit. When the temperature is adjusted on the Control Board, the temperatureprobe will read the actual temperature inside the unit and adjust to the desired temperature. IMPORTANT: The temperature of your unit is highly affected by ambient outdoor weather, quality of pellets used, flavor of pellets, and the quantity of food being cooked. -
Page 16: First Use - Grill Burn-Off
Plug the power cord into a power source. Press the Power Button to turn the unit on, and turn the Temperature Control Dial to the SMOKE position. Check the following items: • That you can hear the auger turning. Place your hand above the fire pot and feel for air movement. Do not place your hand or fingers inside the fire pot. -
Page 17: Manual Start-Up Procedure
MANUAL START-UP PROCEDURE Ensure the Temperature Control Dial is in the SMOKE position. Plug the power cord into a grounded power source. Check fire pot to ensure there is no obstruction for proper ignition. Open the hopper lid. Ensure there are no foreign objects in the hopper or auger feed system. - Page 18 • Although the probesare stainlesssteel,do notplace in the dishwasheror submergein water.Waterdamageto the internalwireswillcausetheprobetoshort-out,causingfalsereadings.Ifaprobeisdamaged,itshouldbereplaced. 3. INSIDE SURFACES • It is recommended to clean your fire pot after every few uses. This will ensure proper ignition and avoid any hard build-up of debris or ash in the firepot. •...
-
Page 19: Using Wood Pellet Fuel
fresh orchard. fresh orchard. fresh orchard. No fillers, no blends, no additions. No fillers, no blends, no additions. No fillers, no blends, no additions. -
Page 20: Cooking Guidelines
COOKING GUIDELINES Smoking and grilling styles of cooking can give you different results based on time and temperature. For best results, keep a record of what you cooked, at what temperature, how long you cooked for, and the results. Adjust to your taste for the next time. Practice makes perfect. -
Page 21: How To Use Meat Probe
BEEF HEAT SIZE Rare - 54°C / 130°F Medium - 60°C / 140°F WellDone- 65°C/ 150°F Steak (New York, 1.9 cm / ¾" High Sear 8-10 minutes 2.5 cm / 1" Porter-house, Rib- Sear 10-12 minutes 3.8 cm / 1½" Sear 10 minutes, grill 8-10 minutes eye, Sirloin, T-bone, 5 cm / 2"... -
Page 22: Tips &Techniques
TIPS &TECHNIQUES Follow these helpful tips and techniques, passed on from ASMOKE owners, our staff, and customers just like you, to become more familiar with your grill: 1. FOOD SAFETY • Keep everything in the kitchen and cooking area clean. Use different platters and utensils for the cooked meat than the ones you used to prepare or transport the raw meat out to the grill. -
Page 23: Troubleshooting
Proper cleaning, maintenance and the use of clean, dry, quality fuel will prevent common operational problems. When your ASMOKE grill is operating poorly, or on a less frequent basis, the following troubleshooting tips may be helpful. For FAQ, please visit www.asmokegrill.com. You may also contact your local ASMOKE authorized dealer or contact Customer Service for assistance. - Page 24 "ErH" Error Code The Unit Has Press the Power Button to turn the unit off, and allow grill to cool. Follow Care and Overheated, Possibly Maintenance instructions. After maintenance, remove pellets, and confirm positioning of Due To Grease Fire Or all component parts.
-
Page 25: Electrical Wire Diagram
ELECTRICAL WIRE DIAGRAM The Digital Control Board system is an intricate and valuable piece of technology. For protection from power surges and electrical shorts, consult the wire diagram below to ensure your power source is sufficient for the operation of the unit. LOCATE AND REMOVE THE EIGHT SCREWS OF ACCESS PANEL ON... -
Page 26: Grill Replacement Parts
GRILL REPLACEMENT PARTS NOTE: Due to ongoing product development, parts are subject to change without notice. -
Page 27: Hopper Replacement Parts
HOPPER REPLACEMENT PARTS... -
Page 28: Exceptions
Neither ASMOKE, or authorized ASMOKE dealer, accepts responsibility, legal or otherwise, for the incidental or consequential damage to the property or persons resulting from the use of this product. Whether a claim is made against ASMOKE based on the breach of this warranty or any other type of warranty expressed or implied by law, the manufacturer shall in no event be liable for any special, indirect, consequential or other damages of any nature whatsoever in excess of the original purchase of this product. -
Page 29: Recipes
RECIPES APPLE WOOD SMOKED BACON 5. Grill 2 pieces pita bread until warm and toasted, 1 to 2 minutes. 6. Meanwhile, toss together cucumber, scallions, Ingredients: 450g / 1 lb Thick-cut Bacon mint, olive oil, fresh lime juice, and garlic. Season with kosher salt and black Suggested Wood Pellet Flavor: Apple pepper. - Page 30 BBQ PORK CHOPS WITH BOURBON GLAZE 1. Preheat grill, then reduce to 177°C / 350°F. 2. In a small bowl, mix the softened butter, salt, black Ingredients: pepper, and paprika. 283 g / ⅔ lb Bone-in Pork Loin Chops, Trimmed of Excess Fat 3.
-
Page 31: 5-Year Warranty
This warranty does not include labor charges connected with the determination or replacement of defective parts, or freight charges to ship these parts. ASMOKE USA LLC shall not be liable under this or any implied warranty for incidental or consequential damages. This warranty gives the retail customer specific legal rights and the customer may have other rights which vary from state to state. - Page 32 WARNING: Please read the entire manual before installation and use of this electric, pellet fuel burning appliance. Failure to follow these instructions could result in property damage, bodily injury or even death. Contact local building or fire officials about restrictions and installation inspection requirements in your area. WARNING : This product can expose you to chemicals including wood dust, which is known to the state of California to cause cancer.
Need help?
Do you have a question about the AS660 and is the answer not in the manual?
Questions and answers