
Related Manuals for Acer S1200


Summary of Contents for Acer S1200
- Page 1 SERVICE MANUAL S1200 Date Revise Version Description 2008.8.25 V1.0 Initial Issue CopyrightAugust.2008 All Rights Reserved P/N: 36.8BJ03G001 SI : TSE: Check: Approved:...
- Page 2 Preface This manual is applied to S1200 projection system. The manual gives you a brief description of basic technical information to help in service and maintain the product. Your customers will appreciate the quick response time when you immediately identify problems that occur with our products.
-
Page 3: Table Of Contents
2-11 Disassemble DMD Board and DMD Chip 2-12 Disassemble Speaker Module 2-13 Disassemble System Fan Module 2-14 Disassemble Blower 2-15 Disassemble Front Cover 2-16 Disassemble Lamp Driver 2-16 Disassemble LVPS 2-17 Disassemble Bottom cover 2-18 Rod Adjustment 2-20 S1200 Confidential... - Page 4 Assemble Top Cover Module 2-37 Assemble Lamp Module 2-38 Assemble Lamp Cover Module 2-39 Chapter 3 Troubleshooting LED Lighting Message Main Procedure Beep Sound Chapter 4 Function Test & Alignment Procedure Test Equipment Needed Service Mode OSD Reset Test Condition S1200 Confidential...
- Page 5 EDID Upgrade EDID Introduction Equipment Needed Setup Procedure EDID Key-In Procedure Setup Procedure (HDMI) Default Language Reset Appendix A S1200 Exploded Overview Appendix B Serial Number System Definition PCBA Code Definition Appendix C RS232 function command summary table S1200 Confidential...
-
Page 6: Chapter 1 Introduction
Throw Distance - 0.5– 3.7m (focus range) Better display at 60” Throw Ratio - 0.6:1 distance/width @60” - 2500 hours min, 50% survival rate (Full power Mode) Lamp life - 4000 hours min, 50% survival rate (Echo power Mode) s1200 Confidential... - Page 7 -20°C -- 60°C - Operating: 5°C -- 35°C, 80%RH (Max.), non-condensing Maximum Humidity - Storage: -20°C -- 60°C, 80%RH (Max.), non-condensing System controller - TI DDP2230 Number of active dots - Number of active dots : 1024(H) x 768(V) s1200 Confidential...
-
Page 8: Compatible Mode
640x480 31.35 640x480 66.6(67) 34.93 PowerBook G4 800x600 37.90 1024x768 48.40 1152x870 68.68 i Mac DV(G3) 1024x768 60.00 Aspire One 1024x600 48.22 2. VGA Analog - Extended Wide timing 1280x720 45.00 1280x800 49.702 WXGA 1440x900 55.935 1680x1050 65.290 s1200 Confidential... - Page 9 Power Mac G4 1024x768 48.40 1152x870 68.68 640x480 31.35 640x480 66.6(67) 34.93 PowerBook G4 800x600 37.90 1024x768 48.40 1152x870 68.68 i Mac DV(G3) 1024x768 60.00 (2) HDMI - Extended Wide timing 1280x720 45.00 1280x800 49.702 WXGA 1440x900 55.935 1680x1050 65.290 s1200 Confidential...
- Page 10 720x480 59.94 31.47 720x576 576i (PAL) 50(25) 27.00 (1440x576) 576p (PAL) 720x576 31.25 720p (NTSC) 1280x720 45.00 720p (PAL) 1280x720 37.50 1080i (NTSC) 1920x1080 60(30) 33.75 1080i (PAL) 1920x1080 56.25 1080p (NTSC) 1920x1080 67.50 1080p (PAL) 1920x1080 56.25 s1200 Confidential...
-
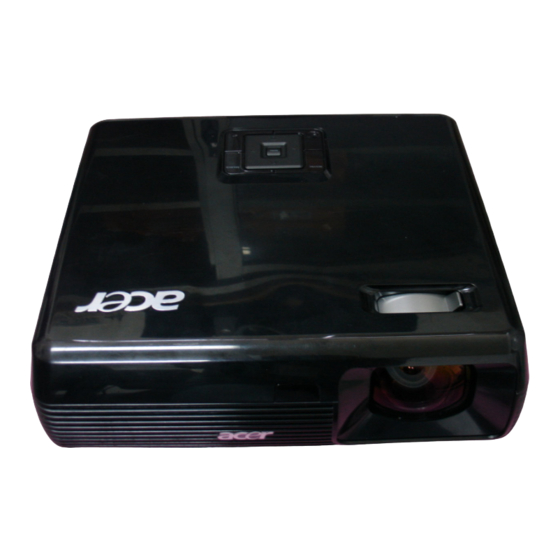
Page 11: Product Overview
1-3 Product Overview Projector Outlook Front /Upper side Item Description Item Description Power button Lens cap Focus ring Control panel Zoom Lens Remote control receivers Elevator button s1200 Confidential... - Page 12 Item Description USB connector S-Video input connector HDMI connector Audio input connector PC analog signal/HDTV/SCART/ component video input connector RS232 connector (VGA IN ) Monitor loop-through output Power socket connector (VGA-Out) Composite video input connector KensingtonTM lock port s1200 Confidential...
- Page 13 Temp Indicator LED. to select items or make Four directional select keys adjustments to your selection. Press “SOURCE” to choose RGB, Component, SVideo, SOURCE Composite, SCART and HDMI™ sources. Unique Acer functions: eOpening, eView, eTimer, Empowering key ePower Management. s1200 Confidential...
- Page 14 Remote Control Layout s1200 Confidential...
- Page 15 Aim the remote at the viewing screen, press and hold this Laser button button to activate the laser pointer. This function is not supported in Japanese market. Unique Acer functions: eOpening, eView, eTimer, ePower Empowering key Management. Adjusts the image to compensate for distortion caused by KEYSTONE tilting the projector (±...
- Page 16 KeyPad 0~9 Press “0~9” to input a password in the “Security”. Four directional Use up, down, left, right buttons to select items or make select keys adjustments to your selection. Note: “#” Japan area is not supported. s1200 Confidential 1-11...
- Page 17 Composite video cable RS232 cable USB cable HDMI cable VGA to component/HDTV adapter 3 RCA component cable Note: To ensure the projector works well with your computer,please makesure the timing of the display mode is compatible with the projector. s1200 Confidential 1-12...
- Page 18 System Block Diagram s1200 Confidential 1-13...
- Page 19 Bottom Cover Dimension s1200 Confidential 1-14...
-
Page 20: Disassembly Process
5. Hex Sleeves 7mm 6. Tweezers 7. S1200 unit * Before you start: This process is protective level II. Operators should wear electrostatic chains. * Note: If you need to replace the main board, you have to get into service mode and record the lamp usage hour. -
Page 21: Disassemble Lamp Cover Module
2-2 Disassemble Lamp Cover Module 1. Turn over the projector 2. Unscrew 2 screws (as red circle) 3. Disassemble the Lamp Cover Module 2-3 Disassemble Lamp Module 1. Unscrew 2 screws (as red circle) 2. Disassemble Lamp Module S1200 Confidential... -
Page 22: Disassemble Top Cover Module
2-4 Disassemble Top Cover Module 1. Unscrew 5 screws (as red circle) and unplug 1 connector (as yellow square) 2. Disassemble Top cover and IR LENS S1200 Confidential... -
Page 23: Disassemble Key Pad Board Module
2. Separate Key Pad and Key Pad Board 2-6 Disassemble Focus Ring Module 1. Disassemble 1 hex Coper Hold (as yellow circle) 2. Unplug 4 screws (as red circle) and take off Focus Ring and Focus Ring Holder S1200 Confidential... -
Page 24: Disassemble Top Shielding
3. Separate Focus Ring and Focus Ring Holder 2-7 Disassemble Top Shielding 1. Unscrew 1 screw (as red circle) and take off IR Sensor Cable 2. Unscrew 10 screws (as yellow circle) and take off Top Shielding S1200 Confidential... - Page 25 Module and IR Sensor Board 1.Unplug 1 IR Sensor Board Connector(as yellow square) 2.Unscrew 4 screws (as red circle) 3.Take off Front Cover Module and IR Sensor Board 4. Unscrew 4 screws (as green circle) and separate LENS Wall S1200 Confidential...
-
Page 26: Disassemble Main Board
3. Unscrew 3 screws (as green circle) and unplug 7 connectors (as green square) 4. Unplug 1 connector (as orange square),take Main Board out 5. Unscrew 2 screws (as blue cirle) and separate Audio Board and Main Board S1200 Confidential... -
Page 27: Disassemble Engine Module
2-10 Disassemble Engine Module 1. Unscrew 4 screws (as red circle) 2. Disassemble Engine Module 2-11 Disassemble Color Wheel Module 1. Unscrew 2 screws (as red circle) 2. Disassemble Color Wheel Module S1200 Confidential... - Page 28 3. Unscrew 1 screw (as yellow circle) 4. Disassemble Photo Sensor Board S1200 Confidential...
-
Page 29: Disassemble Dmd Board And Dmd Chip
2-12 Disassemble DMD Board and DMD Chip 1. Unscrew 2 screws (as red circle) and separate all parts S1200 Confidential 2-10... -
Page 30: Disassemble Speaker Module
2. Rotate 1 switch (as yellow circle) in the red directs separate DMD Board and DMD Chip 2-13 Disassemble Speaker Module 1. Disassemble Speaker Module 2. Take out Speaker S1200 Confidential 2-11... -
Page 31: Disassemble System Fan Module
2-14 Disassemble System Fan Module 1. Unscrew 4 screws (as red circle) and unplug 1 connector (as red square) 2. Take out Fan Module 3. Unscrew 1 screw (as green circle) and take off thermal switch S1200 Confidential 2-12... -
Page 32: Disassemble Blower
4. Unscrew 4 screws (as yellow circle) and separate Fan and Lamp housing 2-15 Disassemble Blower 1. Unscrew 3 screws (as red circle) 2. Take off Blower S1200 Confidential 2-13... -
Page 33: Disassemble
1. Unscrew 2 screws (as red circle) and 1 connector (as yellow square) 2. Take off Lamp Driver 3.Unscrew 2 screws (as yellow cirle) and 2 tensons (as green circle) 4. Unplug 3 connectors (as blue square) S1200 Confidential 2-14... -
Page 34: Disassemble Lvps
2-18 Disassemble LVPS 1.Unscrew 3 screws (as yellow circle) to disassemble ACInlet 2.Unscrew 4 screws (as red circle) 3.Unplug 2 connectors (as red square) 4. Lose 2 tenons (as blue square),take out interupt switch S1200 Confidential 2-15... -
Page 35: Disassemble Bottom Cover
2-19 Disassemble Bottom Cover 1. Unscrew 2 screws (as red circle) and tear1 mylar (as red square) 2. Separate Bottom Cover and Bottom Cover Shielding S1200 Confidential 2-16... -
Page 36: Rod Adjustment
3. Abnormal image inspection - It should not have any abnormal color at the rim of the image by estimating through the eyes. Note: - To avoid over adjust the rod. - “Screw 1” should be adjusted first, and then adjust the “Screw2”.After the adjustment, use the glue to fix the screws. S1200 Confidential 2-17... -
Page 37: Re-Write Lamp Usage Hour
4. Choose Eco Mode Hours Test to re-write the lamp hour under Eco Power Mode back to previous lamp usage hour 5. Choose Return to Service Menu 6. Choose Exit Note: left key = decrease lamp hour right key =increase lamp hour S1200 Confidential 2-18... -
Page 38: Assemble Bottom Cover
2.Screw 2 screws (as red circle) and stick 1 mylar (as yellow square) 2-23 Assemble LVPS 1. Assemble 2 tenons (as blue square),put in interupt switch 2.Plug 2 connectors (as red square) 3.Screw 4 screws (as red circle) S1200 Confidential 2-19... -
Page 39: Assemble Lamp Driver
2-24 Assemble Lamp Driver 1. Plug 3 connectors (as blue square) 2.Screw 2 screws (as yellow cirle) and 2 tensons (as green circle) 3.Put on Lamp Driver 4. Screw 2 screws (as red circle) and plug1 connector (as yellow square) S1200 Confidential 2-20... -
Page 40: Assemble
2-25 Assemble Front Cover 1.Put on Rubber from Front Cover Module 2. Assemble 5 tensons 2-26 Assemble Blower 1.Put on Blower 2.Screw 3 screws (as red circle) S1200 Confidential 2-21... -
Page 41: Assemble System Fan Module
2-27 Assemble System Fan Module 1. Screw 4 screws (as blue circle) and assemble Fan and Lamp housing S1200 Confidential 2-22... - Page 42 2.Screw 1 screw (as green circle) and put in thermal switch 3. Put in Fan Module 4.Screw 4 screws (as red circle) and plug 1 connector (as red square) S1200 Confidential 2-23...
-
Page 43: Assemble Speaker Module
2-28 Assemble Speaker Module 1. Put in Speaker 2. Assemble Speaker Module 2-29 Assemble DMD Board and DMD Chip 1. Rotate 1switch (as yellow circle) in the red directs assemble DMD Board and DMD Chip S1200 Confidential 2-24... -
Page 44: Assemble Color Wheel Module
2. Assemble all parts and screw 2 screws (as red circle) 2-30 Assemble Color Wheel Module 1.Assemble Photo Sensor Board 2. Screw 1 screw (as yellow circle) S1200 Confidential 2-25... -
Page 45: Assemble Engine Module
3. Assemble Color Wheel Module 4.Screw 2 screws (as red circle) 2-31 Assemble Engine Module 1. Assemble Engine Module 2. Screw 4 screws (as red circle) S1200 Confidential 2-26... -
Page 46: Assemble Main Board
Main Board in 3. Screw 3 screws (as green circle) and plug 6 connectors (as green square) 4. Screw 4 hex screws (as red circle) 5. Stick 1 mylar (as red square) and plug FPC Cable (as yellow square) S1200 Confidential 2-27... - Page 47 Board 1. Screw 4 screws (as green circle) and assemble LENS Wall 2. Assemble Front Cover Module And IR Sensor Board 3. Screw 4 screws (as red circle) 4. Plug 1 IR Sensor Board Connector(as yellow square) S1200 Confidential 2-28...
-
Page 48: Assemble Top Shielding
2. Screw 1 screw (as red circle) and put on IR Sensor Cable 2-35 Assemble Focus Ring Module 1. Assemble Focus Ring and Focus Ring Holder 2 .Put on Focus Ring and Focus Ring Holder and screw 4 screws (as red circle) S1200 Confidential 2-29... -
Page 49: Assemble Key Pad Board Module
3. Assemble 1 hex Coper Hold (as yellow circle) 2-36 Assemble Key Pad Board Module 1. Assemble Key Pad and Key Pad Board 2. Screw 4 screws (as red circle) S1200 Confidential 2-30... - Page 50 2-37 Assemble Top Cover Module 1. Assemble Top cover and IR LENS 2. Plug 1 connector (as yellow square) and screw 5 screws (as red circle) S1200 Confidential 2-31...
-
Page 51: Assemble Lamp Module
2-38 Assemble Lamp Module 1. Assemble Lamp Module 2.Screw 2 screws (as red circle) 2-39 Assemble Lamp Cover Module 1. Assemble the Lamp Cover Module 2.Screw 2 screws (as red circle) S1200 Confidential 2-32... -
Page 52: Chapter 3 Troubleshooting
Error for Color FlashRed 0.5 Blue Wheel fail / Striking second H (On), Lamp Fail(On 0.5secondL(Off) Event) Error for Color Flash Red 0.5 Wheel fail second H (On), 0.5 second L (Off) (R) - RED (B) - BLUE S1200 Confidential... -
Page 53: Main Procedure
- Check Main Board b. Power (R) or (B),Lamp off. Temp (R) or Blink (R) Auto Shut Down - Check Thermal Switch - Check Fan c.Power (R) or (B), Lamp Blink(R) Temp off - Check Color Wheel - Check Photo Sensor S1200 Confidential... - Page 54 • Check DMD Chip • Do “Reset (All data)” of the OSD Menu • Ensure that the signal cables and source are work as well- Check Lamp Module Image Flicker • Check Colour Wheel- Check DMD Board • Check Main Board S1200 Confidential...
- Page 55 Check Main Board Control Panel Failed • Control Panel a. Check FPC b. Check key pad c. Check Main Board • Do “Reset (All data)” of the OSD Menu • Check Main Board Function Abnormal • Check DMD Board S1200 Confidential...
-
Page 56: Beep Sound
2 x {So(0.1s) – Off(0.1s)} periodically per second Lamp reminding 3 x {So(0.1s) – Off(0.1s)} periodically per second Presentation Timer(time is up) 3 x {Do(0.2s) – Off(0.8s) – So(0.2s) – Off(0.8s)} per hour Lamp error 3 x {Do(0.1s) – Off(0.9s)} - So(0.5s) S1200 Confidential... -
Page 57: Chapter 4 Function Test & Alignment Procedure
1. After final QC step, we have to erase all saved change again and restore the OSD default setting. The following actions will allow you to erase all end-users' settings and restore the default setting: (1) Please enter OSD menu. (2) To execute "Reset" function. S1200 Confidential... -
Page 58: Test Condition
- Circumstance brightness: Dark room less than 5.0 lux. - Inspection distance: 0.5m~2m functional inspection. - Screen size: 60 inches diagonal - After repairing each S1200, the unit should be run-in (refer to the table below) Symptom Run-in Time Normal repair... - Page 59 Unstable pixel (dots) Any pattern A+B=0 Adjacent dark pixel Any pattern (dots) A+B=4 Dark blemish (Dirty) Blue 60 pattern (diameter <1/2 inch) A+B=4 Bright blemish (Dirty) Gray 30 pattern (diameter <1/2 inch) Bright dot on frame Black pattern S1200 Confidential...
-
Page 60: Test Inspection Procedure
- Check and see if the image sharpness is performed. - If not re-adjust by the following steps: (1) Select "Frequency" function to adjust total pixel number of pixel clock in one line period. (2) Select "Tracking" and use right or left arrow Master S1200 Confidential... - Page 61 - Ref. above table Note: The defect criteria follows TI specification. 3. Blemish (Dark) Procedure - Test equipment: video generator. - Test signal: analog 1024x768@60Hz. - Test Pattern: blue 60 Inspection item - Dark blemish check.(dirty) Blue 60 S1200 Confidential...
- Page 62 - Adjacent dark pixel. Criteria - The number of the dead pixels should be less or equal to 6 pixels. - Adjacent pixel with each other is unacceptable. - Ref. above table Note: The defect criteria follows TI specification. S1200 Confidential...
- Page 63 - It is acceptable to have few lines flashing at the center and on the edge of 1080i image. How- ever, rest of the image should appears stable. SMPTE RP-133 - RGBW should all appear normal on the screen and sort from R -G-B-W. S1200 Confidential...
-
Page 64: Video Performance
- Test equipment: DVD player - Test signal: S-Video Inspection item - Video performance test Inspection Distance - 0.5M ~2M Criteria - Check any abnormal color, line distortion or any noise on the screen. - Check the sound from speakers. S1200 Confidential... - Page 65 - Test Pattern : Any Pattern - Equipment: DVD Player with HDMI output - Display type must be set to 16:9 Inspection item - HDMI Test Criteria - Ensure if the image is well performed and the color can not discolor. S1200 Confidential...
-
Page 66: Optical Performance Measure
3. Ful On/Full Off Contrast Procedure - Full white pattern & full black pattern - Use CL100 to measure brightness values of full white pattern P5 & full black pattern B5 ( see im- Full black pattern age: full white) S1200 Confidential 4-10... -
Page 67: Other
- The factory settings (with appropriate centering, size, geometry distortion, etc.) shall be displayed upon “Recall” is selected from OSD Display Size - All preset modes shall expand to full screen size using OSD Horizontal and Vertical Size controls S1200 Confidential 4-11... - Page 68 It should be locked in the correct place. Plastic Parts All plastic parts can not be brocken and damaged. Safety or warning All safety and warning label should be visible, including all contents. label Connector All interface connector should be complete and workable. S1200 Confidential 4-12...
-
Page 69: Firmware Upgrade
- DLP Composer - Firmware - 8 M flash (library file has to put in PC and set right path in 5-4 step 4) Hardware : - Projector - Power cord (42.53506G002) - USB Cable (42.87304G001) - PC or Laptop S1200 Confidential... -
Page 70: Dlp Composer Lite Setup Procedure
1. Choose "DLP Composer Lite V7.1 Setup" Program. 2. Click "Next" button. 3. Read "License Agreement". - Choose "I accept and agree to be bound by all the terms and conditions of this License Agreement". 4. Click "Next". 5. Click "Next". S1200 Confidential... - Page 71 6. Click "Next". 7. Click "Next". 8. Writing system registry values. 9. Click "Finish". S1200 Confidential...
-
Page 72: Usb Driver Upgrade Procedure
- Link PC USB port and projector USB port by USB Cable. 2. Execute Program (1) "Found new hardware wiszard" will be appearred on the screen. (2) Select "Install the software automatically (Recommended)". (3) Then click "Next". 3. Finish - Click "Finish" to end the installation. S1200 Confidential... -
Page 73: Firmware Upgrade Procedure
Note: The system fan and the light will not operated. 2. Execute the "DLP Compose " file. 3. Click "edit" and "perferences". 4. Click “Library.” - Click the “browse” button and navigate to the directory where you put the library file S1200 Confidential... - Page 74 7. Selete the item "skip Boot Loader Area" (select 32KB). - Click "Reset Bus" to erase the flash memory. 8. If the firmware is ready, click "start download" to process the firmware upgrade. - Click "Yes" to erase the flash memory. S1200 Confidential...
- Page 75 - Unplug USB cable and power cord and replug in power cable. 10. Restart the unit and enter the service mode to check the firmware version. (To enter service mode, please refer to Chapter 4 Function Test and Alignment Procedure.) S1200 Confidential...
-
Page 76: Edid Upgrade
Note: If a display device has digital input ports, like DVI or HDMI, but without EDID in its main board, the display device will show no image while the input source is digital signal.After EDID upfraded, do" default language reset" S1200 Confidential... -
Page 77: Equipment Needed
- RS-232 9 Pin Cable (pin to pin, F-M) (42.83C07G001) - Monitor - PC - VGA cable (42.87305G102) - DVI Cable (42.83N06G001) - Power adapter (47.57803G001) and power cord (42.53506G002) for fixture - Adapter HDMI(M) to DVI-D(F) (42.82B13G001) S1200 Confidential... -
Page 78: Setup Procedure
(1) Connect P1 of Fixture with COM Port of PC/Laptop by RS232 Cable. (2) Connect P2 of Fixture with VGA port of Projector by VGA Cable. (3) Plug Power Adapter to Power CNN. (4) Plug Power Cord to S1200 unit. Note: Confirm JP3 is "Close" status. VGA Port... -
Page 79: Edid Key-In Procedure
(1) Check the COM port is "COM 2" (Select the COM port which you are using). (2) Click the "Model" button. (3) Choose the source file "S1200-20080702-A-0X8572E9ini" and then open it. 3. Process (1) Key in the serial number into the barcode blank space. - Page 80 5. Finish (1) "OK" will be shown on the screen. 6. Read EDID information (1) In the Read item,select "Analog" and "Trans". (2) Please press "Read" button. 7. Read EDID information (1) EDID Informations will show the result. S1200 Confidential...
-
Page 81: Setup Procedure (Hdmi)
(2) Connect P2 of Fixture with P3 by DVI Power Port Cable. Power CNN (3) Plug P4 to HDMI Port of the Projector. (4) Plug Power Adapter to Power CNN. 5) Plug Power Cord to S1200 unit. Note: Confirm JP3 is "Close" status. S1200 Confidential... - Page 82 (Select the COM port which you are using). (2) Click the "Model" button. ( 1 ) (3) Choose the source file "S1200-20080702-A-0X8572E9ini" and then open it. 3. Process (1) Key in the serial number into the barcode blank space. (2) In "Write Source Select" item,select "Digital".
- Page 83 5. Finish (1) "OK" will be shown on the screen. 6. Read EDID information (1) In the Read item,select "Digital" and "Trans". (2) Please press "Read" button. 7. Read EDID information (1) EDID Informations will show the result. S1200 Confidential...
-
Page 84: Default Language Reset
Default Language Reset (For S1200) (1) Hold on “Down” button then plug in the Power Cord. Note: At this moment, Power LED turns blue while Temp LED flashes in red for about 4s,then release the “Down” button. (2) After that, please check the LED status and judge the actions as the following table:...
Need help?
Do you have a question about the S1200 and is the answer not in the manual?
Questions and answers