
Related Manuals for Acer P5327W Series


Summary of Contents for Acer P5327W Series
- Page 1 Acer Projector P5227/P5327W/P1285i/ P1285B/P1385Wi/P1385WB/ S1385WHBe/S1385WHne Series User's Guide...
- Page 2 Serial number: ___________________________________ Date of purchase: ________________________________ Place of purchase: ________________________________ Acer and the Acer logo are registered trademarks of Acer Incorporated. Other companies' product names or trademarks are used herein for identification purposes only and belong to their respective companies.
-
Page 3: Information For Your Safety And Comfort
Information for Your Safety and Comfort Read these instructions carefully. Keep this document for future reference. Follow all warnings and instructions marked on the product. Turning the product off before cleaning Unplug this product from the wall outlet before cleaning. Do not use liquid cleaners or aerosol cleaners. -
Page 4: Using Electrical Power
• To avoid damage of internal components and to prevent battery leakage, do not place the product on a vibrating surface. • Never use it under sporting, exercising, or any vibrating environment which will probably cause unexpected short current or damage rotor devices or lamp. -
Page 5: Product Servicing
Product servicing Do not attempt to service this product yourself, as opening or removing covers may expose you to dangerous voltage points or other risks. Refer all servicing to qualified service personnel. Unplug this product from the wall outlet and refer servicing to qualified service personnel when: •... - Page 6 Do not operate lamps beyond the rated lamp life. It could cause it to break on rare occasions. • Contact your local dealer or Acer service center when you need to change the lamp. • The product will detect the life of the lamp itself. Please contact your local dealer or Acer service center for changing the lamp, when lamp warning message displays.
-
Page 7: Disposal Instructions
Do not throw this electronic device into the trash when discarding. To minimize pollution and ensure utmost protection of the global environment, please recycle. For more information on the Waste from Electrical and Electronics Equipment (WEEE) regulations, visit http://www.acer-group.com/public/ Sustainability/index.htm Mercury advisory For projectors or electronic products containing an LCD/CRT monitor or display: "Lamp(s) contain Mercury,... -
Page 8: First Thing First
When the lamp reaches the end of its life, it will burn out and may make a loud popping sound. If this happens, the projector will not turn back on until the lamp module has been replaced. To replace the lamp, contact your local dealer or Acer service center. -
Page 9: User Controls
Information for Your Safety and Comfort First Thing First viii Usage Notes viii Precautions viii Introduction Product Features Package Overview Projector Overview Projector Outlook Control Panel Remote Control Layout MHL Feature Introduction Getting Started Connecting the Projector Turning the Projector On/Off Turning On the Projector Turning Off the Projector Adjusting the Projected Image... -
Page 10: Regulations And Safety Notices
Troubleshooting LED & Alarm Definition Listing Using the inner connector(s) Ceiling Mount Installation Specifications Compatibility Modes Regulations and safety notices... -
Page 11: Product Features
• One-touch "3D" button on remote control allows quick and easy access to the 3D functions • Acer ColorBoost technology delivers vivid, life-like images • High brightness and contrast ratio • Versatile display modes enable optimum performance in any situation •... -
Page 12: Package Overview
Remote control Quick start guide Battery x 2 Carrying case (Optional) Dust filter WirelessHD dongle kit SmartPen & PB dongle (Optional) (MWIHD1) (Optional) (Optional) USB WiFi adapter (Optional) Acer Projector Multi-media Acer Projector Multi-media (CD-ROM) (Optional) quick start guide (Optional) -
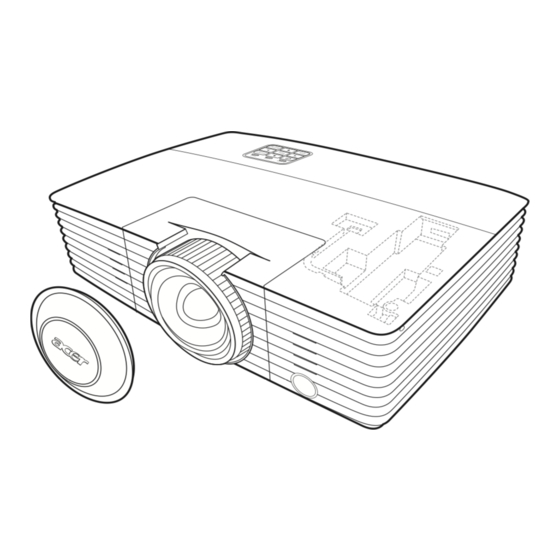
Page 13: Projector Overview
Projector Overview Projector Outlook Front/upper side S1385WHBe/S1385WHne P5227/P5327W/P1285i/ P1285B/P1385Wi/P1385WB Description Description Control panel HDMI (MHL) connector Micro USB cable Power key and Power indicator LED 5 Projection lens Zoom ring and Focus ring Remote control receiver Focus ring Lens cap Rear side 4 5 6 8 S-VIDEO... -
Page 14: Control Panel
Control Panel P1285i/P1285B/P1385Wi/ P5227/P5327W/S1385WHne P1385WB/S1385WHBe Function Description LAMP Lamp Indicator LED. POWER indicator Refer to the "Turning the Projector On/Off" section. Keystone Adjusts image distortion caused by tilting projection. Power key Refer to the "Turning the Projector On/Off" section. MENU Launches the Onscreen Display (OSD) menu, returns to the previous step for the OSD menu operation or exits the OSD menu. -
Page 15: Remote Control Layout
Remote Control Layout P5227/P5327W/P1285i/ P1285B/P1385Wi/P1385WB S1385WHBe/S1385WHne Function Description POWER Refer to the "Turning the Projector On/Off" section. MEDIA SETUP Opens MEDIA SETUP page. (for P1285i/P1285B/P1385Wi/ P1385WB/S1385WHBe) ZOOM Zooms the projector display in or out. MODE Chooses a display mode. Adjusts image distortion caused by tilting projection. Keystone Four Selects items or makes adjustments to your selection. - Page 16 Function Description 12 FREEZE To pause the screen image. 13 SOURCE Chooses RGB, component video, S-Video, composite video, HDMI (MHL) or HDTV source. 14 HIDE Press "HIDE" to hide screen image; press again to display the image. 15 MENU Launches the Onscreen Display (OSD) menu, returns to the previous step for the OSD menu operation or exits the OSD menu.
-
Page 17: Mhl Feature Introduction
MHL Feature Introduction When your smart device is connected to the projector, you can use some buttons on the remote control to control your smart device. Press "MODE" for one second to enter or leave the MHL control mode. After entering the MHL control mode, press "SOURCE"... -
Page 18: Getting Started
Getting Started Connecting the Projector Display Speakers DVD player, Set-top box, Video/S-Video HDTV receiver Output RS232 Smartphone/ tablet HDTV adapter S-VIDEO HDMI -1/ MHL VGA IN -2 VGA IN -1 VGA-OUT RS232 AUDIO IN MINI-B MIC IN USB -A AUDIO OUT VIDEO Wireless Dongle DC 12V OUT... - Page 19 Description Description 4 Composite video cable 12 WirelessHD dongle 5 Audio cable 13 Wireless dongle 6 S-Video cable 14* USB storage device/USB Wifi adapter (Optional) 7 RS232 cable 8 USB cable Note: To ensure the projector works well with your computer, please make sure the timing of the display mode is compatible with the projector.
-
Page 20: Turning The Projector On/Off
Turning the Projector On/Off Turning On the Projector Ensure that the power cord and signal cable are securely connected. The Power LED will light red. Turn on the projector by pressing (POWER) on the control panel or remote control, and the Power indicator LED will turn blue. Turn on your source (computer, notebook, video player, etc.).
Need help?
Do you have a question about the P5327W Series and is the answer not in the manual?
Questions and answers