Advertisement
Available languages
Available languages
Quick Links
User & Care Guide
Instrukcja obsługi i konserwacji
Guide d'utilisation et d'entretien
Benutzer- und Pflegeanleitung Handbuch
English / Polski / Français / Deutsch
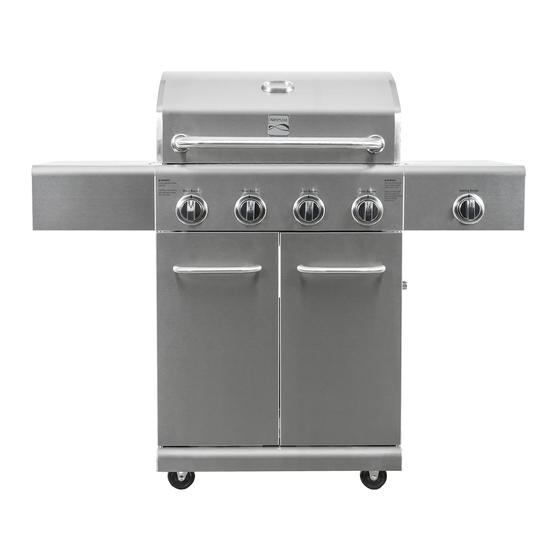
Outdoor Gas Grill
Grill gazowy zewnętrzny
Grill à gaz extérieur
Gasgrill im Freien
Model / Modèles / Modell :
If you have any questions, please refer to the "Contact Us" page to reach out to
us.
Jeśli masz jakiekolwiek pytania, przejdź do strony „Kontakt", aby się z nami skontaktować.
Si vous avez des questions, veuillez vous référer à la page « Contactez-nous » pour nous
contacter.
Wenn Sie Fragen haben, besuchen Sie bitte die Seite „Kontakt", um mit uns Kontakt
aufzunehmen.
P/N E 4 0 5 0 0 3 1 8
/MD
R E V 1 1 2 3
/MD
Kenmore and the Kenmore logo are registered trademarks of Transform SR Brands LLC and are used under license by Permasteel, 100 Exchange
Place, Pomona, CA 91768.
Kenmore i logo Kenmore są zastrzeżonymi znakami towarowymi Transform SR Brands LLC i są używane na podstawie licencji przez P ermasteel,
100 Exchange Place, Pomona, CA 91768.
Kenmore et le logo Kenmore sont des marques déposées de Transform SR Brands LLC et sont utilisés sous licence par Permasteel, 100 Exchange
Place, Pomona, CA 91768.
Kenmore und das Kenmore-Logo sind eingetragene Marken von Transform SR Brands LLC und werden unter Lizenz von Permasteel, 100 Ex change
Place, Pomona, CA 91768 verwendet.
PG-40405S0L-SE
Scan QR Code for Video
Assemb ly Ins tr ucti ons
Advertisement

Related Manuals for Kenmore PG-40405S0L-SE


Summary of Contents for Kenmore PG-40405S0L-SE
- Page 1 Kenmore i logo Kenmore są zastrzeżonymi znakami towarowymi Transform SR Brands LLC i są używane na podstawie licencji przez P ermasteel, 100 Exchange Place, Pomona, CA 91768. Kenmore et le logo Kenmore sont des marques déposées de Transform SR Brands LLC et sont utilisés sous licence par Permasteel, 100 Exchange Place, Pomona, CA 91768.
-
Page 2: Table Of Contents
Kenmore Grill Warranty ........ -
Page 3: Installation Safety Precautions
Installation Safety Precautions DANGER • Please read this User’s Manual in its entirety before using the grill. • Failure to follow the provided instruction can result in If you smell gas: seriously bodily injury and / or property damage. 1. Shut off gas to the appliance. •... -
Page 4: Product Information
PRODUCT INFORMATION... - Page 5 WARRANTY KENMORE LIMITED WARRANTY WITH PROOF OF SALE: the following warranty coverage applies when this appliance is correctly installed, operated and maintained according to all supplied instructions. Note: Consumer is responsible for Shipping & Handling of all warranty replacement parts.
-
Page 6: Use And Care
Gas Cylinder USE AND CARE • This product does not include the regulator and hose. • The regulator shall comply with EN 16129, and the length of the hose connecting the appliance to the gas DANGER cylinder shall not exceed 1.5 m (minimum distance is 0.5m). - Page 7 Pay attention when placing the gas cylinder outside • Do not release the liquid propane (LP) gas into the of the grill. Ensure the hose is connected to the gas atmosphere. This is a hazardous practice. • To remove gas from the gas cylinder, contact a LP cylinder and the gas cylinder does not touch any dealer or call a local fire department for assistance.
- Page 8 WARNING WARNING • Outdoor gas appliance is not intended to be For Safe Use of Your Grill and to Avoid Serious installed in or on a boat. Injury: • Outdoor gas appliance is not intended to be installed in or on an RV. •...
- Page 9 Electronic Ignition Lighting Instructions Searing Burner Match Lighting 1. Open the searing burner lid. Turn on the LP tank. ▲ Do not lean over the grill while lighting. 2. Place the lit match near the burner. 1. Open the lid during lighting. 3.
- Page 10 CAUTION Cast Iron Grate Seasoning (if applicable) First Use –Before your first use, season your cast iron grates as follows: Rinse the cast iron grates with SPIDER ALERT! hot water. Do not use soap. Dry the grates thoroughly with a cloth towel. Coat the grates with the vegetable oil or any non-stick cooking spray.
- Page 11 Cleaning the Burner Assembly Indirect Cooking Follow these instructions to clean and/or replace parts of Poultry and large cuts of meat cook slowly to the burner assembly or if you have trouble igniting the perfection on the grill by indirect heat. Place food over grill.
-
Page 12: Parts List
PARTS LIST (1/2) Part Description Part Number Description Number Side Burner Lid 41500041 Side Burner Hose 40900216 Rotate Rod, Side Burner Lid 40500211 Ground Wire 30800244 Side Burner Grid 50600203 Control Knob Bezel 40900036 Searing Burner 40900142 Control Knob, Main Burner 40900206 Searing Burner Wire 50600225... - Page 13 PARTS LIST (2/2) Part Part Description Description Number Number Plastic Hold Set 40900225 Silicone Rubber Bumper, Lid 40700103 E4050022 Cart Support Angle Bar 40500074 Temperature Gauge Door Handle 40500082 Logo 40800106 Right Door 40500080 Rotate Rod, Lid 40500202 Left Door 40500076 Insulation Spacer, Lid 30800231...
-
Page 14: Parts Diagram
PARTS DIAGRAM... - Page 15 BEFORE ASSEMBLY NOTICE: Once you have unpacked the grill following the STOP SHEET instructions, check all grill parts against the pictures on page 15-17. If any parts are missing or damaged, please refer to the "Contact Us" page to reach out to us.
- Page 16 BEFORE ASSEMBLY...
- Page 17 BEFORE ASSEMBLY...
- Page 18 ASSEMBLY CAREFULLY READ AND PERFORM ALL ASSEMBLY INSTUCTIONS ON THE FOLLOWING PAGES. Tools Required: • Adjustable wrench (not provided) • Screwdriver (not provided) • The following hardware is provided in the blister pack for convenient use. M4 x 10 Hex Bolt M6 x 13 Screw Qty: 2 pcs Qty: 32 pcs...
- Page 19 Bottom Shelf Turn the bottom shelf upside down. Attach the front panel bottom shelf to the bottom shelf with (8) M4x10 screws. (A) Attach the casters to the bottom shelf with (16) M6x13 screws. (B) Note: Install each caster into the correct position as shown in the figure below. The standard caster (non-swiveling) will only install in one direction.
- Page 20 Cart To attach the side panels, align the side panel holes with the bottom panel holes on each side of the bottom shelf. Note: Left side panel has the match holder attachment. Attach, but do not fully tighten, the left and right side panels to the bottom shelf with (6) M6x13 screws.
- Page 21 Electronic Ignition Module Attach the electronic ignition module through the mounting hole on the right side panel. (A) Insert the rubber gasket followed with the plastic lock nut and tighten by hand. (A)
- Page 22 Front Door Attach the left and right grease tray brackets to side panels with (8) M4x10 screws. (A) Remove the (4) M5x15 screws pre-assembled from the door handle ends, and use them to attach the handles to the doors. (B) ...
- Page 23 Grill Head to Cart IMPORTANT: Remove the tie wraps and packing material from the searing burner valve and igniter wire. Pull the igniter wire out to the right side of the grill head. This step requires two people to lift and to position the grill head onto the cart. ...
- Page 24 Burner Electrode and Igniter Cover Place the 5 burner electrode wires (thin black & thin orange), the ground wire (red capped) and the igniter wire (large black) through the pre-installed side panel clamp. (A) Note: If wires are difficult to install, loosen the clamp screw, put the wires through the clamp and retighten the screw.
- Page 25 Left Side Shelf Attach the fascia to the left side shelf with (2) M5x10 hex bolts, (2)M5 flat washers, and (1) M4x10 hex bolt. (A & B) Hang the left side shelf onto the brackets on left side of the firebox. (C) ...
- Page 26 Right Side Shelf Attach the fascia to the right side shelf with (2) M5x10 hex bolts, (2)M5 flat washers, and (1) M4x10 hex bolt with the provided wrench. (A & B) Hang the right side shelf onto the brackets on right side of the firebox. (C) ...
- Page 27 Searing Burner Remove the plastic packaging from the searing burner valve. Remove the searing burner grate from the searing burner shelf. Attach the ignition wire to the searing burner valve. (A) Remove the 2 pre-installed screws from the valve control stem and set them aside. (B) ...
- Page 29 Heat Diffuser, Cooking Grates and Warming Rack Place the heat diffusers over the burners. Diffusers will fit in the firebox in either direction. (A & B) Place the cooking grates onto the grate rests at the front and rear of the firebox. (C & D) ...
- Page 30 Drip Tray, Drip Cup and Gas Cylinder Insert the drip tray into bottom of firebox from back. Then open the door and insert the drip cup into the drip cup slot. (A & B) Gas cylinder is sold separately. Use only with an OPD (Overfill Protection Device) equipped gas cylinder.
- Page 31 EMERGENCIES: If a gas leak cannot be stopped, or a fire occurs due to gas leakage, call the fire department. Problem Possible Cause Prevention/Solution • Damaged hose. • Turn off the gas from your gas cylinder or your natural Gas leaking from cracked/cut/burned a gas system.
- Page 32 Troubleshooting (continued) Problem Possible Cause Prevention/Solution • See Section I of the Electronic Ignition System. Burner(s) will not light ELECTRONIC IGNITION: using igniter. • No spark, no ignition noise. • No spark, some ignition noise. • See Section II of the Electronic Ignition System. (Also view the Electronic ignition •...
- Page 33 Troubleshooting – Electronic Ignition Problem Possible Cause Check Item Prevention/Solution • The battery is not • Check that the battery • Install the battery, making sure that the SECTION I No sparks installed has the positive side positive end is facing outward, and the appear at any properly.
- Page 34 Gwarancja Grilla Kenmore ........
- Page 35 Środki ostrożności dotyczące instalacji NIEBEZPIECZEŃSTWO • Przed rozpoczęciem korzystania z grilla należy w całości przeczytać niniejszą instrukcję obsługi. Jeśli poczujesz zapach gazu: • Niezastosowanie się do podanych instrukcji może skutkować poważnymi obrażeniami ciała i/lub 1. Odciąć dopływ gazu do urządzenia. uszkodzeniem mienia.
- Page 36 INFORMACJE O PRODUKCIE...
- Page 37 GWARANCJA OGRANICZONA GWARANCJA KENMORE Z DOWODEM ZAKUPU: Poniższa gwarancja obowiązuje, gdy urządzenie jest prawidłowo zainstalowane, obsługiwane i konserwowane zgodnie ze wszystkimi dostarczonymi instrukcjami. Uwaga: Konsument jest odpowiedzialny za wysyłkę i obsługę wszystkich części zamiennych objętych gwarancją. PRZEZ JEDEN ROK: od daty sprzedaży ten grill jest objęty gwarancją na wady materiałowe lub produkcyjne, konsument otrzyma bezpłatne części zamienne z dowodem zakupu, konsument jest odpowiedzialny za koszty...
- Page 38 Butla gazowa UŻYTKOWANIE I KONSERWACJA • Ten produkt nie zawiera regulatora i węża. • Regulator powinien być zgodny z normą EN 16129, a długość węża łączącego urządzenie z butlą gazu nie NIEBEZPIECZEŃSTWO powinna przekraczać 1,5 m (minimalna odległość to 0,5 m). •...
- Page 39 Należy zwrócić uwagę podczas umieszczania butli • Nie wolno wypuszczać ciekłego propanu do na zewnątrz grilla. Upewnij się, że wąż jest atmosfery. Jest to niebezpieczna praktyka. • Aby usunąć gaz z butli, należy skontaktować się ze podłączony do butli, a butla nie dotyka żadnych sprzedawcą...
- Page 40 OSTRZEŻENIE OSTRZEŻENIE • Zewnętrzne urządzenie gazowe nie jest przeznaczone do Dla bezpiecznego użytkowania grilla i montażu na łodzi. uniknięcia poważnych obrażeń: • Zewnętrzne urządzenie gazowe nie jest przeznaczone do montażu w kamperze. • Nie pozwalaj dzieciom obsługiwać grilla ani • Nigdy nie próbuj podłączać tego grilla do niezależnego bawić...
- Page 41 Instrukcje dotyczące oświetlenia zapłonu elektronicznego ▲ Nie pochylaj się nad grillem podczas rozpalania. 1. Otwórz pokrywę podczas podświetlania. 2. Włącz zawór gazu na butli z gazem. 3. Aby zapalić, należy obrócić pokrętło palnika głównego do pozycji HI. 4. Naciśnij i przytrzymaj elektroniczny przycisk zapłonu.
- Page 42 • Tacka ociekowa i kubek: Gdy grill całkowicie Kontrola zaworu ostygnie po użyciu, należy wyjąć tacę ociekową i • Ważne: Przed sprawdzeniem zaworu należy upewnić pojemnik na skropliny w celu wyczyszczenia. się, że gaz w butli jest wyłączony, a pokrętła znajdują...
- Page 43 Czyszczenie zespołu palnika Gotowanie pośrednie Drób i duże kawałki mięsa gotują się powoli do Postępuj zgodnie z tymi instrukcjami, aby wyczyścić i/lub perfekcji na grillu za pomocą ciepła pośredniego. wymienić części zespołu palnika lub w przypadku Umieść jedzenie nad niepodświetlonym palnikiem problemów z rozpaleniem grilla.
- Page 44 LISTA CZĘŚCI (1/2) Klucz Opis Ilość Numer części Klucz Opis Ilość Numer części Boczna pokrywa palnika 41500041 Wąż palnika bocznego 40900216 Obracanie pręta, boczna 40500211 Przewód uziemiający 30800244 pokrywa palnika Boczna ruszt palnika 50600203 Ramka pokrętła sterującego 40900036 Pokrętło sterujące, palnik Palnik do pieczenia 40900142 40900206...
- Page 45 LISTA CZĘŚCI (2/2) Numer Numer Klucz Opis Ilość Klucz Opis Ilość części części Plastikowy zestaw Zderzak z gumy silikonowej, 40900225 40700103 podtrzymujący pokrywa Kątownik podtrzymujący E4050022 40500074 Wskaźnik temperatury wózek Według uchwytu 40500082 Logo 40800106 Prawe drzwi 40500080 Obróć pręt, pokrywę 40500202 Lewe drzwi 40500076...
- Page 46 SCHEMAT CZĘŚCI...
- Page 47 PRZED MONTAŻEM UWAGA: Po rozpakowaniu grilla należy sprawdzić wszystkie części grilla zgodnie ze zdjęciami na stronie 47-49. Jeśli brakuje jakichkolwiek części lub są one uszkodzone, prosimy skorzystać ze strony „Kontakt”, aby się z nami skontaktować.
- Page 48 PRZED MONTAŻEM...
- Page 49 PRZED MONTAŻEM...
- Page 50 MONTAŻ UWAŻNIE PRZECZYTAJ I WYKONAJ WSZYSTKIE INSTRUKCJE MONTAŻU NA KOLEJNYCH STRONACH. Wymagane narzędzia: • Klucz nastawny (brak w zestawie) • Śrubokręt (brak w zestawie) • Następujący sprzęt jest dostarczany w opakowaniu blistrowym dla wygodnego użytkowania. Śruba sześciokątna M4 x 10 Śruba M6 x 13 Ilość: 2 szt.
- Page 51 Dolna półka Odwróć dolną półkę do góry nogami. Przymocuj dolną półkę panelu przedniego do dolnej półki za pomocą (8) M4x10. (A) Przymocuj kółka do dolnej półki za pomocą (16) M6x13. (B) Uwaga: Zamontuj każde kółko we właściwej pozycji, jak pokazano na poniższym rysunku.
- Page 52 Wózek Aby przymocować panele boczne, wyrównaj otwory w panelu bocznym z otworami w panelu dolnym po obu stronach dolnej półki. Uwaga: Lewy panel boczny ma mocowanie uchwytu zapałek. Przymocuj, ale nie dokręcaj całkowicie, lewy i prawy panel boczny do dolnej półki za pomocą (6) M6x13.
- Page 53 Elektroniczny moduł zapłonowy Zamocuj elektroniczny moduł zapłonowy przez otwór montażowy w prawym panelu bocznym. (A) Włóż gumową uszczelkę, a następnie plastikową nakrętkę zabezpieczającą i dokręć ręcznie. (A)
- Page 54 Drzwi wejściowe Przymocuj lewy i prawy wspornik tacki na tłuszcz do paneli bocznych za pomocą (8) M4x10. Wykręć (4) M5x15 wstępnie zmontowane z końcówek klamek drzwi i użyj ich do przymocowania klamek do drzwi. (B) Włóż kołek u dołu każdych drzwi do otworu w dolnym panelu. Włóż kołek w górnej części każdych drzwi przez otwór w zawiasie wspornika drzwi.
- Page 55 Grill od głowy do koszyka WAŻNE: Usuń opaski zaciskowe i materiał opakowaniowy z zaworu palnika i przewodu zapalnika. Wyciągnij przewód zapalnika na prawą stronę głowicy grilla. Ten krok wymaga dwóch osób do podniesienia i umieszczenia głowicy grilla na wózku. ...
- Page 56 Elektroda palnika i osłona zapalnika Umieść 5 przewodów elektrod palnika (cienki czarny i cienki pomarańczowy), przewód uziemiający (czerwony nasadka) i przewód zapalnika (duży czarny) przez wstępnie zainstalowany panel boczny clamp. (A) Uwaga: Jeśli przewody są trudne do zainstalowania, poluzuj clamp śruba, przełóż przewody przez clamp i ponownie dokręć. ...
- Page 57 Lewa półka boczna Przymocuj deskę rozdzielczą do lewej półki bocznej za pomocą (2) sześciokątnych M5x10, (2) płaskich podkładek M5 i (1) sześciokątnej M4x10. (A i B) Zawieś lewą półkę boczną na wspornikach po lewej stronie paleniska. (C) Przymocuj półkę do paleniska w następujący sposób: ...
- Page 58 Prawa półka boczna Przymocuj deskę rozdzielczą do prawej półki bocznej za pomocą (2) sześciokątnych M5x10, (2) płaskich podkładek M5 i (1) sześciokątnej M4x10 za pomocą dostarczonego klucza. (A i Zawieś prawą półkę boczną na wspornikach po prawej stronie paleniska. (C) ...
- Page 59 Palnik do pieczenia Usuń plastikowe opakowanie z zaworu palnika do pieczenia. Zdejmij ruszt palnika do pieczenia z półki palnika do pieczenia. Podłącz przewód zapłonowy do zaworu palnika palącego. (A) Wykręć 2 wstępnie zainstalowane z trzpienia sterującego zaworem i odłóż je na bok. (B) ...
- Page 61 Dyfuzor ciepła, ruszty do gotowania i ruszt grzewczy Umieść dyfuzory ciepła nad palnikami. Dyfuzory zmieszczą się w palenisku w dowolnym kierunku. (A i B) Umieść ruszty do gotowania na rusztach z przodu iz tyłu paleniska. (C i D) ...
- Page 62 Taca ociekowa, kubek ociekowy i butla z gazem Włóż tackę ociekową do dna paleniska od tyłu. Następnie otwórz drzwi i włóż kubek ociekowy do szczeliny kubka ociekowego. (A i B) Butla z gazem sprzedawana jest osobno. Używać wyłącznie z butlą gazową wyposażoną w OPD (urządzenie zabezpieczające przed przepełnieniem).
- Page 63 SYTUACJE AWARYJNE: Jeśli nie można zatrzymać wycieku gazu lub doszło do pożaru spowodowanego wyciekiem gazu, należy wezwać straż pożarną. Problem Możliwa przyczyna Zapobieganie/rozwiązanie • Uszkodzony wąż. • Wyłącz gaz z butli lub instalacji gazu ziemnego. Jeśli Wyciek gazu z pękniętego/przeciętego wąż...
- Page 64 Rozwiązywanie problemów (ciąg dalszy) Problem Możliwa przyczyna Zapobieganie/rozwiązanie • Patrz sekcja I Elektroniczny układ zapłonowy. Palniki nie zapalają się ZAPŁON ELEKTRONICZNY: przy użyciu zapalnika. • Brak iskry, brak hałasu zapłonu. • Brak iskry, trochę hałasu • Patrz sekcja II Elektroniczny układ zapłonowy. (Zobacz również...
- Page 65 Rozwiązywanie problemów - zapłon elektroniczny Problem Możliwa przyczyna Sprawdź pozycję Zapobieganie/rozwiązanie • Bateria nie jest • Sprawdź, czy bateria jest • Zainstaluj baterię, upewniając się, że SEKCJA I Po ustawieniu prawidłowo skierowana stroną jej dodatni koniec jest skierowany na pokrętła zainstalowana.
- Page 66 Garantie du gril Kenmore ........
- Page 67 Précautions de sécurité lors de l'installation DANGER • Veuillez lire ce manuel d'utilisation dans son intégralité avant d'utiliser le gril. • Le non-respect des instructions fournies peut entraîner des Si vous sentez du gaz : blessures corporelles graves et/ou des dommages 1.
- Page 68 INFORMATION PRODUIT...
- Page 69 GARANTIE GARANTIE LIMITÉE KENMORE AVEC PREUVE DE VENTE : la couverture de garantie suivante s'applique lorsque cet appareil est correctement installé, utilisé et entretenu conformément à toutes les instructions fournies. Remarque : Le consommateur est responsable de l'expédition et de la manutention de toutes les pièces de rechange sous garantie.
- Page 70 • Une bouteille de gaz déconnectée en stockage ou en UTILISATION ET ENTRETIEN cours de transport doit avoir un bouchon de sécurité installé (comme illustré). Ne stockez pas une bouteille de gaz dans des espaces clos tels qu'un abri d'auto, DANGER un garage, un porche, une terrasse couverte ou tout autre bâtiment.
- Page 71 Remplissage du réservoir de bouteille de gaz N'utilisez pas de produits de nettoyage ménagers. L'utilisation de produits de nettoyage peut • Utilisez uniquement des revendeurs agréés et endommager les composants de la rampe de gaz expérimentés. (vanne / tuyau / régulateur). •...
- Page 72 AVERTISSEMENT DANGER • Lors du changement du réservoir d'essence, Pour une utilisation sûre de votre gril et pour veillez à le tenir éloigné de toute source éviter des blessures graves : d'ignition. • Ne laissez pas les enfants utiliser ou jouer près du gril.
- Page 73 Conseils de sécurité Instructions d'allumage électronique Avant d'ouvrir la vanne du réservoir de bouteille de ▲ ▲ Ne vous penchez pas sur le gril pendant l'allumage. gaz, vérifiez le serrage de l'écrou de couplage. 1. Ouvrez le couvercle pendant l'éclairage. ▲...
- Page 74 Vérification de l'allumeur • Éteignez le réservoir de bouteille de gaz. Appuyez et maintenez enfoncé le bouton d'allumage électronique. Un « clic » doit être entendu et des étincelles doivent être visibles à chaque fois entre la boîte collectrice ou le brûleur et l'électrode.
- Page 75 Stockage de votre gril • Surfaces en acier inoxydable : Pour conserver l’apparence de haute qualité de votre gril, lavez-le • Nettoyez les grilles de cuisson. avec un détergent doux et de l’eau tiède • Conserver dans un endroit sec. savonneuse.
- Page 76 Instructions de cuisson indirecte TRÈS IMPORTANT : Les tubes du brûleur doivent réengager les ouvertures des vannes. Voir les • Cuisinez toujours avec le couvercle fermé. illustrations ci-dessous. • Une fois les brûleurs allumés, éteignez chaque brûleur individuel en tournant son bouton sur OFF. •...
- Page 77 LISTE DES PIÈCES (1/2) Numéro Numéro Description Qté Description Qté d'article d'article Couvercle du brûleur latéral 41500041 Tuyau de brûleur latéral 40900216 Tige rotative, couvercle du 40500211 Fil de terre 30800244 brûleur latéral Grille du brûleur latéral 50600203 Lunette du bouton de commande 40900036 Bouton de commande, brûleur Brûleur à...
- Page 78 LISTE DES PIÈCES (2/2) Numéro Numéro Description Qté Description Qté d'article d'article Ensemble de maintien en Pare-chocs en caoutchouc de 40900225 40700103 plastique silicone, couvercle Barre d'angle de support de E4050022 40500074 Indicateur de temperature chariot Poignée de porte 40500082 Logo 40800106 Porte droite (garniture en...
- Page 79 SCHÉMA DES PIÈCES...
- Page 80 AVANT LE MONTAGE AVIS : Une fois que vous avez déballé le gril en suivant les instructions de la FEUILLE D'ARRÊT, vérifiez toutes les pièces du gril par rapport aux images des pages 80-82. Si des pièces sont manquantes ou endommagées, veuillez vous référer à...
- Page 81 AVANT LE MONTAGE...
- Page 82 AVANT LE MONTAGE...
- Page 83 ASSEMBLÉ LIRE ATTENTIVEMENT ET EXÉCUTER TOUTES LES INSTRUCTIONS DE MONTAGE DES PAGES SUIVANTES. Outils nécessaires : • Clé à molette (non fournie) • Tournevis (non fourni) • Le matériel suivant est fourni dans le blister pour une utilisation pratique. Boulon hexagonal M4 x 10 Vis M6 x 13 Qté...
- Page 84 Étagère inférieure Retournez l’étagère inférieure. Fixez l'étagère inférieure du panneau avant à l'étagère inférieure avec (8) vis M4 x 10. (A) Fixez les roulettes à l'étagère inférieure avec (16) vis M6 x 13. (B) Remarque : installez chaque roulette dans la position correcte, comme indiqué dans la figure ci-dessous.
- Page 85 Chariot Pour fixer les panneaux latéraux, alignez les trous des panneaux latéraux avec les trous du panneau inférieur de chaque côté de l'étagère inférieure. Remarque : Le panneau latéral gauche comporte la fixation du porte-allumettes. Fixez, mais ne serrez pas complètement, les panneaux latéraux gauche et droit à l'étagère inférieure avec (6) vis M6x13.
- Page 86 Module d'allumage électronique Fixez le module d'allumage électronique à travers le trou de montage sur le panneau latéral droit. (A) Insérez le joint en caoutchouc suivi du contre-écrou en plastique et serrez à la main. (A)
- Page 87 Porte d'entrée Fixez les supports du bac à graisse gauche et droit aux panneaux latéraux avec (8) vis M4 x 10. (A) Retirez les (4) vis M5 x 15 pré-assemblées des extrémités des poignées de porte et utilisez- les pour fixer les poignées aux portes.
- Page 88 Tête de gril au panier IMPORTANT : Retirez les attaches et le matériau d'emballage de la valve du brûleur de saisie et du fil d'allumage. Tirez le fil d'allumage vers le côté droit de la tête du gril. Cette étape nécessite deux personnes pour soulever et positionner la tête du gril sur le chariot.
- Page 89 Électrode du brûleur et couvercle de l'allumeur Placez les 5 fils d'électrode du brûleur (fin noir et fin orange), le fil de terre (avec capuchon rouge) et le fil de l'allumeur (grand noir) à travers la pince du panneau latéral préinstallée. Remarque : Si les fils sont difficiles à...
- Page 90 Tablette latérale gauche Fixez la façade à la tablette latérale gauche avec (2) boulons hexagonaux M5 x 10, (2) rondelles plates M5 et (1) boulon hexagonal M4 x 10. (A & B) Accrochez la tablette latérale gauche aux supports situés sur le côté gauche de la chambre de combustion.
- Page 91 Right Side Shelf Fixez la façade à la tablette latérale droite avec (2) boulons hexagonaux M5 x 10, (2) rondelles plates M5 et (1) boulon hexagonal M4 x 10 avec la clé fournie. (A & B) Accrochez la tablette latérale droite aux supports situés sur le côté droit de la chambre de combustion.
- Page 92 Brûleur à saisir Retirez l'emballage en plastique de la valve du brûleur de saisie. Retirez la grille du brûleur de saisie de la grille du brûleur de saisie. Fixez le fil d'allumage à la valve du brûleur de saisie. (A) Retirez les 2 vis préinstallées de la tige de commande de la vanne et mettez-les de côté.
- Page 94 Diffuseur de chaleur, grilles de cuisson et grille chauffante Placez les diffuseurs de chaleur sur les brûleurs. Les diffuseurs s’insèrent dans la chambre de combustion dans les deux sens. (A et B) Placez les grilles de cuisson sur les supports de grille à l'avant et à l'arrière de la chambre de combustion.
- Page 95 Bac d'égouttage, gobelet d'égouttement et bouteille de gaz Insérez le bac d'égouttement dans le fond de la chambre de combustion par l'arrière. Ensuite, ouvrez la porte et insérez le gobelet d'égouttage dans la fente du gobelet d'égouttement. (A et B) ...
- Page 96 URGENCES : Si une fuite de gaz ne peut être arrêtée ou si un incendie se produit en raison d'une fuite de gaz, appelez les pompiers. Problème Cause possible Prévention / Solution Fuite de gaz provenant • Tuyau endommagé. • Coupez le gaz de votre réservoir de bouteille de gaz ou de votre d’un tuyau système de gaz naturel.
- Page 97 Dépannage (suite) Problème Cause possible Prévention / Solution • Voir la section I du système d'allumage électronique. Le(s) brûleur(s) ne ALLUMAGE ÉLECTRONIQUE : • Aucune étincelle, aucun bruit s’allumeront pas à • Voir la section II du système d'allumage électronique. l’aide de l’allumeur.
- Page 98 Dépannage – Allumage électronique Problème Cause possible Vérifier l'article Prévention / Solution • La batterie n'est pas • Vérifiez que le côté • Installez la batterie en vous assurant SECTION I Aucune étincelle installée correctement. positif de la batterie est que l'extrémité...
- Page 99 Kenmore Grill-Garantie ........
- Page 100 Sicherheitsvorkehrungen bei der Installation GEFAHR • Bitte lesen Sie dieses Benutzerhandbuch vollständig durch, bevor Sie den Grill benutzen. • Die Nichtbeachtung der Anweisungen kann zu Wenn Sie Gas riechen: schweren Körperverletzungen und / oder 1. Stellen Sie die Gaszufuhr zum Gerät ab. Sachschäden führen.
- Page 101 PRODUKTINFORMATION...
- Page 102 GARANTIE KENMORE BESCHRÄNKTE GARANTIE MIT VERKAUFSNACHWEIS: Die folgende Garantie gilt, wenn dieses Gerät korrekt installiert, betrieben und gewartet wird und alle mitgelieferten Anweisungen befolgt werden. Hinweis: Der Verbraucher ist für den Versand und die Bearbeitung aller Garantieersatzteile verantwortlich. TWEI JAHRESGARANTIE: Ab dem Verkaufsdatum gilt für diesen Grill eine Garantie gegen Material- und Verarbeitungsfehler.
- Page 103 Gaszylinder VERWENDUNG UND PFLEGE • Dieses Produkt beinhaltet nicht den Regler und den Schlauch. • Der Regler muss der Norm EN 16129 entsprechen, und GEFAHR die Länge des Schlauches, der das Gerät mit dem Gaszylinder verbindet, darf nicht 1,5 m überschreiten (der Mindestabstand beträgt 0,5 m).
- Page 104 Seien Sie vorsichtig, wenn Sie die Gasflasche außerhalb • Lassen Sie das Gas nicht in die Atmosphäre gelangen. des Grills platzieren. Stellen Sie sicher, dass der Dies ist eine gefährliche Praxis. • Um Gas aus der Gasflasche zu entfernen, wenden Sie Schlauch an die Gasflasche angeschlossen ist und die sich an einen Händler oder rufen Sie die örtliche Gasflasche keine heißen Oberflächen berührt.
- Page 105 WARNUNG WARNUNG • Das Gasgerät für den Außenbereich ist nicht für die Für den sicheren Gebrauch Ihres Grills und zur Installation in oder auf einem Boot vorgesehen. Vermeidung von schweren Verletzungen: • Das Gasgerät für den Außenbereich ist nicht für die •...
- Page 106 Elektronische Zündung Beleuchtung Anweisungen ▲ Beugen Sie sich beim Anzünden nicht über den Grill. 1. Öffnen Sie den Deckel während der Beleuchtung. 2. Drehen Sie das Gasventil am Tank auf. 3. Drehen Sie zum Zünden den hauptbrennerknopf auf HI. 4. Drücken und halten Sie den Knopf für die elektronische Zündung.
- Page 107 Ventil prüfen • Kochflächen: Wenn Sie eine Bürste zum Reinigen der Grillflächen verwenden, achten Sie darauf, dass vor dem • Wichtig: Vergewissern Sie sich, dass das Gas im Grillen keine losen Borsten auf den Grillflächen Flüssiggastank abgestellt ist, bevor Sie das Ventil zurückbleiben.
- Page 108 Reinigung der Brennereinheit Indirektes Garen Befolgen Sie diese Anweisungen, wenn Sie Teile der Geflügel und große Fleischstücke werden auf dem Grill durch Brennerbaugruppe reinigen und/oder austauschen möchten oder indirekte Hitze langsam zur Perfektion gegart. Legen Sie das wenn Sie Probleme beim Anzünden des Grills haben.Turn the gas Grillgut auf den/die unbeleuchteten Brenner;...
- Page 109 STÜCKLISTE (1/2) Schlüss Schlüssel Beschreibung Menge Teil Nummer Beschreibung Menge Teil Nummer Seitenbrenner-Deckel 41500041 Seitenbrennerschlauch 40900216 Drehbare Stange, 40500211 Erdungskabel 30800244 Seitenbrennerdeckel Seitenbrenner-Gitter 50600203 Bedienknopf Lünette 40900036 Anbratbrenner 40900142 Bedienknopf, Hauptbrenner 40900206 Searing Brenner Draht 50600225 Bedienknopf, Anbratbrenner 40900224 E4080011 Sockel des Anbratbrenners 40500055 Schlauchadapter (Anschluss J)
- Page 110 STÜCKLISTE (2/2) Schlüss Schlüssel Beschreibung Menge Teil Nummer Beschreibung Menge Teil Nummer 4090022 Plastik-Halte-Set Silikon-Gummipuffer, Deckel 40700103 4050007 E4050022 Wagenstütze Winkeleisen Temperaturmessgerät 4050008 Türklinke Logo 40800106 4050008 Rechte Tür Drehbare Stange, Deckel 40500202 4050007 Linke Tür Isolierabstandshalter, Deckel 30800231 4050006 Linke Seitenwand Lünette, Griff des Deckels 30800011...
- Page 111 TEILESCHEMAPLAN...
- Page 112 VOR DER MONTAGE HINWEIS: Überprüfen Sie nach dem Auspacken des Grills alle Grillteile anhand der Abbildungen auf Seite 112-114. Sollten Teile fehlen oder beschädigt sein, wenden Sie sich bitte über die Seite „Kontakt“ an uns.
- Page 113 VOR DER MONTAGE...
- Page 114 VOR DER MONTAGE...
- Page 115 MONTAGE LESEN SIE ALLE MONTAGEANWEISUNGEN AUF DEN FOLGENDEN SEITEN SORGFÄLTIG DURCH UND FÜHREN SIE SIE AUS.. Erforderliche Werkzeuge: • Verstellbarer Schraubenschlüssel (nicht mitgeliefert) • Schraubendreher (nicht mitgeliefert) • Das folgende Zubehör ist in der Blisterpackung enthalten und erleichtert die Verwendung. M4 x 10 Sechskantschraub M6 x 13 Schraube Anz: 2 Stück...
- Page 116 Unteres Regal Drehen Sie die untere Ablage auf den Kopf. Befestigen Sie die untere Ablage der Frontplatte an der unteren Ablage mit (8) Schrauben M4x10. (A) Befestigen Sie die Rollen mit (16) Schrauben M6x13 an der unteren Ablage. (B) Hinweis: Montieren Sie jede Rolle in der richtigen Position, wie in der Abbildung unten gezeigt.
- Page 117 Wagen Richten Sie zum Anbringen der Seitenwände die Löcher in den Seitenwänden auf die Löcher in der Bodenwand auf jeder Seite des unteren Regals aus. Hinweis: An der linken Seitenwand ist die Streichholzhalterung angebracht. Befestigen Sie die linke und rechte Seitenwand mit (6) M6x13-Schrauben an der unteren Ablage, ziehen Sie sie jedoch nicht ganz fest.
- Page 118 Elektronisches Zündmodul Befestigen Sie das elektronische Zündmodul durch die Montageöffnung an der rechten Seitenwand. (A) Setzen Sie die Gummidichtung und die Kunststoffmutter ein und ziehen Sie sie mit der Hand fest. (A)
- Page 119 Vordertür Befestigen Sie die linken und rechten Halterungen der Fettauffangwanne mit (8) M4x10- Schrauben an den Seitenwänden. (A) Entfernen Sie die (4) M5x15-Schrauben, die an den Enden der Türgriffe vormontiert sind, und verwenden Sie diese, um die Griffe an den Türen zu befestigen (B). ...
- Page 120 Grillkopf zum Warenkorb WICHTIG: Entfernen Sie die Kabelbinder und das Verpackungsmaterial vom Ventil des Anbratbrenners und dem Zündkabel. Ziehen Sie den Zünddraht auf der rechten Seite des Grillkopfs heraus. Für diesen Schritt sind zwei Personen erforderlich, um den Grillkopf anzuheben und auf dem Wagen zu positionieren.
- Page 121 Brennerelektrode und Zünderabdeckung Führen Sie die 5 Brennerelektrodenkabel (dünnes schwarzes und dünnes oranges Kabel), das Erdungskabel (rote Kappe) und das Zündkabel (großes schwarzes Kabel) durch die vorinstallierte Seitenwandklemme. (A) Hinweis: Wenn die Drähte schwer zu installieren sind, lösen Sie die Klemmschraube, führen Sie die Drähte durch die Klemme und ziehen Sie die Schraube wieder an.
- Page 122 Linke Seitenablage Befestigen Sie die Blende mit (2) M5x10 Sechskantschrauben, (2) M5 Unterlegscheiben und (1) M4x10 Sechskantschraube an der linken Seitenablage. (A & B) Hängen Sie die linke Seitenablage in die Halterungen an der linken Seite des Feuerraums ein. ...
- Page 123 Rechte Seitenablage Befestigen Sie die Blende mit (2) M5x10 Sechskantschrauben, (2) M5 Unterlegscheiben und (1) M4x10 Sechskantschraube mit dem mitgelieferten Schraubenschlüssel an der rechten Seitenablage. (A & B) Hängen Sie die rechte Seitenablage in die Halterungen an der rechten Seite des Feuerraums ein.
- Page 124 Anbratbrenner Entfernen Sie die Kunststoffverpackung vom Ventil des Anbratbrenners. Nehmen Sie den Rost des Anbratbrenners von der Ablage des Anbratbrenners ab. Bringen Sie den Zünddraht am Ventil des Anbratbrenners an. (A) Entfernen Sie die 2 vorinstallierten Schrauben von der Ventilsteuerungsstange und legen Sie sie beiseite. (B) ...
- Page 126 Wärmediffusor, Kochroste und Warmhalterost Platzieren Sie die Wärmediffusoren über den Brennern. Die Diffusoren passen in beide Richtungen in den Feuerraum. (A & B) Legen Sie die Grillroste auf die Rostauflagen an der Vorder- und Rückseite des Feuerraums. (C & D) ...
- Page 127 Tropfschale, Tropfbecher und Gasflasche Setzen Sie die Tropfschale von hinten in den Boden des Feuerraums ein. Dann die Tür öffnen und die Tropfschale in den Schlitz der Tropfschale einsetzen. (A & B) Die Gasflasche ist separat erhältlich. Nur mit einer mit OPD (Overfill Protection Device) ausgestatteten Gasflasche verwenden.
- Page 128 NOTFÄLLE: Wenn ein Gasaustritt nicht gestoppt werden kann oder ein Brand aufgrund von Gasaustritt entsteht, rufen Sie die Feuerwehr. Problem Mögliche Ursache Prävention/Lösung • • Aus einem Beschädigter Schlauch. Drehen Sie das Gas aus Ihrem Flüssiggastank oder Ihrem geplatzten/geschnittenen/ Erdgassystem ab. Wenn der Schlauch gerissen oder •...
- Page 129 Fehlersuche (Fortsetzung) Problem Mögliche Ursache Prävention/Lösung • Siehe Abschnitt I über die elektronische Zündanlage. Der/die Brenner ELEKTRONISCHE ZÜNDUNG: zündet/zünden nicht mit • Kein Funke, kein Zündgeräusch. • Kein Funke, etwas Zündgeräusch. • Siehe Abschnitt II über die elektronische Zündanlage. dem Zünder. (Siehe •...
- Page 130 Fehlersuche - Elektronische Zündung Problem Mögliche Ursach Artikel prüfen Prävention/Lösung ABSCHNITT I • Die Batterie ist nicht • Vergewissern Sie sich, • Setzen Sie die Batterie ein und achten Sie Wenn der richtig eingesetzt. dass die positive Seite der darauf, dass das positive Ende nach außen •...
- Page 131 CONTACT US For Poland customers, please refer to the contact information below. Email: serwis@vivamix.pl Website: www.vivamix.pl For all the other customers, please refer to the contact information below. (Germany, Austria and Luxembourg) Email: info@youroutdoorkitchen.eu Website: Kenmoregrill.com SKONTAKTUJ SIĘ Z NAMI Informacje kontaktowe dla klientów z Polski znajdują...
Need help?
Do you have a question about the PG-40405S0L-SE and is the answer not in the manual?
Questions and answers