Table of Contents
Advertisement
Quick Links
Advertisement
Table of Contents

Related Manuals for Vestax WRX-2000


Summary of Contents for Vestax WRX-2000
-
Page 2: Table Of Contents
TABLE OF CONTENTS Section 1 - History Section 2 -Basics Difference VRX-Recording Laces Mastering General Section 3 – Basic VRX-2000 Set-up and Components Set-up Handling Cutting Head Tracking Arm Stylus & Heater Life Blank Vinyl Section 4 – Description of VRX-2000 Components Top Panel Rear View Cutting Head Section... -
Page 3: Section 2 Basics
VESTAX VRX-2000 CUTTING SEMINAR Section 1 History Up to now it only was possible to produce vinyl’s with big machines and a room full of equipment. The cost was tremendous The new VRX-System now enables a musician to produce his own music on a vinyl in a very short time and without the necessity of. - Page 4 2 . 1 V R X - 2 0 0 0 R E C O R D I N G T he V R X -2000 is a n innova tive ma c hine for the e xpe rie nc e d profe s s iona l mus ic ia n. W he n us e d with prope r tra ining a nd knowle dge , your a bility to produc e unique , high qua lity re c ordings with the wa rmth of vinyl is gre a tly improve d.
- Page 5 [dB ] 950Hz 100Hz 1kHz 10kHz fig . 2 : C U T T I N G H E A D F R E Q U E N C Y R E S P O N S E V E S T A X V R X - 2 0 0 0 T hough both ma c hine s c a n tole ra te s uc h e xtre me s ounds , the wa y in whic h the y a re ha ndle d is c omple te ly diffe re nt.
- Page 6 [dB ] 950Hz 100Hz 1kHz 10kHz fig . 4 : C U T T I N G H E A D F R E Q U E N C Y R E S P O N S E V E S T A X V R X - 2 0 0 0 c utting he a d c utting drive a mp input...
- Page 7 V R X -2000 * S ma ll S ys te m A dva nta ge s * N o c ooling s ys te m is ne e de d * C a n us e a s ma ll powe r a mplifie r * R e c ording le ve l is not pe rfe c tly fla t * D iffic ult to a djus t the E Q to ge t a gre a t s ound D is a dva nta ge s...
- Page 8 C D /M D /P C d e t e c t o r l o o p c o m p /l i m i t t e r m a s t e r c o m p /l i m i t t e r G E 3 3 S A E Q M I X E R A M P...
- Page 9 (1) T E S T C U T - T R IA L C U T S e t up the c utting s tylus , ma king s ure tha t its pos ition is c orre c t a nd s e c ure . C he c k the s tylus c onne c tion a nd pre s s ure .
-
Page 10: Mastering
2.2 Mastering Excellent cutting is only possible with excellent mastered records. This Seminar is not intended to teach mastering and engineering skills. These are a requirement for successful cutting. However here are some hints about Mastering. More and more people nowadays are recording in their living room or garage without caring about monocompatibility or phase continuity and correlation. -
Page 11: Section 3: Basic Vrx-2000 Set-Up And Components
Section 3: BASIC VRX-2000 SET-UP AND COMPONENTS 3.1 SET UP Please place this unit on a solid, stable and horizontal surface. An unstable surface may pick up external vibrations, and these unwanted sounds will be recorded on the vinyl. Unstable surfaces may also cause platter rotation fluctuations. -
Page 12: Tracking Arm
3.4 TRACKING ARM The VRX-2000 tracking arm is another sensitive component, and is and very accurately made. Please do not put pressure on the tracking arm, as it may cause inaccuracies and problems in recording. If the arm is bent by strong force it will cause the VRX2000 to disfunction totally. Please also note that the moving parts of the tracking arm require maintenance from time to time. -
Page 13: Section 4: Description Of Vrx-2000 Components
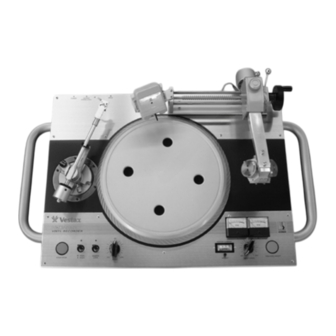
Section 4: Description of VRX-2000 Components 4.1 Top Panel... - Page 14 7. Manual rotation wheel: to set the position of the cutting arm in the correct place on the vinyl blank 8. Cutting head: Vestax proprietary design high quality stereo cutting head 9. Tracking on/off switch 10. Recording level volume control: to adjust the level of the incoming signal 11.
-
Page 15: Rear View
4.2 Rear View 28. Limiter bypass switch: turns the internal compressor limiter on or off. Must always be in on position unless external compressor limiter devices are used in the cutting process. 29. Input level select switch: adjusts the input gain +4dB/ 0dB/ -10dB 30. -
Page 16: Cutting Head Section
4.3 Cutting Head Section 37. Cutting stylus holder (A) 39. Heater wire terminal 38. Cutting stylus holder (B) 40. Multipin connector Section 5: TECHNICAL DESCRIPTION OF VRX-2000 CUTTING MACHINE 5.1 Description of each Part • Cutting arm - the cutting arm consists of two parts: the base and the arm. The base has a mechanism which moves the arm from the outside to inside of the vinyl as you record. -
Page 17: Section 6: Assembly And Set-Up
Section 6: ASSEMBLY AND SET-UP Platter assembly 1. Insert platter to center spindle 2. Stick the lower “mirror mat” (2) on the platter with 4 small pcs 2x2 cm of double sided adhesive tape. 2. Also stick the platter weight on “mirror mat” at the same way. 3. -
Page 18: Cutting Stylus Assembly
6.4 Cutting stylus assembly Cutting stylus components: • Stylus tip – highest quality sapphire • Heater line – to heat stylus tip to 40-60 degrees centigrade • Lifetime of stylus – 200-300 minutes N.B. To mount the stylus please only use the screwdriver which comes with the >VRX-2000 !! Please be careful of sapphire tip due to its delicate nature. -
Page 19: Cutting Head Assembly
FIG10.4-F FIG10.4-G Front View Side View 6.5 Cutting head assembly • Before the assembly, please ensure that the cutting head is always to the right • Please assemble the cutting head after installing the stylus. 1. If you lift the cutting arm release lever, the cutting arm lifts up. Please ensure the release lever is locked. -
Page 20: Section 7: Final Adjustments
Section 7: FINAL ADJUSTMENTS 7.10000Stylus pressure adjustment • Move the cutting arm over the blank disk • Ensure that the tracking is off. • Put the cutting arm with the stylus gently on the blank disk 1. Attach the supplied extra fine weight scale (Figure 11.1-A). -
Page 21: Section 9: Playback
If the source material has an extremely wide dynamic range, minimum levels may not be sufficient to achieve the desired result. In this case, use of Vestax SL-201mkII Compressor-Limiter is required. 13. Using anti-static spray, clean the vinyl blank perfectly. -
Page 22: Section 10: Troubleshooting
Section 10: Troubleshooting COPYRIGHT ISSUES COPYRIGHT ISSUES Section 10: 10.1 Step by Step If you have any problem to cut vinyl’s please follow these instructions step by step. A :The OFF-CUT is straight like fig. (a) Please follow instructions after E ! B: The OFF-CUT is curly (b);... -
Page 23: Start Recording
10.2 Start Recording If the OFF-CUT is ok please start to record music without equalization For testing only record 1-2minutes so you will save time and money. F: The OFF-CUT starts to be curly again • Try to reduce the stylus heating by 50 mA •... -
Page 24: Distortion
During playback please switch off the Ioniser as it my cause noise and distortion. Section 11: COPYRIGHT ISSUES VESTAX takes no responsibility for copyright infringement. Copyright laws are different in many countries and we strongly suggest that you get all the copyright information before duplicating any artists’ recordings. Artists deserve to be paid for public performance of their works, and VESTAX supports this stance.
Need help?
Do you have a question about the WRX-2000 and is the answer not in the manual?
Questions and answers