
Related Manuals for Amway eSpringPro


Summary of Contents for Amway eSpringPro
- Page 1 Water Purifier OWNER’S MANUAL Scan QR code to download Amway Mobile Apps on Amwayglobal.com PLEASE KEEP THIS SAFETY INFORMATION This product may be covered by one or more U.S patents including XXXXXX...
-
Page 2: Introduction
INTR ODUC T IO N Congratulations on the purchase of your new eSpring™ Pro Water Purifier. Your decision to improve the quality of your drinking water is a wise investment for you and your family. Inside this box you will find the base Water Purifier, owner’s manual, and registration information. -
Page 3: Table Of Contents
TA B LE O F CO N T E NTS INTRODUCTION ...................................... 2 Customer Service ......................................2 Safety Information ....................................... 4 Important Precautions ....................................5 OPERATION ......................................... 7 eSpring™ Pro Water Purifier ................................... 7 Understanding the Purifier’s Display and Buzzer ........................ -
Page 4: Safety Information
IMPO RTA N T SA F E G UAR DS A ND PR E CAU T I O N S Safety Information WHEN USING AN ELECTRIC APPLIANCE, BASIC SAFETY PRECAUTIONS SHOULD ALWAYS BE FOLLOWED TO REDUCE THE RISK OF FIRE, ELECTRIC SHOCK, AND/OR INJURY TO PERSONS INCLUDING THE FOLLOWING: READ ALL INSTRUCTIONS BEFORE USE. -
Page 5: Important Precautions
IMPO RTA N T SA F E G UAR DS A ND PR E CAU T I O N S Improper connection of the power adapter can result in a risk of electric shock. Do not modify the power adapter. If it will not fit into the outlet, have a proper outlet installed by a qualified electrician. - Page 6 IMPO RTA N T SA F E G UAR DS A ND PR E CAU T I O N S The eSpring™ Pro Water Purifier should be only used with the power supply included with the unit. REMEMBER: OPERATIONAL, MAINTENANCE AND REPLACEMENT REQUIREMENTS ARE ESSENTIAL FOR THIS PRODUCT TO PERFORM AS REPRESENTED.
-
Page 7: Operation
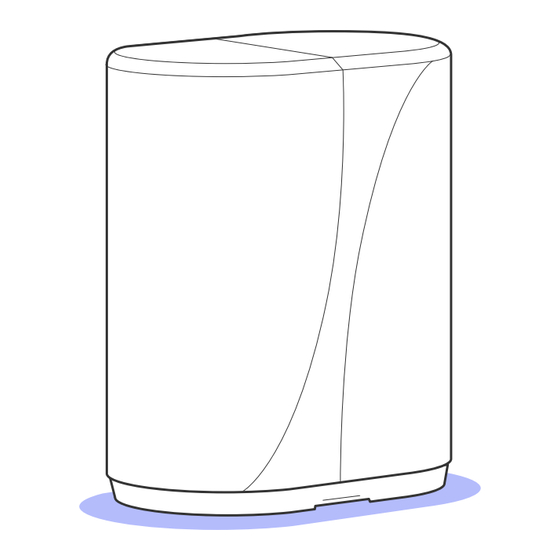
OPE RAT IO N eSpring™ Pro Water Purifier The eSpring™ Pro Water Purifier has 3 functional buttons: ( UV System, Carbon Filter, Connectivity and a line-shaped LED light for displaying the current health of the UV system and carbon filter. There is a removeable cover in front of the water purifier. -
Page 8: Understanding The Purifier's Display And Buzzer
UNDERSTANDING THE PURIFIER’S DISPLAY AND BUZZER The eSpring™ Pro Water Purifier has 2 display modes: Idle Mode and Water Flow Mode. The Filter icon is used to display Filter status and as a button to show Filter life. The UV icon is used to display UV status and as a button to show UV life. -
Page 9: Water Flow Mode
Water Flow Mode The eSpring™ Pro Water Purifier is in water flow mode when water is flowing through the system. During water flow mode, the display will automatically indicate the status of the system and filters. A buzzer alarm will also beep if there is a critical issue. See table below for line shaped LED light and buzzer indication types and corresponding filter status levels. -
Page 10: Installation And Setup
INSTAL LAT I O N A ND S ETU P ABOVE COUNTER INSTALLATION WITH SINK FAUCET The eSpring™ Pro Water Purifier can sit on the countertop with the diverter and tubing attached directly to your tap. It does not work with pull out sprayer faucets. IMPORTANT: Attach the Diverter to a tap that will supply COLD, POTABLE WATER to the Water Purifier. -
Page 11: Attaching The Diverter To The Spout
Attaching the Diverter to The Spout Prepare the faucet spout and diverter Unscrew to remove the threaded aerator cap on the faucet spout and set aside. Unscrew to remove the plastic fastening ring and metal connector from the top of the diverter. Attach the adapter to the spout. - Page 12 Option 3 - Spout has internal threads: Screw the threaded adapter to the metal connector. Note: The rubber washer should remain on top of the threaded adapter Option 4 - Spout does not have threads or threads are unusable, install the Universal Adapter: Unscrew the four screws on the top of the universal adapter until the ends no longer extends into the center area of the adapter.
- Page 13 Attach the diverter to the adapter Press and hold the diverter up to the tap/adapter and screw the plastic ring onto the diverter by hand. Attach the tubing to the diverter IMPORTANT: Do not try to connect tubes to the diverter unless nuts are mounted. Remove both textured nuts exposing both the large and small barbs.
- Page 14 Note: If the tubing is too long on the counter, cut tubes to desired length. Use a sharp knife carefully to cut the tubes to the same length in a location where they are NOT BONDED TOGETHER. Make sure to make a straight cut to form a flat end on the tubes. CAUTION: SHARP BLADE.
-
Page 15: Operation Of The Diverter
Set the unit upright then fill and flush the water purifier prior to use Turn on cold water tap and switch handle to treated water position. Note: It will take a short time for water to saturate the Filter and start flowing out of the faucet. Run for 5 minutes to remove air pockets and carbon dust and if not clear, run for another 5 minutes. -
Page 16: Below-Counter Installation With An Espring™ Auxiliary Faucet
Below-Counter Installation with an eSpring™ Auxiliary Faucet Installing the eSpring™ Pro Water Purifier below the counter allows for maximum use of counter space with no visible tubing. Note: Cold water plumbing must be modified to provide a 3/8” (9.5 mm) Outer Diameter (O.D.) x ¼”... -
Page 17: Installation Of The Espring™ Auxiliary Faucet
Select a location for the faucet or dispensing device. There may already be an extra, capped hole in your sink’s ledge for a sprayer, soap dispenser or extra faucet that can be used for mounting the faucet. If you are removing the connected sprayer, it will need to be sealed properly. (See local plumbing store for assistance.) For eSpring™... - Page 18 Holding the rubber washer in place against the faucet body, lower the eSpring™ Faucet stem and tubes through the hole in the sink ledge or counter With an assistant holding the faucet in place, reach up from below the counter and slide the metal washer then the wing nut onto the threaded faucet Position the faucet in the desired orientation and tighten the metal washer and wing nut to secure the faucet.
-
Page 19: Maintenance
MAIN TE N A N C E FILTER REPLACEMENT Refer to the exploded view of the eSpring™ Pro Water Purifier for assistance with part names. To replace the filter, you will need a replacement filter kit. This kit can be ordered on the web site at www.xxxxxx.xxxx/xxx, or ordered through Customer Service: xxxxxxxxxx, call x-xxx-xxxx, Days/Hours WARNING... - Page 20 Lift the handle to release the vessel and tip it out from the frame. Carry the vessel to the sink using the handle, then unscrew and remove the vessel lid from the vessel. IMPORTANT: If the filter sticks to the lid during removal, twist and pull to release the filter.
- Page 21 Remove plastic wrap from the new filter and place it into the vessel using the small handle at the top of the filter. Note: The filter does not need to be oriented and will rest loosely on the bottom of the vessel until the lid is secured in the following step.
- Page 22 IMPORTANT: It will take a short time for water to saturate the Filter and flow from the diverter/faucet. Flush for a minimum of 5 U.S. gallons (20 liters) (approximately 5-15 minutes) to remove air pockets and carbon dust. If water is not clear, see Troubleshooting.
-
Page 23: Troubleshooting Guide
TR O U BL E S HO OT I NG G UI DE PERFORMANCE PROBLEMS Concern Cause(s) Solution(s) Tubing not pushed all the way onto barbs. Tubing needs to be pushed completely onto barbs and nuts hand tightened. Nuts not tightened all the way. Water leaks at Diverter Tighten all connections between Connections at faucet and/or... - Page 24 Concern Cause(s) Solution(s) Screen on inlet is clogged. Clean treated water screen with brush Water flow rate out of Diverter has reduced. Screen on the treated water Unscrew treated water port and clean port is clogged. screen with brush Cold water shut-off valve(s) Make sure all shut-off valve(s) are not fully open.
-
Page 25: Problems With The Display Or Alarms
PROBLEMS WITH THE DISPLAY OR ALARMS For questions regarding changes in the display, please refer to the table. Below are some common concerns regarding display changes of the Water Purifier. Concern Cause(s) Solution(s) Water Purifier is not plugged Plug Water Purifier into outlet with into outlet with continuous continuous power. -
Page 26: Specifications
SPE CIF I CAT I O N S eSpring™ Pro Water Purifier Models 122941, 122940 • Height: 13.6” (346 mm) nominal. • Width: 10.0” (254 mm) nominal. • Depth: 5.5” (140 mm) nominal. • Constructed of durable, high impact plastic •... -
Page 27: Warranty
Amway will, at its option, either repair or replace the defective item at its expense. HOW AND WHEN MUST YOU MAKE A CLAIM UNDER THIS LIMITED WARRANTY? -
Page 28: Satisfaction Guarantee
Water Purifier for inspection, Amway does not concede that the returned Water Purifier is defective. Amway will bear the expense of shipping, both ways, with respect to the repair or replacement of any defective eSpring™ Pro Water Purifier within the warranty period. If, in Amway’s opinion, the eSpring™...
Need help?
Do you have a question about the eSpringPro and is the answer not in the manual?
Questions and answers