
Related Manuals for Linea 2000 DOMO DO-321A


Summary of Contents for Linea 2000 DOMO DO-321A
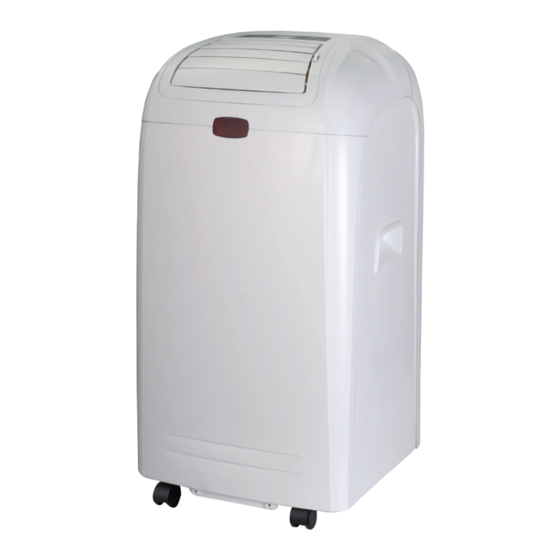
- Page 1 HANDLEIDING MODE D’EMPLOI GEBRAUCHANLEITUNG INSTRUCTION BOOKLET AIRCONDITIONER CLIMATISEUR KLIMAANLAGE AIRCONDITIONER DO-321A PRODUCT OF...
-
Page 2: Conditions De Garantie
The warranty will only be valid if the warranty application has been completed by the dealer at the time of purchase. LINEA 2000 - Industriezone Klein Gent - Bouwelven 12A - 2280 Grobbendonk - Tel 014/21.71.91 - Fax : 014/21,54,63... - Page 3 Type nr. of appliance Naam Nom .............................. Name Name Adres Adresse ............................Adresse Address Aankoopdatum Date d’achat ........................... Kaufdatum Date of purchase LINEA 2000 - Industriezone Klein Gent - Bouwelven 12A - 2280 Grobbendonk - Tel 014/21.71.91 - Fax : 014/21,54,63...
-
Page 4: Recycling Informationen
DO-321A RECYCLAGE INFORMATIE Het symbool op het product of op de verpakking wijst erop dat dit product niet als huishoudafval mag worden behandeld. Het moet echter naar een plaats worden ge- bracht waar elektrische en elektronische apparatuur wordt gerecycleerd. Als u ervoor zorgt dat dit product op de correcte manier wordt verwijderd, voorkomt u mogelijk voor mens en milieu negatieve gevolgen die zich zouden kunnen voordoen in geval van verkeerde afvalbehandeling. - Page 5 DO-321A Wanneer het elektrisch snoer beschadigd is, moet het vervangen worden door de fabrikant, zijn dienst naverkoop of een gelijkaardig gekwalificeerd persoon, om ongelukken te voorkomen. Si le cordon électrique est endommagé, il doit être remplacé par le fabricant, son ser- vice après-vente ou toute autre personne qualifiée, pour éviter tout accident.
- Page 6 DO-321A LEVERING EN UITPAKKEN Deze handleiding voorziet u van nuttige informatie voor de installatie en het onderhoud van uw toestel. Een goed geïnstalleerde en onderhouden airconditioner garandeert u vele jaren van probleemloos gebruik. Wanneer u het toestel uit de doos haalt, controleer dan goed of er geen transportschade is.
- Page 7 DO-321A Maak het ene uiteinde van de luchtafvoerslang vast aan de luchtuitlaat van het toestel en steek het andere uiteinde door een raam, deur of gat in de muur. Zorg ervoor dat de luchtinlaat en uitlaat niet geblokkeerd geraken. Houd het toestel ten minste 1 meter af van tv’s of radio’s om interferentie te voorkomen.
- Page 8 DO-321A ) toets. De display geeft de gewenste temperatuur gedurende 5 seconden aan en nadien de kamertemperatuur. De ventilatorsnelheid aanpassen Druk op de -toets om gewenste ventilatorsnelheid te kiezen uit onderstaand menu. Stand-by Wanneer u nogmaals op de -toets drukt, geeft het toestel eenmaal een akoestisch signaal en zal vervolgens stoppen.
- Page 9 DO-321A Slaapstand ) is alleen van toepassing als het toestel in De slaapstandwerking ( modus staat. Om de slaapstand te activeren, druk op de toets in ‘Koelen’ modus. De bovenste ventilator zal automatisch op lage snelheid overschakelen. De ingegeven temperatuur zal na één uur met 1°C omhoog gaan en met 2°C na twee uur.
- Page 10 DO-321A Trek luchtafvoerslang uiteen door aan de twee uiteinden te trekken. Schroef de luchtafvoerslang in de rechthoekige toestelconnector. Schroef het andere uiteinde van de luchtafvoerslang in de ronde muurconnector Verbind de rechthoekige toestelconnector met de airconditioner. AUTOMATISCHE BEVEILIGINGSFUNCTIE De automatische beveiligingsfunctie kan het toestel in onderstaande gevallen uitschakelen: Koelen Binnentemperatuur is boven 43°C...
- Page 11 DO-321A de plug zorgvuldig weer in de afvoeropening. ONDERHOUD Zet het toestel uit voordat u de stekker uit het stopcontact neemt. Maak het toestel schoon met een zachte droge doek. Gebruik lauw water (kouder dan 40°C) om het toestel schoon te maken als het erg vuil is. Gebruik nooit vluchtige of schurende schoonmaakmiddelen.
- Page 12 Het toestel werkt, maar koelt niet Er staat een raam of deur open DO-321A In modus KOELEN Er staat een verwarmingselement of verwarming aan De luchtfilter is vuil Lucht af- of aanvoer is geblokkeerd De gekozen temperatuur is te hoog Er lekt water uit het toestel wanneer u Maak de opvangbak leeg het verplaatst...
-
Page 13: Instructions De Sécurité
DO-321A LIVRAISON ET DÉBALLAGE Ce manuel d’utilisation vous donne des informations utiles sur l’installation et l’entretien de votre appareil. Un climatiseur bien installé et entretenu vous garantit une utilisation sans problèmes pendant des années. Contrôlez si l’appareil n’a pas été endommagé à cause du transport, quand vous l’enlevez de l’emballage. -
Page 14: Panneau De Commande
DO-321A d’une fenêtre coulissante. Placez-le sur une surface plane. Laissez une espace de 60 cm entre le mur et la sortie d’air. Raccordez le bout du tuyau d’évacuation d’air à la sortie d’air de l’appareil et mettez l’autre bout par une fenêtre, une porte ou un orifice dans le mur. Veillez à... - Page 15 DO-321A Il faut appuyer une fois sur la touche + ( ) of - ( ) pour augmenter ou baisser la température de 1°C. L’écran indique la température souhaitée pendant 5 secondes et ensuite la température ambiante. Adaptation de la vitesse de ventilateur Appuyez sur la touche ( ) pour sélectionner la vitesse de ventilateur souhaitée du menu ci-dessous :...
-
Page 16: Commande À Distance
DO-321A la touche ‘minuterie’ pour sélectionner ‘branchement automatique’, si l’appareil est allumé. Il est possible de sélectionner une durée de temps entre 1 et 24 heures. Appuyez sur la touche ( ) ou la touche ( ) pour augmenter ou réduire la durée de temps d’une heure. - Page 17 DO-321A infrarouge sur votre appareil. Après que vous avez inséré de nouvelles piles, la commande à distance a une portée d’au maximum 7 mètres. INSTALLATION DU TUYAU D’ÉVACUATION D’AIR 1. Tuyau d’évacuation d’air 2. Adaptateur vers l’intérieur, pour insertion du tuyau à l’arrière du climatiseur 3.
-
Page 18: Entretien
DO-321A Si vous retirez la fiche de la prise de courant, l’appareil reviendra au réglage initial. Il faut alors de nouveau activer ou désactiver la minuterie. DRAINAGE Dans votre climatiseur il y a un bac de récupération d’eau pour recycler l’eau de condensation. -
Page 19: Messages D'erreur
DO-321A MESSAGES D’ERREUR L’appareil ne s’allume pas. La fiche n’a pas été bien introduite dans la prise de courant. Le fusible dans la boîte à fusibles a sauté. Les piles de la commande à distance sont vides. Attendez toujours trois minutes, avant de redémarrer l’appareil. -
Page 20: Lieferung Und Auspacken
DO-321A LIEFERUNG UND AUSPACKEN In dieser Gebrauchsanweisung finden Sie nützliche Informationen zur Installation und Wartung Ihres Geräts. Eine gut gewartete und unterhaltene Klimaanlage garantiert Ihnen viele Jahre des problemlosen Gebrauchs. Wenn Sie das Gerät aus der Verpackung nehmen, kontrollieren Sie bitte gut, ob es keine Transportschäden hat. - Page 21 DO-321A VORSORGEMASSNAHMEN Stellen Sie Ihre Klimaanlage am besten neben ein Fenster, eine Tür oder ein Schiebefenster. Stellen Sie das Gerät auf einen flachen Untergrund. Lassen Sie zwischen Wand und Luftauslass 60cm frei. Befestigen Sie das Ende der Luftauslassschlauchs am Luftauslass des Geräts und stecken Sie das andere Ende durch ein Fenster, eine Tür oder ein Loch in der Wand.
- Page 22 DO-321A Modus wählen Drücken Sie die -Taste, um den gewünschten Modus aus untenstehendem Menü zu wählen: Temperatur anpassen Es kann eine Temperatur zwischen 15°C und 31°C mit einem Intervall van 1°C eingegeben werden. Um die Temperatur um 1°C zu erhöhen oder zu senken, drücken sie 1-mal + ( ) oder – ( ).
- Page 23 DO-321A 24 Stunden gewählt werden. Drücken Sie die Taste oder die Taste, um die Zeitenstellung um 1 Stunde zu erhöhen oder zu verkürzen. Schlafeinstellung Die Schlafeinstellung ( ) kann nur verwendet werden, wenn das Gerät im Modus steht. Um die Schlafeinstellung zu aktivieren, drücken Sie die Taste im ‚Kühlen’...
- Page 24 DO-321A ANBRINGEN DES LUFTAUSLASSSCHLAUCHS 1. Luftschlauch 2. Adapter Geräteanschluss 3. Adapter Wandanschluss 4. Fernbedienung 5. Wasserauffangbehälter 6. Wasserauslassschlauch Ziehen Sie den Luftauslassschlauch auseinander, indem Sie an beiden Enden ziehen. Schrauben Sie den Luftauslassschlauch in den rechteckigen Geräteadapter. Schrauben Sie das andere Ende des Luftauslassschlauchs in den runde Wandadapter.
-
Page 25: Wartung
DO-321A ENTWÄSSERUNG In Ihrem Gerät befindet sich ein Auffangbehälter zur Wiederverwendung von Kondenswasser Wenn der Wasserstand sich unter dem Minimumstand des Auffangbehälters befindet, arbeitet die Pumpe zur Wiederverwendung des Wassers nicht. Steigt der Wasserstand über den Minimumstand, beginnt die Pumpe, das Wasser wiederzuverwerten. Steigt der Wasserstand über den Maximumstand, erscheint ‚E4’... - Page 26 DO-321A Die Sicherung im Sicherungskasten ist herausgesprungen. Die Batterien der Fernbedienung sind leer. Warten Sie stets 3 Minuten, bevor Sie das Gerät erneut anschalten. Das Gerät arbeitet nur eine kurze Zeit Die gewählte Temperatur nähert sich der lang. Raumtemperatur. Wählen Sie eine niedrigere Temperatur oder warten Sie, bis das Gerät automatisch wieder anspringt.
-
Page 27: Delivery And Unpacking
DO-321A DELIVERY AND UNPACKING This manual provides you with useful information for the installation and maintenance of your appliance. A properly installed and maintained air conditioner guarantees you many years of problem-free use. When you remove the appliance from the box, check thoroughly for transport damages. -
Page 28: Control Panel
DO-321A or radios. Keep appliance out of direct sunlight to avoid discolouration of casing. The appliance should not lean more than 35°, do not place upside down during transport. PARTS 1. Control panel 2. Cold air outlet 3. Infrared receptor 4. - Page 29 DO-321A Standby If you press on the standby button a second time the appliance will produce a single acoustic signal then switch off. MODES Automatic Mode If the function has been selected, the sensor will automatically adjust to the correct mode: If room temperature is higher or equal to 24°C the appliance will automatically select the cooling function If the temperature is lower than 24°C the appliance will automatically switch to adjust...
-
Page 30: Remote Control
DO-321A To activate sleep settings, press on sleep function button making sure appliance is already set to the Cooling (down) Mode. The top ventilator will switch automatically to low speed. After one hour the selected temperature will increase by 1°C, and by 2°C after two hours. After six hours the appliance will automatically switch off. -
Page 31: Automatic Safety Function
DO-321A 6. Water discharge pipe Pull the air outlet pipe apart by pulling on both ends. Screw the air outlet pipe to the square-shaped appliance connector. Screw the other end of the air outlet pipe into the round wall connection fitting. -
Page 32: Maintenance
DO-321A Remove the plug from the drainage opening. Let all of the water run out and carefully put the plug back into place. MAINTENANCE Switch the appliance off before you remove the plug from the socket. Clean the appliance with a soft, dry cloth. If the appliance is very dirty use lukewarm water (colder than 40°C) to clean it. - Page 33 DO-321A The appliance works but A window or door is open does not cool off/down in There is a heater or heating element switched on COOLING mode The air filter is dirty Air or inlet/outlet is blocked The selected temperature is too high Water is leaking from the Empty the water collection container appliance when you move it...
Need help?
Do you have a question about the DOMO DO-321A and is the answer not in the manual?
Questions and answers