
Subscribe to Our Youtube Channel
Related Manuals for Thomasville RENOVATIONS Bryant Park 3182 C04


Summary of Contents for Thomasville RENOVATIONS Bryant Park 3182 C04
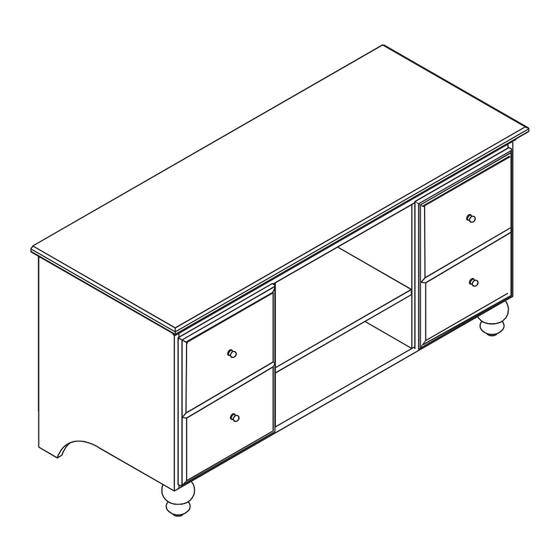
- Page 1 All manuals and user guides at all-guidesbox.com Bryant Park (3182 C04) tv stand style# 3182-157-1 C04 >> assembly instructions...
- Page 2 Good luck though we re confident you won t need it Before you begin Check for damaged or missing parts Call 1-800-782-3876 or e mail CISupport Thomasville com between 8:00 - 9:00 pm Monday Friday and...
- Page 3 All manuals and user guides at all-guidesbox.com table of contents introduction hardware parts list how to use the cam lock system assembly 7-19 QUESTIONS Just call 1-800-782-3876 for parts and service. For faster service, have the style number and DPCI number ready when calling.
- Page 4 All manuals and user guides at all-guidesbox.com hardware (H5) x 30 (H2) x 26 (H4) x 18 (H1) x 26 8*30 wooden dowel 5/8" pan-head screw cam bolt 80159658 80184264 80159660 80159661 (H11) x 12 (H13) x 2 (H8 ) x 16 ) x 4 1"...
- Page 5 All manuals and user guides at all-guidesbox.com ITEM DESCRIPTION PART NUMBER QUANTITY 80183884 top panel 80183886 side panel RH 80183888 side panel LH bottom panel 80183889 80183890 front rail 80183892 back rail 80183894 middle panel RH 80183895 middle panel LH foot with tack glide &...
- Page 6 All manuals and user guides at all-guidesbox.com how to use the cam lock system Important Note: +/- on the cam should be positioned as shown. Do not overtighten the cam bolt...
- Page 7 All manuals and user guides at all-guidesbox.com step 1. Make sure the wood dowel protrusion is no more than 12mm, that's 1/2" H4 x 4 cam bolt 8*30 wooden dowel no more than 1/2"...
- Page 8 All manuals and user guides at all-guidesbox.com step 2. The holes for locking feet are at front side (H1)
- Page 9 All manuals and user guides at all-guidesbox.com step 3. Make sure the wood dowel protrusion mm, that's 1/2" is no more than no more than 1/2" (H13) x 2 (H4) x 2 8*30 wooden dowel 1” flat-head screw...
- Page 10 All manuals and user guides at all-guidesbox.com step 4. With a helper... Make sure the wood dowel protrusion mm, that's 1/2" is no more than (H1) (H4) x 8 8*30 wooden dowel no more than 1/2"...
- Page 11 All manuals and user guides at all-guidesbox.com step 5. Make sure the wood dowel protrusion is no more than mm, that's 1/2" H2 x 10 H4 x 4 cam bolt 8*30 wooden dowel no more than 1/2"...
- Page 12 All manuals and user guides at all-guidesbox.com step 6. With a helper... x 10...
- Page 13 All manuals and user guides at all-guidesbox.com step 7. Do not overtighten. )x 1 allen wrench Bolt...
- Page 14 All manuals and user guides at all-guidesbox.com step 8. With a helper... H2 x 8 cam bolt...
- Page 15 All manuals and user guides at all-guidesbox.com step 9 With a helper... (H5) x 30 5/8” pan-head screw...
- Page 16 All manuals and user guides at all-guidesbox.com step 10. (H15) x 4 (H17) x 4 (H9) x 4 (H11) x 16 9/16" pan-head screw 1" pan-head machine screw hinge knob...
- Page 17 All manuals and user guides at all-guidesbox.com step 11. H13 x 12 shelf pin...
- Page 18 All manuals and user guides at all-guidesbox.com step 12 HINGE ADJUSTMENT If the doors do not appear square or aligned, loosen or tighten the appropriate screws on each case hinge as illustrated. 2) Depth adjustment: 3) Height adjustment: 1) Side to side adjustment: Loosen screw A, push hinge arm Loosen screw C, adjust Loosen screw A, adjust gap...
- Page 19 All manuals and user guides at all-guidesbox.com...
Need help?
Do you have a question about the RENOVATIONS Bryant Park 3182 C04 and is the answer not in the manual?
Questions and answers