Advertisement
Advertisement
Table of Contents

Related Manuals for TieJus MW3


Summary of Contents for TieJus MW3
- Page 1 Make your life smarter and safer QUICK START GUIDE...
-
Page 2: Warranty Service
How to Activate the Free 1-year Warranty Extension? Send us order number and SN number via email. Please email us within 30 days of receiving the camera. Email: Tech@tiejus.com Product Service Email: Tech@tiejus.com Distributor: Distributor@tiejus.com More About Us Web: www.tiejus.com Facebook: www.facebook.com/zumimalloffice YouTube:www.youtube.com/@TieJus... -
Page 3: What's In The Box
What's in the Box Make your life smarter and safer QUICK START GUIDE Camera Outdoor Mount Quick User Guide Screws Set Charging Cable Solar Panel NOTE : Micro SD card and power adapter are not included. -
Page 4: Connection Instructions
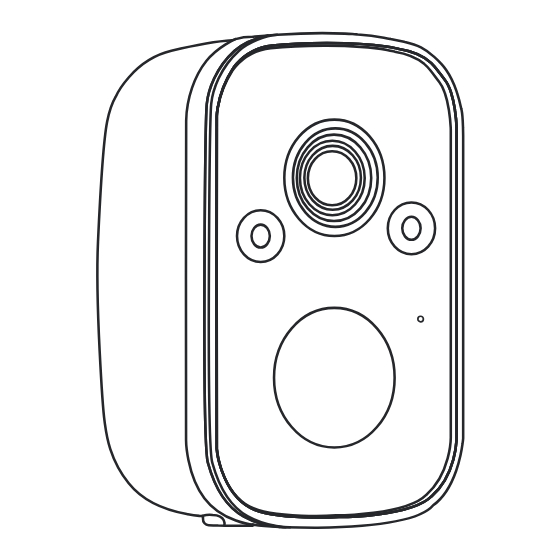
Connection Instructions Photosensitive Element work indicating lamp Infrared + White light TF card Charging port Power button Reset button Speaker... -
Page 5: Charging Instructions
Charging Instructions Connect the power interface and the power socket with the power cord to charge the battery. - Page 6 Installation Guide Choose a location Please install the camera in a location where the field of view is not blocked, and make sure that the location of the camera has a good Wi-Fi signal Easy installation of solar panels, plenty of sunlight.
- Page 7 Mounting bracket Use a drilling tool to drill holes in the wall according to the hole spacing of the base. It is recommended to use a pencil to mark the holes in the wall before riling. Screw the expansion nut into the hole on the wall and then connect the bracket with the nut in screws to complete the fix.
- Page 8 Adjust the angle Mount the camera on a magnetic stand and adjust the monitoring angle.
-
Page 9: Indicator Light
Indicator Light Device status Indicator light Blue light Waiting for network configuration flashes slowly Network configuration failed Network Configuration completed Blue light always on Blue light flashes Disconnected from the network quickly Long press the reset button to reset Green light flashes slowly Device unbinding AP mode... -
Page 10: Device Connection
Device Connection Download the APP Scan the QR code below to download and install the O-KAM Pro APP. Register and log in to the APP ① Please register an APP account and log in. ② If you have already registered, please log in directly. - Page 11 Add device ① Method 1: Open the mobile APP, click the "+" in the upper right cornerto scanthe QR code on the camera and complete the device binding according to the guidance of the mobile phone ② Method 2: Open the mobile APP, please click the "+"...
-
Page 12: Device Sharing
Device Sharing Open permission of Device sharing, the person being shared can set the function of the devicelf the permission is turned off, you can only watch thevideo, and cannot set the function. - Page 13 1. How do l invite family and friends to use my camera together? A: Open the APP and select your camera in the home page. Click "Share" in the camera settings to enter the sharing page, and a QR code will be generated. Your friends can open the app and gain some access by scanning the OR code in their phone.
- Page 14 5. How far should the camera be from the router? A: After testing, the Wi-Fi connection distance can reach 150 meters in an open area. But the actual situation depends on the strength of the Wi-Fi and its surroundings(thick walls, electromagnetic devices, large metal objects can all cause interference to the Wi-Fi signal).
- Page 15 ④If the OR code network configuration is unsuccessful, try to use the AP network configuration(the mobile phone can be automatically added after connecting to the WiFi hotspot issued by the camera and returning to the App)the password should not be set as complicated as possible, and it does not contain special characters.
Need help?
Do you have a question about the MW3 and is the answer not in the manual?
Questions and answers