Table of Contents
Advertisement
Quick Links
Advertisement
Table of Contents

Related Manuals for Kramer GP2-890RR 2024


Summary of Contents for Kramer GP2-890RR 2024
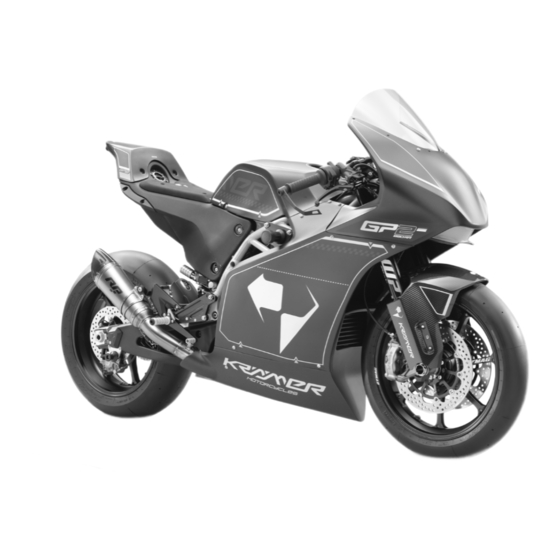
- Page 1 OWNER’S MANUAL GP2-890RR (Model Year 2024)
- Page 2 Introduction Introduction Dear Krämer Customer, We want to congratulate you on purchasing a Krämer GP2-890RR series motorcycle. The GP2-890RR is equipped with class-leading specifications, including the best power-to-weight ratio in the category, with 138 hp on-tap and a ready-to-race weight of 142 kg (313 lbs).
-
Page 3: Table Of Contents
General Information Table of Contents USAGE AND SETUP CHASSIS ELECTRICAL Identification / Serial Numbers ... 4 Handlebar Adjustment ....14 Tail light Operation . -
Page 4: Usage And Setup
Usage and Setup Usage and Setup Identification / Serial Numbers Reference Views of Vehicle NOTE: Instructions, such as right-hand (R.H.) side and left-hand (L.H.) side are from rider position. Serial Numbers Chassis S/N — R.H. side steering head. Engine S/N — L.H. side of the engine above the sprocket. -
Page 5: Control Components
Usage and Setup Control Components Hand Controls Dashboard Pit limiter / Main Switch Suspension zero rear* (behind fairing support) Start Button Clutch Lever Ignition/Kill Switch Suspension zero front* Front Brake Lever Workmode selector Throttle Trimmer + Trimmer - Foot Controls Hand Controls Trimmer context Shift Lever... -
Page 6: Vehicle Break-In Procedure
Usage and Setup Vehicle Break-in Procedure Post-Crash Inspection Following the fi rst outing For the fi rst 100 km (62 miles) 1. Remove the entire fairing (including the Intake Cover/Air (15-20 minutes): Filter Box) [See pg. 15]. • Do not exceed 70% of full brake pressure. 2. -
Page 7: Transporting / Loading
Usage and Setup Transporting / Loading NOTE: Use wheel chock to stabilize front wheel. Recommended Tie-Down Points 1. FRONT: Attach a soft-tie loop straps on the lower triple tree (examplary shown in the pictures). Lead the loop forward out the lower front fairing attaching to the tie-down straps secured to a solid mounting point in the transport vehicle. -
Page 8: Storage
Usage and Setup Storage To store the motorcycle for an extended period, Preparing for Storage Removing from Storage take the following actions. 1. Drain fuel tank empty. See “Fuel Tank Draining 1. Fill coolant, if drained for freezing temperature Procedure” on page 16. storage conditions [See pg. -
Page 9: Maintenance / Service
Maintenance / Service Maintenance / Service Service Schedule For a detailed listing of service schedule see the chart on pg. 29. Krämer Motorcycles Onlineshop If any part of your GP2-890RR needs to be replaced because of wear or damage, spare parts can be found in the Krämer Motorcycles Onlineshop: www.kmc-shop.com Checking the Engine Oil Level... -
Page 10: Chain Cleaning / Lubrication
Maintenance / Service Chain Cleaning / Lubrication 1. Raise the rear of the motorcycle on a lift stand 6. Let the chain dry to the touch before spraying [See pg. 7]. lubricant. 2. Check that the shift lever is in neutral. 7. -
Page 11: Fuel Filler Cap
Maintenance / Service FIRE HAZARD Fuel Filler Cap Fuel is highly Open the Fuel Filler Cap fl ammable. The fuel in the fuel tank 1. Push down on cap lever expands when warm and 2. Rotate it counter-clockwise 1/4-turn. can escape if overfi lled. 3. -
Page 12: Engine
Engine Engine Repairs Repack the Muffler In case of damage or problems with the engine, please contact your local Krämer Motorcycles • Every 1.000 km or when it is burned out. The muffl er is burned dealer. out when the bike is signifi cantly louder than normal. Empty muffl er reduces engine performance and can lead to cracks in the exhaust. -
Page 13: Cooling System
Cooling System Cooling System Checking the Coolant Level 1. With the engine cold, position the motorcycle Coolant should be visible at the bottom of the on a level surface. radiator fi ll fi tting—35mm (1.38”) below the upper edge of fi ller neck 2. -
Page 14: Chassis
Chassis Chassis Handlebar Adjustment The position of the handlebars is adjustable in both height and angle. Please note that the right and the left handlebar sides mirror each other, and neither should be at a different angle or height. Height and Angle Adjustment 1. -
Page 15: Bodywork Removal
Chassis Bodywork Removal Remove the bodywork pieces in the order of appearance. Reinstall the bodywork pieces in reverse order [See below]. Remove Tail Cap Remove Side Fairing Front Upper Fairing Fastener Steering Damper Screws 1. Remove the two screws under the tail cap. 9. -
Page 16: Fuel Tank Draining Procedure
Chassis Fuel Tank Draining Procedure 1. Remove the fuel cap to allow tank ventilation. CAUTION! Fire Hazard 2. Remove the protective red cap from the Drain the fuel in a well-ventilated fuel tank quick-couple drain port on the area without any open fl ame or sparks. fuel pump located on the lower right-hand side Have a fi re extinguisher nearby. -
Page 17: Clutch Lever Free Play And Reach Distance
Chassis Clutch Lever Free Play and Reach Distance Checking Clutch Lever Free Play NOTE: Proper free play is important to 1. Check the clutch lever for smooth operation. prevent clutch damage. Lever Reach 2. Position the handlebar to straight-ahead. • No free play could cause the clutch to slip. Distance 3. -
Page 18: Rearset Setup
Chassis Rearset Setup The adjustable rearset allows a personalized setting for each rider, with both foot pegs, the shift lever, and the brake lever being adjustable. Adjusting the Foot Pegs Right Side Left Side 1. Remove the exhaust muffl er retainer 1. -
Page 19: Brake System
Brake System Brake System WARNING! Danger of accidents NOTE: If the brake pads are not changed in time, the steel Reduced braking effi ciency can be caused brake pads carriers grind on the by worn brake pads. brake disc. The braking effect is greatly –... -
Page 20: Changing The Brake Pads
Brake System Changing the Brake Pads Front Brake Calipers 1. Position the motorcycle on a rear lift stand. install mounting bolts , but do not tighten them yet. 2. Position the brake reservoir in a horizontal position. Remove brake reservoir cap and 11. -
Page 21: Suspension
Suspension Suspension Suspension Inspection Front Forks Rear Suspension Swingarm 1. Check the full action of the forks by applying the 1. Check the full action of the shock absorber by 1. Raise the rear wheel off the ground and support the front brake, pushing down on the handlebars, and compressing it several times. -
Page 22: Changing The Fork Offset
Suspension Changing the Fork Offset 1. Raise the motorcycle under the frame, lifting 12. Remove the screw from the hole the front wheel off the ground. push up the lower triple clamp to the original position. Apply blue thread lock*, install the 2. -
Page 23: Fork Suspension Settings
Suspension Fork Suspension Settings Adjusting Spring Preload Preload: The distance the spring is compressed from its free length with the suspension fully extended. It affects the suspension sag. 1. On the top of both fork tubes, turn the hex Fork Spring Preload Initial Spring Preload Guideline: adjuster equally to the desired setting. -
Page 24: Rear Shock Suspension Settings
Suspension Rear Shock Suspension Settings Adjusting the Spring Preload Preload: It affects the suspension sag. The Initial Guideline: adjustment knob is on the right hand side STANDARD – 12 mm (0.47 in) under the seat. 1. Increase the spring preload by turning the preload knob clockwise. -
Page 25: Wheels
Wheels Wheels Front Wheel Removal 1. Raise the motorcycle front and rear on lift WARNING! Danger of accidents stands [See pg. 7]. Damaged brake discs reduce braking. 2. Remove the front fender [See pg. 15]. 3. Loosen the pinch bolts on both front forks. -
Page 26: Rear Wheel Removal
Wheels Rear Wheel Removal 1. Raise the motorcycle front and rear on lift 5. Move the rim forward in the swingarm to stands [See pg. 7]. remove the chain from the sprocket. 2. Remove the axle nut and the chain adjuster 6. -
Page 27: Electrical
Electrical Electrical Tail light Operation Charging the Tail light Switching On 1. Rotate tail light bezel counterclockwise to remove the tail light from the mount. 1. Press and hold the tail light lens to power 2. Plug a the mini-USB cable into the connector to charge for a couple hours. -
Page 28: Battery
Electrical Battery Location Removal The 12 V battery is found behind the left side 1. Turn off the Main Switch. fairing. 2. Remove the left side fairing [See pg. 15]. Charging 3. Remove screws Use a proper lithium rated battery charger. (Optimate 12.8/13.4 V 0.8 A charger is 4. - Page 29 Service Schedule Service Schedule Check that the brake linings of the front brake are • • • • • • • Check the coolant level in the compensating tank • • • • • • secured [See pg. 19]. [See pg. 13]. Check that the brake linings of the rear brake are •...
-
Page 30: Technical Data
Technical Data Technical Data GP2 890-RR Specifications Engine Specifications Frame Trellis frame of steel Design Four-Stroke, Twin-Cylinder, DOHC, 8-Valve, water- and oil-cooled tubes, powder-coated Power 138 hp (101 kW) @ 10,100 rpm Fork WP Suspension APEX Torque 100 Nm (74 lbs-ft) @ 8,200 rpm PRO 7543 KMC Spec 1 Displacement 889 cm... -
Page 31: Torque Specifications
Torque Specifications Engine Torque Chart Nut, Exhaust Flange 15 Nm (11.1 ft-lb)*** Water Pump Drain Hole Plug EJOTALtracs 8 Nm (5.9 ft-lb)* ® Plus 60x14 Oil Nozzle for Clutch Lubrication 5 Nm (3. 7 ft-lb)* Bleeder Flange Screw EJOTALtracs 8 Nm (5.9 ft-lb)* Remaining Screws for Engine 20 Nm (14.8 ft-lb) ®... -
Page 32: Chassis Torque Chart
Torque Specifications Chassis Torque Chart Safety Wire Chassis Remaining M5 Nuts 5 Nm (3.7 ft-lb) Safety wire is installed as an additional measure of Chassis Remaining M5 Screws 5 Nm (3.7 ft-lb) protection to keep critical fasteners in place from hard Chassis Remaining M6 Nuts 10 Nm (7.4 ft-lb) use or vibration. -
Page 33: Dashboard
Dashboard AIM MXS 1.3 Race GPS with Data Logger Dash Logger Indicators Overview The AIM Compact 5” Color TFT dash logger has been specifi cally confi gured for the Krämer Main Display Page GP2-890RR motorcycle. It displays relevant data to the rider and logs data that can be GPS Indicated Speed retrieved and analyzed in the AIM Race Studio 3 software. -
Page 34: Dash Logger Menu Configuration Settings
Dashboard Dash Logger Menu Configuration Settings Using the Multi-function Menu buttons , press the MENU button to display the sub- menues of the confi guration page. Press the NEXT and PREV buttons to navigate this page. Move to desired function setting, then press ENTER to open that setting’s page. -
Page 35: Lap Time Setup
Dashboard Lap Time Setup The Lap Time Predictive Reference is selected on this page. • Best Lap of Test • Best Lap of Today • Previous Lap Lap Time Setup Counters Four user odometers are displayed. Management User 1 – User 4, plus a non-resettable System Odometer. All odometers are shown on the configuration software Race Studio 3 too. -
Page 36: Wi-Fi Management
Dashboard Wi-Fi Management Here you can manage the Wi-Fi settings, select the channel to be used (expert users only), and reset its configuration. Wi-Fi modes are: • ON • AUTO: switches the Wi-Fi on when the vehicle is stopped and automatically switches it off when the dash logger starts recording according to the setting you performed on the “Parameters”... -
Page 37: Sampled Data Recall
Dashboard Sampled Data Recall MXS 1.3 dash logger can show up to eight pages of sampled data. The Test Session Summary of collected data is recalled by pressing the MEM/OK button. • Select a desired date. The Day Summary page shows the tests with time of •... - Page 38 Maintenance / Service Krämer Motorcycles Gewerbepark Lindach B5 84489 Burghausen Germany info@kraemer-motorcycles.com www.kraemer-motorcycles.com © 2023 Krämer Motorcycles All rights reserved. Ver. GP2-890RR-2023-11-28...
Need help?
Do you have a question about the GP2-890RR 2024 and is the answer not in the manual?
Questions and answers