Table of Contents
Advertisement
Quick Links
Operating Instructions
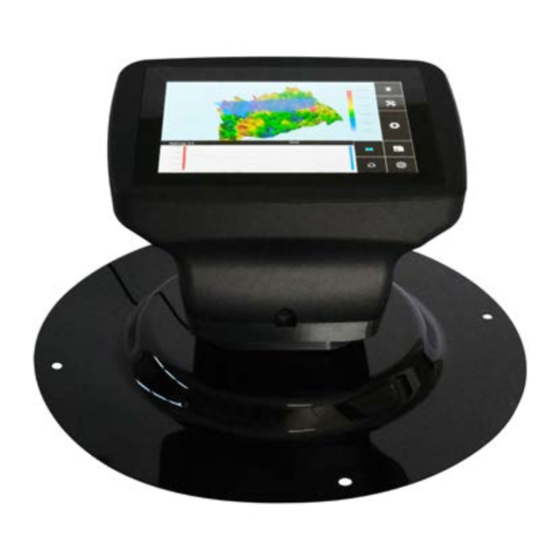
Optimap3 PSD
A revolution in surface measurement
Thank you for purchasing this Rhopoint product.
Please read these instructions carefully before operating this product and retain them for future
reference. The images shown in this manual are for illustrative purposes only.
Manufactured by Rhopoint Instruments in the United Kingdom
Advertisement
Table of Contents

Subscribe to Our Youtube Channel
Related Manuals for Rhopoint Optimap3 PSD


Summary of Contents for Rhopoint Optimap3 PSD
- Page 1 Thank you for purchasing this Rhopoint product. Please read these instructions carefully before operating this product and retain them for future reference. The images shown in this manual are for illustrative purposes only. Manufactured by Rhopoint Instruments in the United Kingdom...
- Page 2 © Copyright 2022 Rhopoint Instruments Ltd. All Rights Reserved. Optimap™ and Rhopoint™ are registered trademarks or trademarks of Rhopoint Instruments Ltd. in the UK and other countries.
-
Page 3: Table Of Contents
Project Menu 8.5.4 Close Batch 8.5.5 View Batches 8.5.6 Exporting Measurements Settings Screen 8.6.1 Calibration Measurement Principle Measurement Algorithms 10.1 O-Rough Algorithm 10.2 Altitude 10.3 Curvature 10.4 Texture 10.5 TAMS_STD How to read *.res file format on PC Rhopoint Optimap3... -
Page 4: Storage And Handling
Nevertheless, if dust is noticed inside the instrument, it is highly recommended to gently use pressurised clean air to clean the inside of the unit. In case dust dot would not go off, the user can also use a clean cotton swab with a little bit of alcoholic solution. Rhopoint Optimap3... -
Page 5: About The Optimap
A wide range of surface finishes can be measured from low gloss (2.0GU@60°) to mirror finish allowing the complete characterisation of manufacturing processes from machining, moulding, and forming, through to surface preparation and final coating. Further technical information about PSD can be found later in this manual. Rhopoint Optimap3... -
Page 6: Accessories
The instrument is supplied as a standard package complete with all accessories needed to calibrate and recharge the unit including: - • Optimap3™ PSD Instrument • Calibration tile • Check tile • Mains charger • SD card with software and manual. • Protective instrument carry case Rhopoint Optimap3... -
Page 7: Functional Overview
Functional Overview Label No. Function Power button Touch screen display Harness attachments SD card slot Ethernet Battery charger connector USB connector Carry handle Measurement port Rhopoint Optimap3... -
Page 8: Power
The operation of the device is detailed in the next section. To power the instrument off, press the Power button (1) until five audible beeps are heard. The instrument will then safely enter its power down cycle. Rhopoint Optimap3... -
Page 9: Operation
To the right of the measurement main screen there are six buttons to access the main features of the instrument. In order these are: profile screen • analysis screen • live view button • delete last measurement • project menu • settings menu • Rhopoint Optimap3... - Page 10 Measurements can then be made according to requirement with each being stored as a separate measurement number over the surface. In the right of the map window of the main screen, a scale is displayed corresponding to the image displayed in the map window. Rhopoint Optimap3...
-
Page 11: Profile Screen
The magnification level can be adjusted by moving the magnification slider, the level of which is displayed above the slider. A PDF report can be generated and saved to the SD card of the profile screen displayed by pressing the button in the top lefthand corner of the display. Rhopoint Optimap3... -
Page 12: Analysis Screen
Pressing the button allows the min. and max. altitude values that are shown to be changed. Rhopoint Optimap3... - Page 13 All buttons that appear greyed out are not functional during this process. Any of the surface maps can be cropped to display a user defined area. To do this press the crop button, a new screen will be displayed as shown below Rhopoint Optimap3...
- Page 14 To save the new ROI press the button, to delete the new ROI press the button. Once the new ROI is saved the screen will display a reprocessing message and then display the map of the new ROI/. Rhopoint Optimap3...
-
Page 15: Measurement Screen
first measurement after the instrument is turned on or when the surface to be measured is changed the image could be too dark or light. This will be corrected after the first measurement, which can be deleted if not suitable. The measurement process is described below. Rhopoint Optimap3... - Page 16 , which can be used to delete the last measurement taken if not wanted. All buttons are now active to take another measurement, analyse the current measurement, change settings or any of the other features described in this manual. Rhopoint Optimap3...
-
Page 17: Project Screen
Open existing projects Export existing projects To start a new project, press the “New Project” button. New Project Screen Enter the project name using the onscreen keyboard and press save. The instrument will now enter the open project menu. Rhopoint Optimap3... -
Page 18: Project Menu
Delete Project - Deletes all measurements within the open project and removes the project itself. Delete measurement - This performs the same process as the delete last measurement button. The project menu can be closed by pressing the button, to prepare and start a measurement. Rhopoint Optimap3... -
Page 19: Close Batch
View Batches The view batches screen is the place to view previous results and load saved maps, as well as to close the current batch. Open batch Close batches Rhopoint Optimap3... - Page 20 Counts in batch Scroll buttons A batch can be further inspected by pressing on the entry. Batch name Count ID Counts in batch Algorithm used for count Individual counts can be viewed by pressing on the entry. Rhopoint Optimap3...
-
Page 21: Exporting Measurements
These two methods work in a similar way with the option from the no opened project menu having the extra step of choosing which projects to export. The quick and full export types refer to the amount of information that is transferred and therefore the speed of the export. Rhopoint Optimap3... - Page 22 Where YYYY-MM-DD and hh-mm-ss refers to the date and time of the transfer action and OPTxxxxxxx refers to the instrument serial number. The results csv files are named as a combination of surface, dull or reflective and the measurement algorithm. Rhopoint Optimap3...
- Page 23 B1_RaX - This is the RaX result for the first band. • B1_RaY - This is the RaY result for the first band. • B1_RsM - This is the RsM result for the first band. • B2_Sa - This is the Sa result for the second band. • Rhopoint Optimap3...
- Page 24 Kd - This is the standard deviation value from band D. • Ke - This is the standard deviation value from band E. • Klw - This is the standard deviation value from band LW. • Ksw - This is the standard deviation value from band SW. • Rhopoint Optimap3...
- Page 25 The export folder also contains folders with information about the calibration measurement, and surface and screen focus positions as well as a password protected zip folder “log.zip” for manufactures use to troubleshoot. Rhopoint Optimap3...
- Page 26 User may need to open the *.csv results file for each algorithm that has been used. All *.csv outputted files have got the same starting structure. The last structure part differs regarding the parameters that have been calculated. Rhopoint Optimap3...
-
Page 27: Settings Screen
The reflective and dull surface models have different possible algorithms. When the surface type is changed the algorithm resets to the default which should be changed to the required algorithm before taking a measurement. Rhopoint Optimap3... - Page 28 This value is given in millimeters with a resolution of 0.1mm. The limits can be adjusted by 1 by pressing the double arrow and by 0.1 by pressing the single arrow. Band 1 filter type button Band 2 filter type button Rhopoint Optimap3...
- Page 29 This is the first way to change the time however if the time drifts over time the exact time can be set by pressing button. Additionally in this menu the default map can be changed. This is the map that is displayed for all new measurements. Rhopoint Optimap3...
-
Page 30: Calibration
If the first step is successful, then the Optimap3 will ask to place the instrument onto the silver ref. plate(mirror), on the reverse of the surface reference. Make sure that the instrument is sitting properly on the surface and press start. The system is performing screen auto-focus setting and measurement calibration. Rhopoint Optimap3... -
Page 31: Measurement Principle
As curvature is the first derivative of slope and second derivative of amplitude it combines both parameters to produce a more adapted quantity capable of being expressed in traceable SI units as m-¹. Integration of this information allows the original 3D surface topology to be reconstructed. Rhopoint Optimap3... -
Page 32: Measurement Algorithms
For each filtered surface, a Sa parameter is calculated following ISO-25178 norm Arithmetical Mean Height (Sa) is calculated using the filtered altitude map of the measured area. It is • reported in µm. It is defined as follows: Rhopoint Optimap3... -
Page 33: Curvature
Ta…Te, TS - TL used to represent the SD (sigma) of correlated surface textures Wa – We, WS – WL. This correlation provides a best fit translation from the dimensionless, single or multiple scan waviness scale to a dimensioned, full field, texture scale Rhopoint Optimap3... -
Page 34: Tams_Std
TAMS_STD The Rhopoint Total Appearance Measurement System (TAMS) is an extremely portable surface measurement device designed to give inspectors at the production line an audit tool which predicts how a customer will judge an automotive body finish in a showroom – will it yield a good or bad impression? Two new metrics are used to define the overall visual surface appearance, Quality and Harmony, replacing traditional multi-... - Page 35 Dimension represents the main structure size perceived at 1.5m. The value is given in millimetres • ranging from 0.5 to 8mm. Remark: Optimap3 has capability for others analysis methods. Rhopoint can supply custom computation algorithm for special application. Please contact your distributor for more information. Rhopoint Optimap3...
-
Page 36: How To Read *.Res File Format On Pc
To transfer maps onto the SD card, select full export from the project menu as described earlier in this manual (exporting measurements) . All maps will then be available - altitude (alt.res), slopeX (slox.res), slopeY (sloy.res), curvatureX (curx.res), curvatureY (cury.res) the maps can be opened using Rhopoint Optimap Reader software for further analysis. - Page 37 20GB SSD • 200 readings • Data Transfer SD card • Power Rechargeable Lithium Ion Battery 13400mAH • 3 hours usage / charge • Weight 4.3 Kg • Dimensions H – 230mm, W – 310mm, D – 220mm • Rhopoint Optimap3...
- Page 38 Rhopoint Instruments Ltd have arranged a means for our customers to have products that have reached the end of their useful life safely recycled. We encourage all end users to us at the end of the product’s life to return their purchase to as for recycling as per Article 9 of the WEEE Directive.
- Page 39 Rhopoint Instruments Ltd Rhopoint Americas Inc. Rhopoint Instruments GmbH 1000 John R Road, Rhopoint House, Enviro 21 Park, Seebauer Office Center, Queensway Avenue South, Suite 209, Troy, Am Weiglfeld 24, St Leonards on Sea, TN38 9AG, UK MI 48083, USA...
Need help?
Do you have a question about the Optimap3 PSD and is the answer not in the manual?
Questions and answers