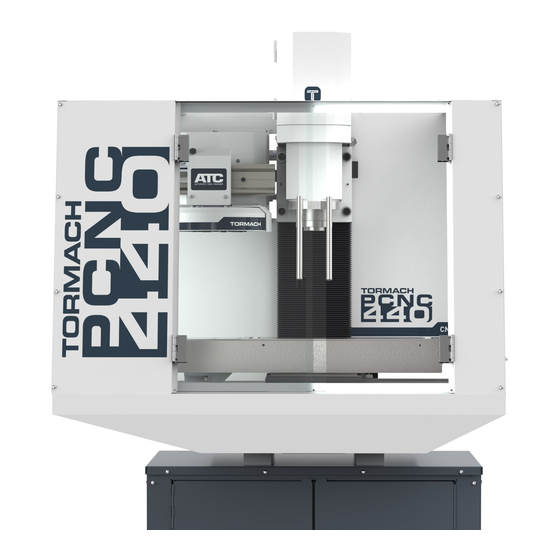
Tormach PCNC 440 Owner's Manual
Door switch kit
Hide thumbs
Also See for PCNC 440:
- Operator's manual (183 pages) ,
- Technical document (29 pages) ,
- Installation manual (21 pages)

Related Manuals for Tormach PCNC 440


Summary of Contents for Tormach PCNC 440
- Page 1 TECHNICAL DOCUMENT Version 1223A OWNER'S GUIDE PCNC 440 DOOR SWITCH KIT Page 1 Specifications subject to change without notice. ©Tormach® 2023...
-
Page 2: Product Information
Screw, Flat Head Cap, M5 × 0.8 - 12 Safety Screw (PN 37592) Torx L-Key (PN 37593) Note: If any items are missing, we can help. Create a support ticket with Tormach Technical Support at tormach.com/how-to-submit-a-support-ticket for guidance on how to proceed. - Page 3 Install the Door Switches The installation of the door switch kit varies depending on the PCNC 440 enclosure version. The quickest way to determine which enclosure you're using is by looking at the hinges on the front of the doors: PCNC 440 Enclosure Kit (PN 51469) The newer version of the enclosure kit has three hinges per door.
- Page 4 INSTALLING THE PCNC 440 DOOR SWITCH KIT PCNC 440 Enclosure Kit (PN 35605) The older version of the enclosure kit has two hinges per door. Go to "2-Hinge Doors (Older Enclosure)" (page 6). 3-Hinge Doors (Newer Enclosure) 1. Power off the machine and the PathPilot controller.
- Page 5 Page 5 ©Tormach® 2023 tormach.com Specifications subject to change without notice. TD10482: Owner's Guide: PCNC 440 Door Switch Kit (1223A)
- Page 6 15. Use the cable tie holders to secure all door switch wires in place. 2-Hinge Doors (Older Enclosure) 1. Power off the machine and the PathPilot controller. Page 6 ©Tormach® 2023 tormach.com Specifications subject to change without notice. TD10482: Owner's Guide: PCNC 440 Door Switch Kit (1223A)
- Page 7 Then, discard the screws, and set aside the nuts. 8. Align the holes on the door switch with the holes in the door hinge inside of the enclosure. Page 7 ©Tormach® 2023 tormach.com Specifications subject to change without notice. TD10482: Owner's Guide: PCNC 440 Door Switch Kit (1223A)
- Page 8 NOTICE! To prevent window damage from over-tightening, use your fingers to tighten the screws. 13. Close each door on the enclosure, and make sure that the magnet contacts the door switch. Page 8 ©Tormach® 2023 tormach.com Specifications subject to change without notice. TD10482: Owner's Guide: PCNC 440 Door Switch Kit (1223A)
- Page 9 If your enclosure has holes for safety screws pre-drilled above the side windows, go to Step 4. If your enclosure doesn't have holes for safety screws pre-drilled, go to Step 2. Page 9 ©Tormach® 2023 tormach.com Specifications subject to change without notice. TD10482: Owner's Guide: PCNC 440 Door Switch Kit (1223A)
- Page 10 Note: Keep the Torx L-key. You'll need it to remove the safety screws from the enclosure. 6. Repeat Step 1 through Step 5 to install two safety screws on the right side of the enclosure. Page 10 ©Tormach® 2023 tormach.com Specifications subject to change without notice. TD10482: Owner's Guide: PCNC 440 Door Switch Kit (1223A)
-
Page 11: Make Electrical Connections
Figure 12: Example of a new access panel assembly installed on the bottom of the electrical cabinet. Note: If you misplace these screws, there are four extra provided in this kit. Page 11 ©Tormach® 2023 tormach.com Specifications subject to change without notice. TD10482: Owner's Guide: PCNC 440 Door Switch Kit (1223A) - Page 12 12. Replace the lower wire trough that you set aside in Step 7. 13. Replace the electrical cabinet panel on the back of the machine that you set aside in Step 1. Page 12 ©Tormach® 2023 tormach.com Specifications subject to change without notice. TD10482: Owner's Guide: PCNC 440 Door Switch Kit (1223A)
-
Page 13: Verify The Installation
5. From the PathPilot interface, on the Status tab, make sure that the Door Switch LED is on, which indicates that both enclosure doors are open. Page 13 ©Tormach® 2023 tormach.com Specifications subject to change without notice. TD10482: Owner's Guide: PCNC 440 Door Switch Kit (1223A) -
Page 14: Troubleshooting
Figure 1: Reed switch magnet. 2. Tighten the screws on the reed switch magnet. 3. Repeat the steps in "Verify the Installation" (page 13). Page 14 ©Tormach® 2023 tormach.com Specifications subject to change without notice. TD10482: Owner's Guide: PCNC 440 Door Switch Kit (1223A)
Need help?
Do you have a question about the PCNC 440 and is the answer not in the manual?
Questions and answers