
Related Manuals for GreenWorks ST40L03


Summary of Contents for GreenWorks ST40L03
- Page 1 User Manual of Product 1: Greenworks 40V 16-Inch Brushless (Attachment Capable) Cordless String Trimmer (Gen 2), 4.0Ah Battery and Charger Included...
- Page 2 ST40L03 ST40L414 STRING TRIMMER OPERATOR MANUAL COUPE-HERBE MANUEL D’OPÉRATEUR CORTABORDES MANUAL DEL OPERADOR STF457 www.greenworkstools.com...
-
Page 4: Table Of Contents
English Start the machine........8 Description........4 Stop the machine........9 Purpose............4 Line cut-off blade........9 Overview............ 4 Adjust the length of the cutting line.... 9 Important safety instructions..4 Adjust the cutting diameter......9 Symbols on the machine.... 5 Operation tips..........9 Risk levels........5 Cutting tips.......... -
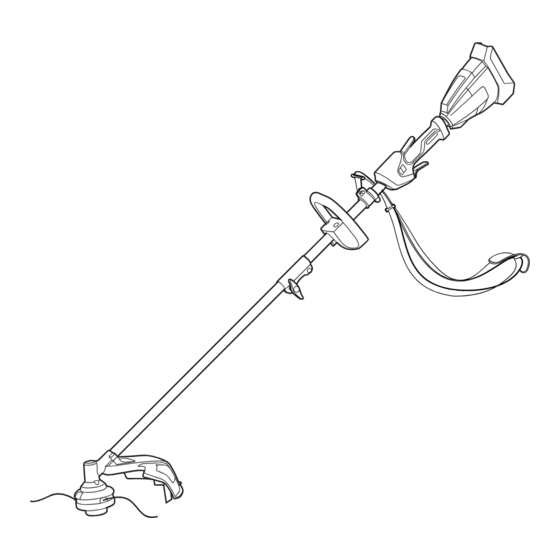
Page 5: Description
English DESCRIPTION WARNING Read and understand all instructions before using PURPOSE this product. Failure to follow all instructions listed below may result in electric shock, fire, and/or serious This machine is used to cut grass, light weeds, and personal injury. other similar vegetation at or around ground level. -
Page 6: Symbols On The Machine
Use of any other battery packs may than recommended by the manufacturer and line create a risk of injury and fire. Use only Greenworks materials of other types – for example, metal wire, BAF724 battery or other BAF series. -
Page 7: Service
English WARNING SYM- SIGNAL MEANING If the battery pack cracks or breaks, with or without leaks, do not recharge it and do not use. Discard it DANGER Indicates an imminently and replace with a new battery pack. DO NOT TRY hazardous situation, which, TO REPAIR IT! To prevent injury and risk of fire, if not avoided, will result in... -
Page 8: Attach The Guard
English 3. Align the release button with the positioning hole (3) WARNING and slide the two shafts. • If parts of the machine are damaged, do not use the machine. • If parts are missing, do not operate the machine. •... -
Page 9: Attach The Shoulder Strap
English 1. Align the lift ribs on the battery pack with the grooves in the battery compartment. 2. Push the battery pack into the battery compartment until the battery pack locks into place. 3. When you hear a click, the battery pack is installed. REMOVE THE BATTERY PACK 1. -
Page 10: Stop The Machine
English 2. Push the speed switch (3) to the desired operating 2. Remove the blade screws from the cut-off blade (1). speed. Push the speed switch to position 1 for low 3. Turn the cut-off blade 180°. speed or position 2 for high speed. 4. -
Page 11: Cutting Tips
English MAINTENANCE IMPORTANT Read and understand the safety regulations and the maintenance instructions before you clean, repair or do the maintenance work on the machine. IMPORTANT Make sure that all nuts, bolts and screws are tight. Check regularly that the handles are firmly mounted. IMPORTANT Use only the replacement parts and accessories of the initial manufacturer. -
Page 12: Install The Cutting Line
English 10. Push the tabs and install the spool cover onto the spool housing. 11. Push the spool cover until it clicks into position. 10.4 INSTALL THE CUTTING LINE 2. Pull and remove the spool cover (2). NOTE Do not put more than 15 feet of cutting line in at a time. -
Page 13: Transportation And Storage
English 11.1 STORE THE MACHINE • Remove the battery pack from the machine. • Make sure that children cannot come near the machine. • Keep the machine away from corrosive agents such Hole as garden chemicals and de-icing salts. • Secure the machine during transportion to prevent damage or injury. -
Page 14: Technical Data
English Problem Possible Cause Solution Problem Possible Cause Solution The ma- The guard is not Remove the battery The line The machine is 1. Cut with the tip of chine attached to the pack and attach the keeps used incorrectly. the line, avoid stones, stops machine. -
Page 15: Limited Warranty
(3) years against defects in materials, parts or workmanship. Greenworks, at its own discretion, will repair or replace any and all parts found to be defective, through normal use, free of charge to the customer. -
Page 16: Exploded View
English EXPLODED VIEW No. Part No. Qty Description No. Part No. Qty Description R0200106-00 Auxiliary handle assembly 3 R0203770-00 Guard assembly R0201784-00 Knob R0101144-00 String head assembly... - Page 17 Français Retirer le bloc-batterie......22 Description.........17 Utilisation........22 But............17 Aperçu............17 Démarrez la machine....... 22 Instructions importantes sur Arrêter la machine........22 Lame de coupe de la ligne....... 23 la sécurité........17 Réglez la longueur de la ligne de coupe.. 23 Symboles figurant sur la Réglez le diamètre de coupe....23 machine........18...
-
Page 18: 1 Description
Français DESCRIPTION INSTRUCTIONS IMPORTANTES SUR LA SÉCURITÉ Cette machine est utilisée pour couper l'herbe, LISEZ TOUTES LES INSTRUCTIONS AVANT les mauvaises herbes légères et d'autres végétaux L'UTILISATION (CET OUTIL ÉLECTRIQUE) similaires au niveau du sol ou à proximité. La surface AVERTISSEMENT de coupe doit être approximativement parallèle à... -
Page 19: Symboles Figurant Sur La Machine
Débranchez le bloc-batterie de l'outil électrique blessure et d'incendie. N'utilisez que la batterie avant d'effectuer des réglages, de changer des Greenworks BAF724 ou d'autres séries BAF. accessoires ou de ranger la machine. De telles • Rechargez uniquement avec le chargeur spécifié... -
Page 20: Niveaux De Risques
Français signification. Une bonne interprétation de ces symboles SYM- SIGNAL SIGNIFICATION vous permettra de mieux utiliser l'outil et de manière BOLE plus sécuritaire. MISE EN (Sans symbole d’alerte de GARDE sécurité) indique une situa- Symbole Explication tion pouvant entraîner des Précautions destinées à... -
Page 21: Proposition 65
Français INSTALLATION AVERTISSEMENT Si la batterie se fend ou se brise, avec ou sans DÉBALLER LA MACHINE fuites, ne la rechargez pas et ne l'utilisez pas. Jetez-la et remplacez-la par une nouvelle batterie. AVERTISSEMENT N'ESSAYEZ PAS DE LA RÉPARER ! Pour prévenir les blessures et les risques d'incendie, d'explosion ou Assurez-vous d'assembler correctement la machine de décharge électrique, et pour éviter tout dommage à... -
Page 22: Assemblez L'arbre
Français ASSEMBLEZ L'ARBRE ATTACHEZ LA POIGNÉE AUXILIAIRE 1. Desserrez le bouton (1) sur le coupleur. 1. Dévissez les vis de la poignée à l'aide d'un tournevis 2. Enfoncez le bouton de déclenchement (2) sur l’arbre cruciforme (non fourni). inférieur. 2. Attachez la poignée auxiliaire et abaissez la bride 3. -
Page 23: Installez Le Bloc-Batterie
Français 2. Enfilez la bandoulière. UTILISATION 3. Ajustez la longueur de la bandoulière de façon à ce que le mousqueton ait à peu près la largeur d'une IMPORTANT main sous votre hanche droite. Avant d'utiliser la machine, lisez et comprenez les INSTALLEZ LE BLOC-BATTERIE consignes de sécurité... -
Page 24: Lame De Coupe De La Ligne
Français LAME DE COUPE DE LA LIGNE Ce coupe-herbe est équipé d’une lame de coupe sur la garde protectrice. La lame de coupe de la ligne coupe en continu la ligne pour assurer un diamètre de coupe constant et efficace. Avancez la ligne chaque fois que vous entendez le moteur tourner plus vite que d'habitude, ou lorsque l'efficacité... -
Page 25: Conseils De Coupe
Français ENTRETIEN IMPORTANT Lisez et comprenez les consignes de sécurité et les instructions d'entretien avant de nettoyer, de réparer ou d'effectuer des travaux d'entretien sur la machine. IMPORTANT Assurez-vous que tous les écrous, les boulons et les vis sont bien serrés. Vérifiez régulièrement que les poignées sont bien fixées. -
Page 26: Installez La Ligne De Coupe
Français 8. Rallongez la ligne de coupe pour la dégager de la fente de guidage de la bobine. 9. Placez le bouton de réglage sur la bobine. 10. Installez la bobine et le couvercle de la bobine sur la tête de coupe. 11. -
Page 27: Transport Et Entreposage
Français 11.1 ENTREPOSEZ LA MACHINE • Retirez le bloc-batterie de la machine. • Assurez-vous que les enfants ne peuvent pas s'approcher de la machine. • Gardez la machine loin des agents corrosifs, tels Hole que les produits chimiques de jardin et les sels de déglaçage. -
Page 28: Données Techniques
Français Problème Cause possible Solution Problème Cause possible Solution La ma- La garde protec- Retirez la batterie et in- La ligne Les lignes sont Lubrifiez avec du sili- chine s’ar- trice n’est pas at- stallez la garde protec- n'avance soudées entre cone en vaporisateur. -
Page 29: Garantie Limitée
LIMITED WARRANTY GARANTIE LIMITÉE GARANTÍA LIMITADA Greenworks garantit par la présente ce produit, à l'acheteur original avec preuve d'achat, pour une période de trois (3) ans contre tout défaut de matériaux, de pièces ou de main-d'œuvre. Greenworks, à sa propre discrétion, réparera ou remplacera toutes les pièces défectueuses, dans des conditions normales... -
Page 30: Vue Éclatées
Français VUE ÉCLATÉES No. No de pièce Qté Description No. No de pièce Qté Description R0200106-00 Ensemble de la poignée R0203770-00 Ensemble de la garde pro- auxiliaire tectrice R0201784-00 Bouton du coupleur R0101144-00 Ensemble de la tête de coupe... - Page 31 Español Retirada de la batería.......35 Descripción........31 Funcionamiento......36 Finalidad...........31 Perspectiva general........31 Puesta en marcha de la máquina.....36 Instrucciones importantes de Detención de la máquina......36 Cuchilla de corte de hilo......36 seguridad........31 Ajuste de la longitud del hilo de corte..36 Símbolos en la máquina... 32 Ajuste del diámetro de corte.....36 Niveles de riesgo.......33 Consejos de funcionamiento....
-
Page 32: Descripción
Español DESCRIPCIÓN INSTRUCCIONES IMPORTANTES DE FINALIDAD SEGURIDAD Esta máquina se utiliza para cortar hierba, maleza LEA TODAS LAS INSTRUCCIONES ANTES DEL ligera y otra vegetación similar a nivel del suelo. El USO (DE ESTA HERRAMIENTA ELÉCTRICA) plano de corte debe estar aproximadamente paralelo AVISO a la superficie del suelo. -
Page 33: Símbolos En La Máquina
Utilice únicamente la batería riesgo de que el aparato se ponga en marcha Greenworks BAF724 u otra serie BAF. accidentalmente. • Recargue solo con el cargador especificado por el •... -
Page 34: Niveles De Riesgo
Español de servicio, le recomendamos que devuelva la máquina Símbolo Explicación al CENTRO DE SERVICIO AUTORIZADO más cercano Debe leer y entender todas las in- para su reparación. Utilice únicamente accesorios y strucciones antes de manejar la má- piezas de repuesto idénticos del fabricante. quina, así... -
Page 35: Propuesta 65
Español PROPUESTA 65 FIJACIÓN DE LA PROTECCIÓN AVISO AVISO No toque la cuchilla de corte. Este producto contiene una sustancia química conocida en el estado de California como causante 1. Retire los tornillos del cabezal de corte con un de cáncer, defectos de nacimiento u otros daños destornillador Phillips (no incluido). -
Page 36: Fijación Del Asa Auxiliar
Español 4. Gire el eje inferior hasta que el botón se bloquee en el orificio de posicionamiento. 5. Apriete el mando. 2. Póngase la correa de hombro. 3. Ajuste la longitud de la correa para que el mosquetón quede aproximadamente a la anchura de una mano debajo de su cadera derecha. -
Page 37: Funcionamiento
Español CUCHILLA DE CORTE DE HILO Este cortabordes está equipado con una cuchilla de corte de hilo en la protección. La cuchilla de corte de hilo recorta continuamente el hilo para garantizar un diámetro de corte uniforme y eficaz. Avance el hilo cada vez que escuche que el motor funciona más rápido de lo normal, o cuando la eficiencia del corte disminuya. -
Page 38: Consejos De Funcionamiento
Español CONSEJOS DE FUNCIONAMIENTO AVISO Mantenga un espacio entre el cuerpo y la máquina. AVISO No utilice la máquina sin la protección en su posición. CONSEJOS DE CORTE Le sugerimos lo siguiente cuando utilice la máquina • Incline la máquina hacia la zona que va a cortar. Utilice la punta del hilo de corte para cortar hierba. -
Page 39: Mantenimiento
Español MANTENIMIENTO IMPORTANTE Debe leer y entender los reglamentos de seguridad y las instrucciones de mantenimiento antes de limpiar, reparar o realizar tareas de mantenimiento en la máquina. IMPORTANTE Asegúrese de que todas las tuercas, los pernos y los tornillos estén apretados. Compruebe periódicamente que las asas estén firmemente montadas. -
Page 40: Instalación Del Hilo De Corte
Español 8. Extienda el hilo de corte para soltarlo de la ranura de guía en el carrete. 9. Coloque el mando de avance en el carrete. 10. Presione las pestañas e instale la cubierta del carrete en la carcasa del carrete. Hole 11. -
Page 41: Almacenamiento De La Máquina
Español 11.1 ALMACENAMIENTO DE LA Problema Posible causa Solución MÁQUINA La máqui- La protección no Retire la batería y fije na se de- está fijada a la la protección a la má- • Retire la batería de la máquina. tiene máquina. -
Page 42: Datos Técnicos
Avance el notable- zado a tiempo. hilo. Por la presente Greenworks garantiza este producto, mente. al comprador original con el comprobante de compra, durante un periodo de tres (3) años frente a defectos en materiales, piezas o mano de obra. A su entera discreción Greenworks reparará... -
Page 43: Vista Despiezada
Greenworks. Dirección en EE.UU.: Dirección en Canadá: Greenworks Tools Greenworks Tools Canada, Inc. P.O. Box 1238 P.O. Box 93095, Newmarket, Ontario Mooresville, NC 28115... - Page 44 Español Nº. Nº pieza Descripción Nº. Nº pieza Descripción R0200106-00 Conjunto de asa auxiliar R0203770-00 Conjunto de protección R0201784-00 Mando R0101144-00 Conjunto de cabezal de corte...
- Page 45 www.greenworkstools.com P0804436-00 Rev B...
Need help?
Do you have a question about the ST40L03 and is the answer not in the manual?
Questions and answers
How can I attach a 10" wire brush cuttin wheel to this machine?