
Related Manuals for GivEnergy GIV-AIO-13.5


Summary of Contents for GivEnergy GIV-AIO-13.5
- Page 1 INSTALLATION GUIDE ALL IN ONE + GIV-GATEWAY GIV-AIO-13.5 | GIV-AIO-13.5-3.6 | GIV-AIO-13.5-4.6 | GIV-AIO-13.5-5.0 | GIV-AIO-GW1 V1.0 FEB 24...
-
Page 2: Table Of Contents
CONTENTS CONTENTS INTRODUCTION GIV-GATEWAY INSTALLATION CONT... General Introduction Connections Overview System Diagram Giv-Gateway AC Utility Grid Connection Giv-Gateway Wiring Connections ALL IN ONE INSTALLATION All in One Neutral Continuity Giv-Gateway Communication Connections All in One Specifications Connecting All in One to Giv-Gateway All in One Box Contents All in One Components All in One Unboxing... -
Page 3: Introduction
The model and specification of the All in One and Giv-Gateway’s nameplate match the order specifications Ensure the packaging and product are free from any damage If any damaged or missing parts are found, please contact GivEnergy on 1300 GIVENERGY (1300 448 363) or Load EV charger PV inverter email info.aus@givenergy.com immediately and your distributor. -
Page 4: All In One Installation
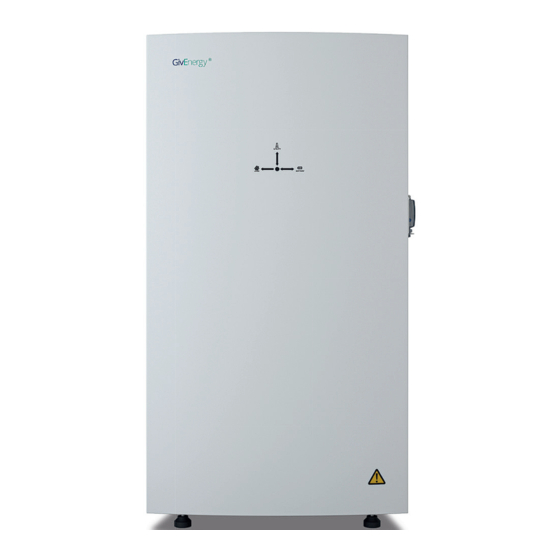
SPECIFICATIONS ROBUST AND FLEXIBLE A great addition to any smart home Primarily working as an on grid system, the All in One can deliver 7.2kW of peak power* into the home on top of any solar generation. Complete with a substantial 13.5kWh usable battery pack that stores excess generation. -
Page 5: All In One Box Contents
ALL IN ONE BOX CONTENTS ALL IN ONE COMPONENTS Item Item Name Item Item Name All in One Unit Power Flow Indicator Bracket AC Supply Terminals Expansion Bolt WiFi Antenna DC Circuit breaker WiFi Antenna On / Off Switch Spirit Level Cable entry point ALL IN ONE INSTALLATION ALL IN ONE INSTALLATION... -
Page 6: All In One Unboxing
ALL IN ONE UNBOXING INSTALLATION INSTRUCTIONS The system must be installed in an easily accessible location, the status display must be visible and not obstructed Please ensure that the wall to be mounted on is sufficient enough to hold the weight of the All in One and Giv-Gateway (if fitted) The system must be installed in a well ventilated area, the ambient temperature should be below 40ºC to ensure optimal operation... -
Page 7: Safety Instructions
Check that no cables, isolation points, or the casing itself are physically damaged. Any errors are shown with a red LED, for full descriptions please refer to the GivEnergy To ensure your All in One operates optimally at all times, annual maintenance checks need to be carried monitoring portal out. -
Page 8: All In One Step-By-Step Installation
ALL IN ONE STEP-BY-STEP INSTALLATION ALL IN ONE STEP-BY-STEP INSTALLATION Step 3: Mount the All in One onto the mounting bracket. Adjust the height of the supporting feet to ensure Step 1: Place the wall mounting template horizontally onto the wall and mark the position of the bracket the unit is level and attach the securing screws to the brackets, ensuring the weight is on the feet, not the holes. -
Page 9: All In One Connections Overview
ALL IN ONE CONNECTIONS OVERVIEW ALL IN ONE AC UTILITY GRID CONNECTION If installing using the Giv-Gateway, the RCD is already included. If being installed without the Giv-Gateway, Item Item Name the installer will need to source their own RCD / protection device and ensure that the current rating is Communication / network ports suitable for the installation. -
Page 10: All In One Comms Connection With Giv-Gateway
ALL IN ONE COMMS CONNECTION WITH GIV-GATEWAY ALL IN ONE COMMS CONNECTION WITHOUT GIV-GATEWAY Generation Generation Grid Meter port Giv-Gateway in Single All in One installation To install a single All in One, ID2 (optional) ID3 (optional) connect the communication wire to the socket D in the wiring compartment of the Meter... -
Page 11: Gem120Ct Overview And Instructions
GEM120CT OVERVIEW AND INSTRUCTIONS Technical Specifications Model Number GEM-CT-45/100 Dimensions (HxWxD) 119 x 17.5 x 62mm Working Temperature -25°C ~ 55°C Protection Class IP51 Display Metering Every system will need at least 1 GEM120 (ID1) meter installing to monitor the import and export of the building. -
Page 12: Giv-Gateway Box Contents
GIV-GATEWAY SPECIFICATIONS GIV-GATEWAY BOX CONTENTS Item Item Name WHOLE HOME BACKUP Giv-Gateway A great companion to the AIO Bracket Mounting screw Wall plug By purchasing the additional Giv-Gateway, the Antenna All in One can provide whole house backup in the event of a grid failure. -
Page 13: Isolating The Main Supply To The Property
ISOLATING THE MAIN SUPPLY TO THE PROPERTY GIV-GATEWAY COMPONENTS Before installing the Giv-Gateway, make sure that the whole house is isolated from the main supply. Item Item Name MCB, RCD Once isolated, please test to ensure that no voltage is present to the property before disconnecting the Grid / PV Meter and LoRa (spare) main supply cable from the main distribution/switch board. -
Page 14: Clearance And Maintenance
CLEARANCE AND MAINTENANCE GIV-GATEWAY STEP-BY-STEP INSTALLATION Step 1: Place the wall mounting bracket horizontally onto the wall and mark the position of the bracket Space Clearance holes. Drill 2 holes at the marked positions, at least 75mm deep. There must be adequate clearance around the Giv-Gateway. The diagram below illustrates the space required around the system. -
Page 15: Connections Overview
CONNECTIONS OVERVIEW GIV-GATEWAY AC UTILITY GRID CONNECTION Item Item Name Breaker A - Single All in One connection The power wires for All in One connection should be at least 6mm². Strip the wire insulation for LoRa connection Module (spare) 8mm wiring connection. -
Page 16: Giv-Gateway Wiring Connections
GIV-GATEWAY WIRING CONNECTIONS ALL IN ONE NEUTRAL CONTINUITY For Giv-Gateways installed in Australia, a busbar is supplied to link the neutrals between the grid supply side and the off-grid side. Please ensure that these are installed prior to energising the system. Live/active (brown) Neutral... -
Page 17: Giv-Gateway Communication Connections
GIV-GATEWAY COMMUNICATION CONNECTIONS CONNECTING ALL IN ONE TO GIV-GATEWAY Remove bottom connections cover prior to wiring, and then replace once complete. AC supply wiring WiFi USB (Dongle) Mode Gateway communication/network ports RS485 Dip switch PV RS485 Meter RS485 Comms to All in One Communication wiring LOAD CT AC CT... -
Page 18: Configuration
For a more in-depth guide about our Monitoring Portal, please view our portal and app guide that is provided on our Resource Hub at www.givenergy.co.uk. Please note: the GivEnergy app is supported by an active development team constantly working on updates and improvements. As such, app information is subject to change. - Page 19 Step 4: To add/remove views, simply click the dropdown arrow and select from the dropdown list. If data is not being displayed correctly on the GivEnergy Monitoring Portal or App, please contact the GivEnergy Service Desk on 1300 GIVENERGY (1300 448 363) or email info.aus@givenergy.com.
- Page 20 Step 4: Click ‘Inverter’ at the top of the Remote Control page. To enable DRM control: Step 1: Log into the GivEnergy Monitoring Portal at www.givenergy.cloud. Step 2: On your portal dashboard, hover over the ‘My Inverter’ card and select the expand icon.
-
Page 21: Enabling Drm Control
The default setpoints of Australia region A are applied in the inverter. Setting the Region setpoints Step 1: Log into the GivEnergy Monitoring Portal at www.givenergy.cloud. Step 2: From the Monitoring Portal dashboard, hover over the left side of the window to expand the navigation bar. - Page 22 If the local grid operator requires other settings instead of the default Australia A, Australia B, Australia C or New Zealand settings, please contact GivEnergy on 1300 GIVENERGY (1300 448 363) or email info.aus@givenergy.com to change them remotely from GivEnergy’s cloud server.
-
Page 23: View Inverter Firmware And Settings
‘Update Firmware’ button. Click the arrow to cycle to your Giv-Gateway. Step 1: Log into the GivEnergy Monitoring Portal at www.givenergy.cloud. Step 2: On your portal dashboard, hover over the ‘My Inverter’ card and select the expand icon. - Page 24 To adjust generation and export control settings: Step 6: Your Giv-Gateway firmware version is displayed on this page. Step 1: Log into the GivEnergy Monitoring Portal at www.givenergy.cloud. Step 2: On your portal dashboard, hover over the ‘My Inverter’ card and select the expand icon.
- Page 25 GENERATION CONTROL & EXPORT CONTROL SETTINGS GENERATION CONTROL & EXPORT CONTROL SETTINGS Step 6: To adjust Generation Control, adjust the slider in the ‘Inverter Max Output Active Power Percent’ Step 4: Click ‘Inverter’ at the top of the Remote Control page. field between 0 and 100%.
-
Page 26: Generation Control & Export Control Settings
GENERATION CONTROL & EXPORT CONTROL SETTINGS WIFI GUIDE Step 8: Adjust the Export Limit by sliding the value in the ‘Grid Export Limit’ field. This is a combined WE / WF / WO / WG / WH / WJ / WK serial number hard and soft limit. - Page 27 WIFI GUIDE WIFI GUIDE Step 3: Select Mode Step 6: Inputting your WiFi password Select Mode Selection. Select STA mode. Click Apply. Step 4: Connecting to your WiFi Note: If the desired network does not appear, you can manually enter it here. Enter the customer’s WiFi password.
-
Page 28: Commissioning And Decommissioning A System
Either sign into the online portal at https://portal.givenergy.cloud, or the GivEnergy app with your Click Apply. GivEnergy Engineer login. If you are a first time user, and you do not have an account or Engineer login, please consult your supplier to get this set up. -
Page 29: Fundamentals
Normal Green (flashing) The system is in waiting Yellow Charging or discharging error All in One & (reboot the unit) Fault (contact GivEnergy) Giv-Gateway Green/Red (flashing) Firmware upgrade Home demand Fundamentals This is a calculation made by our smart energy management system and is lit up when a load is detected within the property. -
Page 30: Understanding Your Giv-Gateway
Normal battery pack. When the battery is Green (flashing) discharging, the arrows will point The system is in waiting towards the inverter. Yellow Charging or discharging error (reboot the unit) Fault (contact GivEnergy) Green/Red (flashing) Firmware upgrade FUNDAMENTALS FUNDAMENTALS... -
Page 31: All In One Installationg Without Giv-Gateway
One must be connected to a Giv-Gateway. In the event of a power cut the Giv-Gateway will seamlessly switch over to battery to power the whole home. Off Grid Operation Remotely disconnect your home from the grid at the push of a button using the GivEnergy App or Online Monitoring Portal. FUNDAMENTALS FUNDAMENTALS... -
Page 32: Manufacturer Warranties
All in One 4.6 13.5 10 years All in One 5.0 13.5 10 years Giv-Gateway 10 years Warranty documents can be found on our resource hub at www.givenergy.co.uk/resource-hub/ Legal Disclaimer: This document is the property of GivEnergy, reproduction is prohibited. FUNDAMENTALS... - Page 33 Work with the best in the energy management business GivEnergy HQ GivEnergy Australia Pty Osprey House, Brymbo Rd Level 1, 1 Queens Road Newcastle-under-Lyme Melbourne ST5 9HX 3004 Victoria www.givenergy.co.uk 1300 GIVENERGY (1300 448 363)
Need help?
Do you have a question about the GIV-AIO-13.5 and is the answer not in the manual?
Questions and answers