Advertisement
Advertisement
Table of Contents

Subscribe to Our Youtube Channel
Related Manuals for GivEnergy ALL IN ONE + GIV-GATEWAY


Summary of Contents for GivEnergy ALL IN ONE + GIV-GATEWAY
- Page 1 INSTALLATION GUIDE ALL IN ONE + GIV-GATEWAY 13.5kWh | UK V1.0...
-
Page 2: General Information
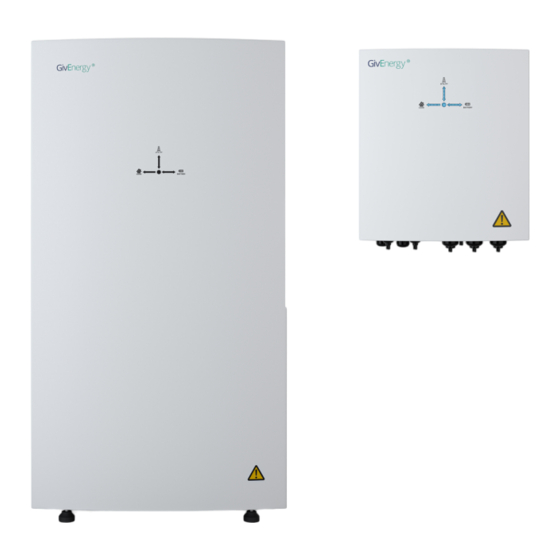
Legal Disclaimer: This document is the property of GivEnergy, reproduction is prohibited. Installation Requirements Giv-Gateway Installation of the GivEnergy All in One and Giv-Gateway must be carried out by a GivEnergy Approved Installer and in accordance with the IEE Wiring Regulations. Unit Information Grid The All in One contains a bidirectional inverter and a 13.5kWh lithium iron phosphate battery. -
Page 3: Specifications
ALL IN ONE SPECIFICATIONS ALL IN ONE BOX CONTENTS Item Item Name All in One Unit ROBUST AND FLEXIBLE A great addition to any smart home Bracket Expansion Bolt Screws Primarily working as an on grid system, the WiFi Antenna All in One can deliver 7.2kW of peak power into the M4 x 6 Screw home on top of any solar generation. - Page 4 ALL IN ONE COMPONENTS ALL IN ONE UNBOXING Item Item Name Power Flow Indicator AC Supply Terminals Wifi Antenna DC Circuit breaker On / Off Switch Cable entry point Remove top cover from the wooden crate Remove the All in One brackets and place to one side Remove bottom waterproof cover of the Remove front cover of the All in One...
-
Page 5: Installation Instructions
The system is capable of retaining a high voltage, even when disconnected. If you suspect something is wrong with the system, contact GivEnergy on 01377 252 874 or email Please ensure that the wall to be mounted on is sufficient enough to hold the weight support@givenergy.co.uk... - Page 6 ALL IN ONE STEP-BY-STEP INSTALLATION Place the wall mounting bracket horizontally onto the wall and mark the position of the bracket holes. Mount the All in One onto the mounting bracket. Adjust the height of the supporting feet to Drill 3 holes at the marked positions, at least 75mm deep. ensure the unit is level and attach the securing screws to the brackets.
- Page 7 CLEARANCE AND MAINTENANCE ALL IN ONE CONNECTIONS OVERVIEW Space Clearance Item Item Name Communication / network ports There must be adequate clearance around the All in One to allow for heat dissipation. The diagram AC Supply below illustrates the space required around the system. 300mm Meter LM 250mm...
- Page 8 ALL IN ONE AC UTILITY GRID CONNECTION ALL IN ONE COMMUNICATION WIRES CONNECTION Cable size requirements for the All in One are 6mm² minimum. Single All in One installation To install a single All in One, connect communication wire to the socket D in the wiring compartment of the All in One.
- Page 9 GIV-GATEWAY SPECIFICATIONS GIV-GATEWAY BOX CONTENTS Item Item Name Giv-Gateway WHOLE HOME BACKUP A great companion to the AIO Bracket Mounting screw Wall plug By purchasing the additional Giv-Gateway, the Antenna All in One can provide whole house backup in the event of a grid failure.
- Page 10 ISOLATING THE MAIN SUPPLY TO THE PROPERTY GIV-GATEWAY COMPONENTS Before installing the Giv-Gateway, make sure that the whole house is isolated from the main supply. Item Item Name Either pull the main fuse or switch off the main breaker to the property. MCB, RCD Grid / PV Meter and LoRa (spare) Once isolated, please test to ensure that no voltage is present to the property before disconnecting the...
- Page 11 GIV-GATEWAY STEP-BY-STEP INSTALLATION Place the wall mounting bracket horizontally onto the wall and mark the position of the bracket holes. Fix the Giv-Gateway to the mounting bracket and secure with the fixings provided. Ensure there Drill 2 holes at the marked positions, at least 75mm deep. is adequate clearance space.
-
Page 12: Connections Overview
CLEARANCE AND MAINTENANCE CONNECTIONS OVERVIEW Space Clearance Item Item Name LoRa connection Module (spare) There must be adequate clearance around the Giv-Gateway. The diagram below illustrates the space PV meter (ID2) required around the system. Grid meter (ID1) Load (house supply) AC supply (in) All in One supply 200mm... - Page 13 GIV-GATEWAY AC UTILITY GRID CONNECTION GIV-GATEWAY COMMUNICATION CONNECTIONS Breaker A - Single All in One connection The power wires for All in One connection should be at least 6mm². Strip the wire insulation for 8mm wiring connection. Breaker B - PV inverter connection WiFi USB (Dongle) Mode Breaker C - EV charger connection...
- Page 14 CONNECTING ALL IN ONE TO GIV-GATEWAY START-UP AND SHUT-DOWN OF THE ALL IN ONE Please note: Remove bottom connections cover prior to wiring, and then replace once complete. Start-Up Procedure Ensure connection covers are in place Connect the AC circuit breaker, ensure that the system is powered and commissioned using the portal/App.
-
Page 15: Work Modes
Back Up / Island Mode To download a fully illustrated guide, please visit our Knowledge Base at www.givenergy.co.uk The system has the ability to be used in the event of a power cut. To utilise this the All in One must be connected to a Giv-Gateway. - Page 16 Products Covered All in One 13.5 5 year standard warranty, extendable to 10 years Battery: 10 years unlimited cycle performance guarantee Giv-Gateway 5 years, extendable to 10 years Legal Disclaimer: This document is the property of GivEnergy, reproduction is prohibited.
- Page 17 www.givenergy.co.uk...
Need help?
Do you have a question about the ALL IN ONE + GIV-GATEWAY and is the answer not in the manual?
Questions and answers