
Related Manuals for GivEnergy GIV-AIO-13.5


Summary of Contents for GivEnergy GIV-AIO-13.5
- Page 1 INSTALLATION GUIDE ALL IN ONE + GIV-GATEWAY AUS | V1.0 30.10.23 GIV-AIO-13.5 | GIV-AIO-13.5-3.6 | GIV-AIO-13.5-4.6 | GIV-AIO-13.5-5.0 GIV-AIO-GW1...
-
Page 2: Table Of Contents
All in One unboxing ................ Installation instructions ..............Installation of the GivEnergy All in One and Giv-Gateway must be carried out by a GivEnergy Approved Safety instructions ................. Installer, in accordance with local wiring regulations, legislation around the installation of energy storage products, and a CEC approved battery installer. -
Page 3: System Diagram
SYSTEM DIAGRAM ALL IN ONE SPECIFICATIONS Giv-Gateway ROBUST AND FLEXIBLE A great addition to any smart home Grid Primarily working as an on grid system, the All in One can deliver 7.2kW of peak power (where All in One permitted) into the home on top of any solar generation. -
Page 4: All In One Box Contents
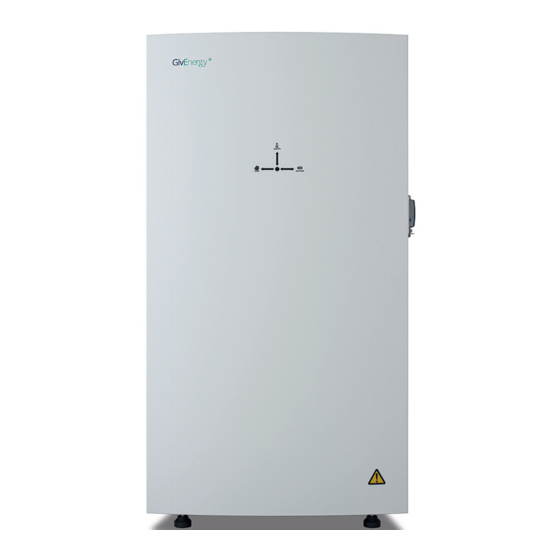
ALL IN ONE BOX CONTENTS ALL IN ONE COMPONENTS Item Item Name Item Item Name All in One Unit Power Flow Indicator Bracket AC Supply Terminals Expansion Bolt Wifi Antenna DC Circuit breaker WiFi Antenna On / Off Switch Spirit Level Cable entry point 06 | AIO AND GIV-GATEWAY AIO AND GIV-GATEWAY | 07... -
Page 5: All In One Unboxing
ALL IN ONE UNBOXING INSTALLATION INSTRUCTIONS The system must be installed in an easily accessible location, the status display must be visible and not obstructed Please ensure that the wall to be mounted on is suffi cient enough to hold the weight of the All in One and Giv-Gateway (if fi tted) The system must be installed in a well ventilated area, the ambient temperature should be below 40ºC to ensure optimal operation... -
Page 6: Safety Instructions
There must be adequate clearance around the All in One to allow for heat dissipation. The diagram If you suspect something is wrong with the system, contact GivEnergy on 1300 448 363 or email below illustrates the space required around the system. -
Page 7: All In One Step-By-Step Installation
ALL IN ONE STEP-BY-STEP INSTALLATION ALL IN ONE STEP-BY-STEP INSTALLATION Place the wall mounting template horizontally onto the wall and mark the position of the bracket Mount the All in One onto the mounting bracket. Adjust the height of the supporting feet to holes. -
Page 8: All In One Connections Overview
ALL IN ONE CONNECTIONS OVERVIEW ALL IN ONE AC UTILITY GRID CONNECTION Item Item Name Cable size requirements are dependent on the country of installation, cable run length, and max. current of the product. Communication / network AC Supply Meter LM Both side and rear cable entry points are provided. -
Page 9: All In One Comms Connection With Giv-Gateway
ALL IN ONE COMMS CONNECTION WITH GIV-GATEWAY ALL IN ONE COMMS CONNECTION WITHOUT GIV-GATEWAY Single All in One installation Grid Grid Generation Generation Generation To install a single All in One, Meter port connect communication wire to the socket D in the wiring compartment of the All in Giv-Gateway in One. -
Page 10: Giv-Gateway Specifications
GIV-GATEWAY SPECIFICATIONS GIV-GATEWAY BOX CONTENTS Item Item Name Giv-Gateway WHOLE HOME BACKUP A great companion to the AIO Bracket Mounting screw Wall plug By purchasing the additional Giv-Gateway, the Antenna All in One can provide whole house backup in the event of a grid failure. -
Page 11: Isolating The Main Supply To The Property
ISOLATING THE MAIN SUPPLY TO THE PROPERTY GIV-GATEWAY COMPONENTS Before installing the Giv-Gateway, make sure that the whole house is isolated from the main supply. Item Item Name MCB, RCD Once isolated, please test to ensure that no voltage is present to the property before disconnecting Grid / PV Meter and LoRa (spare) the main supply cable from the consumer unit. -
Page 12: Clearance And Maintenance
CLEARANCE AND MAINTENANCE GIV-GATEWAY STEP-BY-STEP INSTALLATION Place the wall mounting bracket horizontally onto the wall and mark the position of the bracket Space Clearance holes. Drill 2 holes at the marked positions, at least 75mm deep. There must be adequate clearance around the Giv-Gateway. The diagram below illustrates the space required around the system. -
Page 13: Connections Overview
GIV-GATEWAY STEP-BY-STEP INSTALLATION CONNECTIONS OVERVIEW Item Item Name Fix the Giv-Gateway to the mounting bracket and secure with the fi xings provided. Ensure there is adequate clearance space. LoRa connection Module (spare) PV meter (ID2) Grid meter (ID1) Load (house supply) AC supply (in) All in One supply PV inverter supply... -
Page 14: Giv-Gateway Ac Utility Grid Connection
Breaker A Breaker C (optional) The meter tails between the meter position and Givenergy Gateway should not be longer than 3 Earthing cable to earth rod metres. If the length is more than 3 metres, you should install an additional protective device at the (mandatory) nearest point to the supply inside the customer’s premises, as specifi ed in the current IEE Wiring... -
Page 15: Connecting All In One To Giv-Gateway
CONNECTING ALL IN ONE TO GIV-GATEWAY START-UP AND SHUT-DOWN OF THE ALL IN ONE Please note: Remove bottom connections cover prior to wiring, and then replace once complete. Start-Up Procedure Ensure connection covers are in place Connect the AC circuit breaker, ensure that the system is powered and commissioned using the portal/App. -
Page 16: Commissioning And Decommissioning A System
Either sign into the online portal at https://portal.givenergy.cloud, or the GivEnergy app with Battery your GivEnergy Engineer login. If you are a fi rst time user, and you do not have an account or When the battery is being charged, Engineer login, please consult your supplier to get this set up. -
Page 17: Understanding Your Giv-Gateway
Green (fl ashing) The system is in waiting discharging, the arrows will point towards the inverter. Yellow Charging or discharging error (reboot the unit) Fault (contact GivEnergy) Green/Red (fl ashing) Firmware upgrade 32 | AIO AND GIV-GATEWAY AIO AND GIV-GATEWAY | 33... -
Page 18: All In One Installation Without Giv-Gateway
Off Grid Operation Remotely disconnect your home from the grid at the push of a button using the GivEnergy App or Online Monitoring Portal. Note: An earthing rod MUST be installed. 34 | AIO AND GIV-GATEWAY... -
Page 19: Manufacturer Warranties
The All in One and Giv-Gateway are covered by 10-year warranties. Products Covered Products Covered All in One 13.5 10 years Giv-Gateway 10 years Legal Disclaimer: This document is the property of GivEnergy, reproduction is prohibited. 36 | AIO AND GIV-GATEWAY... - Page 20 www.givenergy.co.uk...
Need help?
Do you have a question about the GIV-AIO-13.5 and is the answer not in the manual?
Questions and answers