Table of Contents
Advertisement
Advertisement
Table of Contents

Subscribe to Our Youtube Channel
Related Manuals for Honda XL125V


Summary of Contents for Honda XL125V
- Page 1 £HONDA HONDA...
- Page 2 HONDA XL125V OWNER’S MANUAL MONTESA HONDA, S.A.
-
Page 3: Important Notice
NOTE: Gives helpful information this publication based information the latest production information available the time approval for printing. HONDA MOTOR CO., LTD. reserves to make This manual should be considered a permanent part right the motorcycle and should remain changes at any... -
Page 4: Operation
Instruments and Indicators U-shaped Anti-theft Lock motorcycle best. knows required, remember that your Honda dealer your 43 Side Cover When service with and tools, your dealer can supply you the required mechanical "know-how" 44 Headlight Aim Vertical... -
Page 5: Motorcycle Safety
MOTORCYCLE SAFETY 3. Many automobile/motorcycle accidents MAINTENANCE happen because the automobile driver does Page not "see" the motorcyclist. Page Motorcycle CLEANING requires special riding Make yourself conspicuous to help 53 MAINTENANCE efforts on your part to ensure your the accident that wasn't avoid your Maintenance Schedule... - Page 6 ROTECTIVE APPAREL other motorists surprise Don't MODIFICATIONS you. fatalities accident intersections, Most motorcycle Use extra caution injuries: ALWAYS wear a due to head and exits, and entrances parking lot face should also wear helmet. Modification of the motorcycle, or driveways. as boots, goggles as well...
-
Page 7: Loading And Accessories
2. Vehicle handiing and stability can be Accessories adin adversely affected LOADING AND ACCESSORIES loose cargo. Genuine Honda accessories have been rider, passenger, weight Recheck cargo security and accessory BEET accessories must not exceed specifically designed and tested cargo and... -
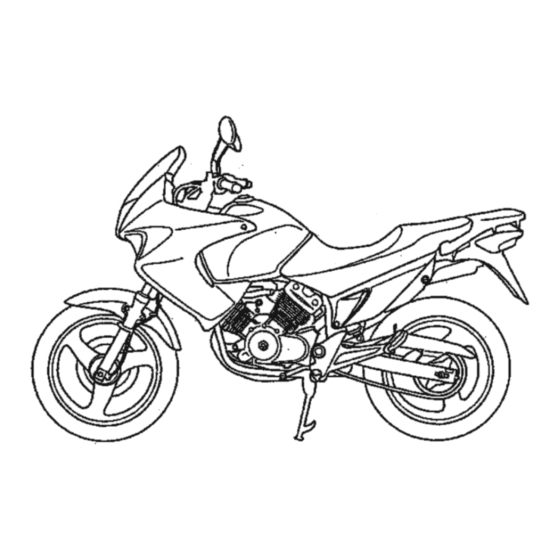
Page 8: Parts Location
PARTS LOCATION alter 3.Accessories which your riding hands or feet away position by moving Indicators from controls may increase reaction time an emergency. Speedometer Tachometer that Headlight dimmer switch not add electrical equipment 4. Do brake Front fluid Servoir exceed the motorcycle's electrical will Rearview mirror blown fuse could... - Page 9 Oil filler holder Document compartment Fuel cock Helmet Tool Fuse box Rear brake fluid reservoir Engine inspection window “7 Del) Rear spring > pre-load adjuster Passenger footpeg footpeg Passenger stand Footpeg Side Gearshift pedal...
-
Page 10: Instruments And Indicators
Ref. No. Description Function INSTRUMENTS AND INDICATORS contained The indicators are Shows riding speed. Speedometer instrument panel. Their functions are The speedometer needle swing to seek the zero will the tables on the following when the position on the switch dial ignition described... - Page 11 Initial Display Function switch When ignition turned Description Ref. No. temporarily show display will the modes the red Never allow the tachometer needle to enter turn signal indicator segments so you can make digital Right zone, even after the engine has been broken sure the liquid crystal display is functioning...
- Page 12 Odometer/Tripmeter Display Coolant Temperature Gauge mark The display under-the the segment shows lights (2), functions: Coolant temperature gauge stop the engine and check the reserve odometer and tripmeter coolant temperature (TOTAL) lighting RIP). Read pages 26-27 and tank coolant level. The normal operating segments.
- Page 13 igital clock Push and — the control button, the hold hour and minute. To adjust time, display will minute set mode with proceed as follows: first digit of minute flashing. display 1. Turn ignition swith ON. Push the control button until the desired Select the odometer...
-
Page 14: Major Components
Positions done your Honda dealer 3 to increase spring preload stiffer rear suspension and can be used qualified mechanic, equipped with when proper tools, safety equipment and motorcycle more heavily loaded. official Honda Shop Manual. Spring adjuster Pin spanner Extention... - Page 15 Tighten brake system and Handle brake must be fluid with care because bled. screws securely. your Honda dealer can damage plastic and painted this service. surfaces. When adding brake sure fluid, reservoir is horizontal before the cap...
- Page 16 Rear Brake CAUTION Check that the above the fluid ievel is Rear brake fluid level: mark LOWER level with the motorcycle Handle brake care because fluid with ¢ upright position. [WARNING can damage plastic and painted must be added to the reservoir Brake fluid surfaces.
- Page 17 Tighten motorcycle stalls when check shifting into gear lock nut your Honda dealer. tends to creep; or the clutch slips, adjustment. causing acceleration to behind engine Start the engine, the clutch Other Checks:...
- Page 18 LABEL). less than 40/ 60 (40 % loss excessive, check leaks and mixture until reaches the UPPER level antifreeze} will provide proper your Honda dealer to the repair. CAUTION mark Always coolant (2). reserve corrosion protection. freezing During tank.
- Page 19 (0.53 US gal, 0.44 imp gal) spark knock or persists, pinking consult your Honda dealer. Failure considered do so misuse, and caused misuse is not damage covered by Honda's Limited Warranty.
- Page 20 Refuel a well-ventilated area with recommended There are two by Honda. Honda cannot endorse the warranty. stopped. engine smoke types of "gasohol": fuels containing methanol since containing ethanol, flames or sparks allow the area and the other containing methanol.
-
Page 21: Engine Oil
ENGINE OIL TUBELESS TYRES Engine Level Check Tyre size This motorcycle equipped with tubeless the engine Running Check the engine with insufficient level each day before tyres, valves, wheel rims. Use only cause serious pressure Front 100/90-18 56P the motorcycle. riding tyres marked "TUBELESS'"... - Page 22 To avoid dents or deformation. there limit: that may result loss tyre deflation your Honda dealer for repair, damage, not exceed control, of vehicle replacement, and balancing. mph) for the first 24 hours, km/h those tyres other than...
-
Page 23: Right Handlebar Controls
ESSENTIAL INDIVIDUAL COMPONENTS Starter RIGHT HANDLEBAR CONTROLS Button The starter button the engine Engine Stop Switch is below IGNITION SWITCH stop switch The engine stop switch next to (1) is should received a (1). number plate switch When the starter button throttle grip. -
Page 24: Left Handlebar Controls
LEFT HANDLEBAR CONTROLS Horn Button FEATURES Press the button to seund the required for operation) horn. (Not Headlight Switch headlight has three switch positions: STEERING LOCK »< and marked OFF, white the steering, turn the handlebars To lock under »<« turn the to the left or right,... -
Page 25: Helmet Holder
SEAT HELMET HOLDER WARNING The helmet holders are located below the remove the seat insert the (1), ignition designed for helmet holder « the seat and turn seat. Remove the seat (see page key into lock 40). helmet security while parked. clockwise. -
Page 26: Document Compartment
DOCUMENT COMPARTMENT STORAGE COMPARTMENT FOR U- SIDE COVER Installation: document bag the document SHAPED ANTI-THEFT LOCK Installation can be done the reverse Removal: located under the seat. fender has a storage compartment compartment The rear (2), Remove the seat (page order of removal. -
Page 27: Headlight Aim Vertical Adjustment
1. Engine Check leaks. Correct required (page discrepancy before 32). you ride. tank when necessary Contact 2. Fuel level-fill fuel Honda dealer assistance your Check leaks. (page you cannot correct the problem. 28). Adjuster (A Up Coolant level-add coolant required. -
Page 28: Starting The Engine
Starting Procedure STARTING THE ENGINE NOTE: NOTE: restart a warm engine, not use the electric starter starting follow Always follow procedure more not open the throttle when starting proper than seconds at a procedure for “High described time. Release the Temperature.”... - Page 29 High Air Temperature ____CAUTION 35° C above Fiooded Engine °F) RUNNING-IN not use the choke. Extended use of choke may impair the engine fails to start after repeated Help assure your motorcycle's future Open the throttle piston and lubrication slightly. cylinder wall attempts, be flooded...
- Page 30 > the motorcycle attains RIDING When BRAKING moderate speed, close the throttle, For normal braking, gradually apply pull WARNING the clutch lever shift to 2nd gear both When front and riding in wet or rainy conditions, rear brakes while the gearshift pedal. Review Motorcycle Safety (pages loose surfaces, the ability to by raising...
-
Page 31: Anti-Theft Tips
Consult your Honda dealer slight 5. Put your name, MAINTENANCE SCHEDULE. recommendations applicable on a incline, address, and phone individual needs and use. - Page 32 FIRST performed whit standards and specifications of Honda trained equipped tech- property Refer Honda dealer meets nicians. Your these requirements. all of the Pra-ride Inspection (page each scheduled main- Perform 45) at x1,000mi tenance ITEM |OPage period.
- Page 33 SHOULD BE SERVICED BY YOUR HONDA DEALER, UNLESS THE OWNER HAS THE PROPER TCOLS TCCL KiT AND SERVICE DATA AND IS MECHANICALLY QUALIFIED. REFER TO THE OFFICIAL HONDA SHOP The tool under the seat. MANUAL. Some roadside repairs, minor adjustments...
-
Page 34: Serial Numbers
SERIAL NUMBERS The frame number stamped COLOUR LABEL The frame and engine side serial numbers are the steering head. right colour label attached to the required when registering your motorcycle. frame behind the left side cover. They also be required The engine number dealer by your... -
Page 35: Maintenance Precautions
The in your following provides Use new, genuine Honda parts a guide to the selection the proper for maintenance their equivalent grade viscosity to be used at Parts which are not repair. - Page 36 O-ring the maintenance engine as specified good condition and then install schedule (page 54). filter. Use the Honda filter OTE: an equivalent filter specified for your Change the engine the engine at ° oil with model. Other filters not specified for...
-
Page 37: Spark Plugs
SPARK PLUGS Disconnect spark plug from caps Check that the sealing washer NOTE: to the maintenance precautions the spark plugs. (Refer drain plug is in good condition and When dusty conditions, running very Clean any dirt from around the spark page 60). -
Page 38: Throttle Operation
Check the spark plug gap using a 6. With washer attached, thread plug THROTTLE OPERATION wire-type feeler gauge. adjustment spark plug hand to prevent in by to the maintenance precautions (Refer necessary, bend the side electrode cross-threading. page 60). carefully. Tighten a new spark plug ™... -
Page 39: Idle Speed
(page Under severe usage, or when 45). other systems adjusting idle speed. ridden motorcycle dusty unusually your Honda dealer regularly maintenace muddy areas, more frequent will scheduled carburetor adjustments, Throttle stop screw Increase be necessary. including individual carburetor adjustment Decrease and synchronization. - Page 40 the motorcycle forward. Stop and Roll Damaged Sprocket Worn Sprocket chain requires adjustment, the drive Adjustment: side stand. Inspect the place Teeth Teeth chain slack should be checked and procedure follows: Drive chain and sprockets drive for any of side stand Place the motorcycle on its 1,000 km...
- Page 41 Honda dealer as mark the chain aligns with arrow Both left and right marks should soon as possible to verify proper adjuster plates after the...
-
Page 42: Drive Chain Slider
Clean the side to the For replacement, wear limit line (2). surfaces the chain with dry cloth. Do Honda dealer. your not brush the rubber O-rings. Brushing will damage them. and lubricate Wipe dry only with SAE 80 or 90... -
Page 43: Front And Rear Suspension Inspection
Carefully rear lever pulled shift the transmission suspension fasteners tightness. into gear. the side stand. Lower engine should stop as put the side stand down. the side stand system does operate described, your Honda dealer service. -
Page 44: Wheel Removal
66 N'm (6.7 kgf-m, 49 Ibf-ft) wheel removal is this required, your Honda it will dealer service brake pads and insert the axle through bolts torque: Axle pinch to raise the center necessary left fork leg. - Page 45 Honda dealer this service. wheel forward. After installation, operate the brake lever and brake pedal and check the brake operation. Lock nuts Drive chain Axle shaft...
-
Page 46: Brake Pad Wear
(Refer torque wrench was used for ¢ removal procedure. 60). page installation, your Honda dealer Make sure that the slot the caliper upon the Brake pad wear depends soon as possible to verify proper bracket located... - Page 47 Provide adequate ventilation a set. See your away. water as or add distilled electrolyte level Honda dealer this service. using battery when charging a maintenance-free the battery (sealed) enclosed space. your battery seems weak and/or type.
-
Page 48: Fuse Replacement
See your overload 3. Disconnect negative terminal loss of lights or engine power. Honda dealer for repair. the battery from lead first, then onnect the positive lead terminal CAUTION fuse... - Page 49 Main Fuse fuse: box: fuse box located behind the side left located behind the left The main fuse cover. side cover. specified fuses are: specified fuse Remove the side cover (page left 43). Remove the side cover (page left 43). the fuse box Open (1).
-
Page 50: Stoplight Switch Adjustment
STOPLIGHT SWITCH ADJUSTMENT BULB REPLACEMENT NOTE: to the maintenance precautions (Refer sure to turn the switch to the maintenance precautions ignition (Refer ® page 60). when replacing the bulb. page 60). Check the operation of the stoplight switch not use bulbs other than that ®... - Page 51 Position Light Bulb Remove the conectors (5). Headlight Bulb it 90° and turn Remove peoe press the bulb lich 5. Slightly socket the clips Remove bulb. counterclockwise. Remove the 2. Pull lid (2). the reverse order out the position’ bulb maintenance 3.
- Page 52 Front/Rear Turn Signal Bulb <REAR> Stop/Taillight Bulb Remove turn signal rens the taillight lens Remove the screw removing (2). the two screws (2). removing the bulb Slightly press and turn and turn bulb 2. Slightly press counterclockwise. counterclockwise . 3. Install new bulb the reverse order the reverse order 0...
- Page 53 Test the brakes before riding Painted Aiuminum Wheei Maintenance CLEANING After cleaning, rinse the motorcycle motorcycle. Several applications may may corrode from contact Aluminum with to protect your mdtorcycle regularly clean water. be necessary to Clean with plenty of store normal brakin thoroughly road salt.
-
Page 54: Storage Guide
prevent Remove the battery. Store rusting cylinders, an area NOTE: STORAGE GUIDE last more than one month, perform the protected from freezing temperatures storage will following: « for winter, Extended storage, such important, to draining is very Remove spark from and direct carburetor plug... -
Page 55: Removal From Storage
SPECIFICATIONS REMOVAL FROM STORAGE motorcycle. Uncover and clean DIMENSIONS more than engine 2,150 Overall length Change mm (84.6 months have passed since the start 850 mm (33.5 Overall width storage. 1,250 Overall height mm (49.2 Install required. 2. Charge the battery Wheelbase 1.450 mm (57.1... -
Page 56: Chassis And Suspension
POWER TRANSMISSION ENGINE Primary reduction 42.0 x 45.0 mm (1.65 x 1.77 3.722 and stroke Bore ratio, Gear 11.8: 3.083 ratio Compression 125 cm? (7.6 cu-in) 1.933 Displacement 1.428 Spark plug *CRBEH-9 (NGK) or 1.173 Standard U24FER-2 (DENSO) 1.000 Final reduction 0.80-0.90 (0.031-0.035... - Page 57 LIGHTS 35/35W x 12V - Headlight 12V - 21/5W light Brake/tail 12V - 10W Turn signal light Front 12V - Rear 12v-5Wx2 Position light 12V - 1.2W light Instrument - 2W 12Vv indicator light Neutral 12V - 2W light Turn signal indicator 12v- 1.2W light...
Need help?
Do you have a question about the XL125V and is the answer not in the manual?
Questions and answers