Advertisement
Quick Links
P.O.Number :
Please Keep This Number For
Future Reference
THIS FORMS PARTS OF
YOUR GUARANTEE!
Please keep these lnstructlons for future reference.
Minimum two
person assembly
1 Hr
Approximate
Assembly Time
Product Details
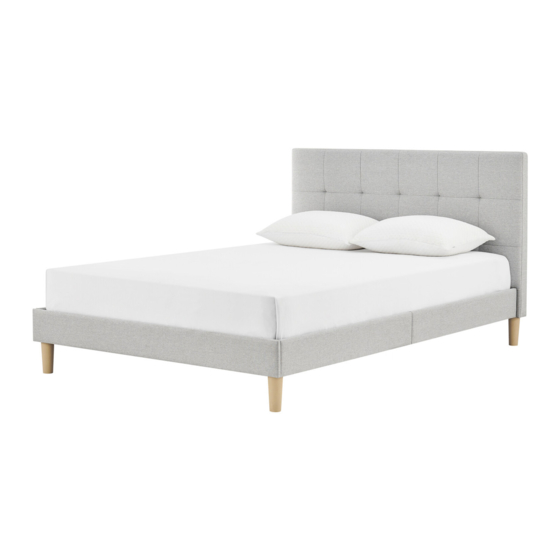
STK799801 4' Bed Light Grey
STK799802 4'6 Bed Light Grey
STK799803 5' Bed Light Grey
Regrettably self-assembly items cannot be returned once assembly is part or fully completed unless the
items are found to be faulty.Should you need to return the un assembled product, please repack in its original
packaging.
lmportant Information
● We suggest you spend a short time reading through this leaflet and then follow the simple step-by-step
instructions.
● Carefully check that you have all the parts before beginning assembly.
● Keep fittings out of children's reach and keep children well away from construction area.
● We suggest you retain these instructions for future reference.
Care Instructions
● Avoid exposing the furniture to excessive heat or direct sunlight as this can cause cracking or
deterioration of the color.
● Periodically check & re-tighten any screws and fixings.
● Periodically dust lightly with a clean soft cloth.
● TAKE CARE WHEN MOVING THE FURNITURE AND NEVER DRAG THE PIECES ACROSS
THE FLOOR,AS THIS WILL CAUSE DAMAGE TO THE JOINTS.
Frame Tested To BSEN1725
Fabrics and filings to BS5852
(REV 03 12/12/2023)
HATTIE BED 120 / 135 / 150 cm
Assembly lnstructlons
Page 1 of 9
Advertisement

Related Manuals for Bensons for Beds HATTIE STK799801


Summary of Contents for Bensons for Beds HATTIE STK799801
- Page 1 P.O.Number : Please Keep This Number For Future Reference THIS FORMS PARTS OF YOUR GUARANTEE! HATTIE BED 120 / 135 / 150 cm Assembly lnstructlons Please keep these lnstructlons for future reference. Minimum two person assembly 1 Hr Approximate Assembly Time Product Details STK799801 4' Bed Light Grey STK799802 4'6 Bed Light Grey...
- Page 2 Tips before you start! 1. Please check that all parts are present before you start the assembly of your furniture. 2. For ease and speed of assembly, we recommend that before you commence each step of the assembly, that you identify all the parts required for that step. 3.
- Page 3 Components A Headboard x 1 B Footboard x 1 C Side Rail (Left) D Side Rail (Left) (4'-1310 x 840mm) (4'-1270 x 150mm) Headboard end x 1 Footboard end x 1 (4'6-1460 x 840mm) (4'6-1420 x 150mm) (4'/4'6-965 x 150mm) (4'/4'6-965 x 150mm) (5'-1610 x 840mm) (5'-1570 x 150mm)
- Page 4 Step 1 ALL parts and components are packed inside a zipped cover on the back of the Headboard. C to F Shown upside down WARNING! The headboard is heavy. Lift with care. Step 2 ● Unfold and extend the central support system ●...
- Page 5 Step 3 ● Open out the legs on cross bar ● Ensure hinges are locked as shown and secured using fixings Locked Straighten the hinge to lock Required Fixings for this step. N x 1 Q x 2 T x 2 Step 4 ●...
- Page 6 Step 5 ● Assemble side rails using connecting plates and fixings Headboard end Headboard end Footboard Footboard Required Fixings for this step. N x 1 T x 12 Q x 12 Step 6 ● Locate side rails into connecting plates , secure using fixings Required Fixings for this step.
- Page 7 Step 7 ● Screw headboard legs into headboard screw fixings into the headboard but leave very lose. 10mm Leave screws lose Required Fixings for this step. P x 4 T x 4 U x 4 N x 1 Step 8 ●...
- Page 8 Step 9 ● Assemble footboard to side rails using fixings ● Secure footboard to central support using fixings Required Fixings for this step. N x 1 O x 5 T x 5 U x 5 Step 10 ● With help, lift the side rails and hook them over the fixings in headboard ●...
- Page 9 Step 11 ● Open out the base slatted system and locate them into position. They are secured by the velcro strips. ● Gently lay the slats onto the centre support and side rails. Evenly space out the slats by gently pulling and press the velcro strips together to hold them in place. (REV 03 12/12/2023) Page 9 of 9...
Need help?
Do you have a question about the HATTIE STK799801 and is the answer not in the manual?
Questions and answers