Advertisement
Quick Links
Attention
Two Person Assembly
Needed
120 mins
Approximate
Assembly time
Self-assembly items cannot be returned once assembly is part or fully completed unless the
items are found to be faulty. Should you need to return the unassembled product, please
repack in its original packaging.
Important Information
We suggest spending a short time reading through this leaflet and then follow the simple
step-by-step instructions.
Carefully check that you have all the parts before beginning assembly.
Keep fittings out of children's reach and keep children well away from construction area.
We suggest retaining these instructions for future reference.
Product Information
Conforms to BS EN 1725 Frame.
Confroms to BS EN 5852 Fabrics and Fillings.
The maximum weight your mattress can be for this bed is 65kg.
Care Instructions
Avoid exposing the furniture to excessive heat or direct sunlight as this can cause cracking and
deterioration of the colour.
Periodically check & re-tighten all fixings.
Periodically dust lightly with a clean soft cloth.
Any spills should be removed immediately with a damp cloth.
TAKE CARE WHEN MOVING THE FURNITURE AND NEVER DRAG THE PIECES ACROSS
THE FLOOR, AS THIS WILL CAUSE DAMAGE TO THE JOINTS.
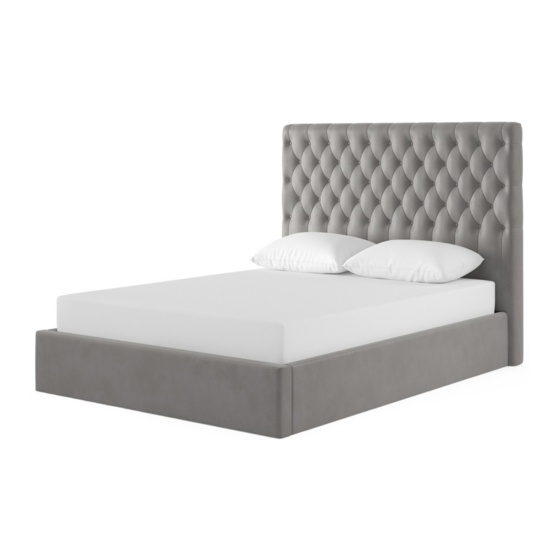
Valentina Ottoman Bed
135cm STK806601, 150cm STK806603, 180cm STK806605
135cm STK806602, 150cm STK806604, 180cm STK806606
Please keep these instructions for future reference.
Assembly Instructions
page 1 of 12
Advertisement

Subscribe to Our Youtube Channel
Related Manuals for Bensons for Beds Valentina STK806601


Summary of Contents for Bensons for Beds Valentina STK806601
- Page 1 Valentina Ottoman Bed Attention 135cm STK806601, 150cm STK806603, 180cm STK806605 Two Person Assembly Needed 135cm STK806602, 150cm STK806604, 180cm STK806606 Assembly Instructions Please keep these instructions for future reference. 120 mins Approximate Assembly time Self-assembly items cannot be returned once assembly is part or fully completed unless the items are found to be faulty.
- Page 2 Double Size / 135cm x 190cm Component of Carton A Hardware List (In Carton C) (A) M4 Allen Key x 2 (1) Headboard x 1 (B) M5 Allen Key x 1 (2) Footboard x 1: (Located in the rear end of (C) M6 x 45mm x 4 the Headboard) (D) M6 x 70mm x 6...
- Page 3 King size / 150cm x 200cm & Super King / 180cm x 200cm Component of Carton A Hardware List (In Carton C) (A) M4 Allen Key x 2 (1) Headboard x 1 (B) M5 Allen Key x 1 (2) Footboard x 1: (Located in the rear end of (C) M6 x 45mm x 4 the Headboard) (D) M6 x 70mm x 6...
- Page 4 Tips before you start! 1. Please check that all parts are present before you start the assembly of furniture. 2. For ease and speed of assembly, we recommend that before you commence each step of the assembly, that you identify all the parts required for that step. 3.
- Page 5 Step 1 Attach Metal Head End Section (6) and Metal Foot End Section (7) using M6 JCN Nut (J), M6 Washer and M6 x 45mm (C) and tighten with M4 Allen Key (A). Follow the step according figure 1. Fig.1 M6 Washer M6 x 45mm M6 JCN Nut...
- Page 6 Step 3 Attach the Non-Woven Fabric x 1 pcs (8) to the associated velcro strips on the Head End (1), Foot End (2) and Side Rails (3). VelcroTape Non-woven Fabric Non-woven Fabric 8x1pcs Step 4 Follow the diagram below, take out the pre-inserted bolt and washer on Footboard (2) and Side Rails (3) and attach the L-Bracket (P) by re-inserting the bolt and washer.
- Page 7 Step 5 Attach the Slatted Base (6) & (7) to the ottoman mechanism using M6 x 70mm (D), M6 Washer (I) x 2, M6 Spring Washer (N) and M6 Lock Nut (K). Insert M6 x 70mm (D) and M6 Washer (I) into the pre drilled holes and secure underneath using M6 Washer (I), M6 Spring Washer (N) and M6 Lock Nut (K).
- Page 8 5 Zoned Slat System - Double Size/ 135cm x 190cm Our unique zonal slat system targets and supports you where it matters for a perfect night’s sleep. Offering upper and lower body support, spinal alignment and pressure relief, this slat system is responsive, comfortable, and perfect for all body types.
- Page 9 5 Zoned Slat System - King Size/ 150cm x 200cm & Super King/ 180cm x 200cm Our unique zonal slat system targets and supports you where it matters for a perfect night’s sleep. Offering upper and lower body support, spinal alignment and pressure relief, this slat system is responsive, comfortable, and perfect for all body types.
- Page 10 Step 6 Follow diagram 3 or 4, to arrange the slats in the correct sequence and keep the rest the same. Step 1 Step 2 ZONE 1 ZONE 1 Fig. 1 ZONE 2 ZONE 2 Insert the slats into the holders at an angle EDGE sliding the corner into the cap first.
- Page 11 Step 7 Attach the hydraulic piston to the metal base. Check all fixings are fully tightened. Carefully lift the whole base and attach the other end of the position to the metal arm using the M8 Hexagonal Nut and secure in place with M13 Spanner (M). Gas Lift Rod M8 Hexagonal Nut Handle...
-
Page 12: Important Notice
PLACE YOUR MATTRESS ON THE BED BEFORE OPERATING THE LIFT. MATTRESS MATTRESS IMPORTANT NOTICE 1. Make sure the bed corners are always square at 90 degrees before closing the sleeping base. 2. Always use handle to lift the metal base. 3.
Need help?
Do you have a question about the Valentina STK806601 and is the answer not in the manual?
Questions and answers