Table of Contents
Advertisement
Quick Links
Advertisement
Table of Contents

Related Manuals for Royalcraft Sorrento


Summary of Contents for Royalcraft Sorrento
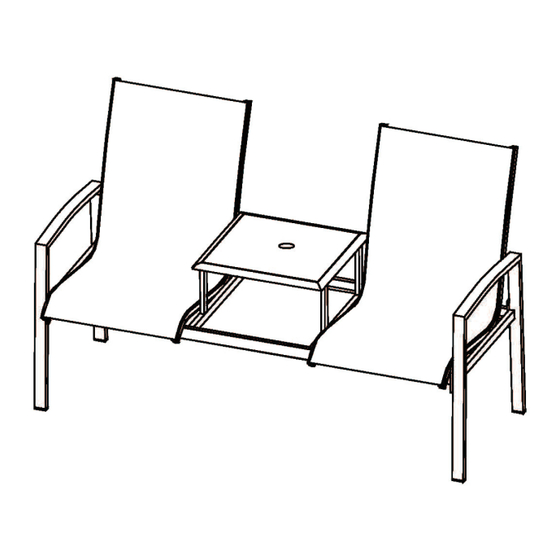
- Page 2 Sorrento Companion Set Assembly Instructions Before you start Where instructions as to the; storage, commissioning, installation, Warnings use and maintenance of the goods or (if there is none) good trade practice are not followed and a defect arises this will void IMPORTANT, RETAIN FOR FUTURE REFERENCE the 12 month manufacturer's guarantee on the product.
- Page 3 Sorrento Companion Set Assembly Instructions Components, fixtures & fittings (not actual size) Parts List Part Part Diagram Qty. Diagram Qty. 1 PC 1 PC Right Left Armrest/Leg Armrest/Leg 1 PC 1 PC Coffee Table Seat Frame Frame 4 PCS 1 PC...
- Page 4 Sorrento Companion Set Assembly Instructions Parts List Part Part Diagram Qty. Diagram Qty. 6 PCS 12 PCS M6*40mm Bolt M6*20mm Bolt 2 PCS 2 PCS Female Bolt M6*55mm Bolt 2 PCS 30PCS Washer M6*25mm Bolt 30PCS 2 PCS Female Bolt...
- Page 5 Sorrento Companion Set Assembly Instructions Step by step assembly instructions Step One Place the Coffee Table Frame (D) upside down on a soft and level surface. Assemble Coffee Table Supporting Bar (E) onto the Coffee Table Frame (D) using Washers (P), Bolts (J) and Bolt Head Caps (Q).
- Page 6 Sorrento Companion Set Assembly Instructions Step Four Turn the Seat (F & G) upside down. Connect them with the partly-assembled frame as per steps showed in the diagram. Sequence : Connect the Part (C) and Part (G)
- Page 7 Sorrento Companion Set Assembly Instructions Step Six When you are satisfied all components, tighten all Bolts with provided tools (S & T). Do not over-tighten. Cover each Bolt with Bolt Head Cap (Q). Lift the product in the upright position, carefully Place the Glass Top (I) onto the frame.
Need help?
Do you have a question about the Sorrento and is the answer not in the manual?
Questions and answers
One of the seat covers on our companion set is beginning to tear. Can the seats be repaired or recovered?