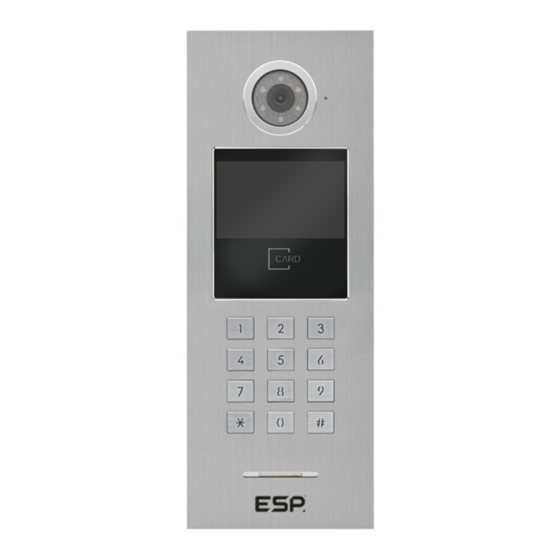
Summary of Contents for Scolmore ESP Aperta IP A1IPDSM1
- Page 1 A1IPDSM1 Full Manual Aperta IP PoE Multi Way Outdoor Station IP65 HD with Proximity Reader The latest product manuals and software is available online: https://www.espuk.com/technical_support...
-
Page 2: Table Of Contents
Contents 1. Installation Page 1 2. Main Interface Page 2 3. Video Intercom Page 2 4. Unlock Functions Page 3 A. Public Password Unlock Page 3 B. User Password Unlock Page 3 C. Proximity Card/Fob Unlock Page 3 5. System Settings Page 4 1. -
Page 3: Installation
1. Installation Connect the Door Station to a switch/network or alternatively directly to a Monitor using the RJ45 port [1]. If the connected network does not support PoE, then DC12V1A needs to be applied to the 12V & GND terminals [2]. *All system cabling has been tested with Cat5E UTP PVC Cable. -
Page 4: Main Interface
2. The Main Interface On standby, the display will show Date & Time, Network Status, Visitor’s Calling, Password Unlocking, and User Instructions. 3. Video Intercom 1. In the main interface, visitors input the Room Number, eg: input 101 or 0101, the three digit room no. call after 3 seconds, the four digits Room Number call immediately. -
Page 5: Unlock Functions
4. Unlock Functions A. Public Password Unlock Public unlock passwords by default are disabled. It will need to be set by the responsible person to set the password. To use the Public Password; Press “#” + “Public Password” + “#”. B. -
Page 6: System Settings
5. System Settings Enter administration mode: Press (when in standby) # to enter the password entry screen, then type in the Administation Passcode, and then press Once into Administration mode, pressing “#” will confirm or enter a submenu, “4” will navigate left, “6” will navigate right, and “... -
Page 7: Setting The Public Password
3. Setting Public Password When Unlock Pwd is selected press # to enter. If Unlock Pwd is not selected, use the 4 and 6 keys to navigate the menu. You will then need to enter the Administation Passcode, and then the new public unlock passcode twice. And then press # to confirm and exit the menu. -
Page 8: Unlock Type
6. Unlock Type When Unlock is selected press # to enter. If Unlock is not selected, use the 4 and 6 keys to navigate the menu. By default, the unlock method is “NO” (Normally Open), and a 10 second delay. Press “0”... -
Page 9: Date Setting
9. Date Setting When Date Set is selected press # to enter. If Date Set is not selected, use the 4 and 6 keys to navigate the menu. If the Date setting is incorrectly set it will indicate setting failed. The format should be YYYY-MM-DD HH:MM. - Page 10 To add an IC card, you will need to assign it to a room number. On the Add Cards screen you will need to enter the room number, and press #. For example for room 159, enter 0159. II. After the correct room number has been inputted, press # to confirm and then once on the below screen, present your card/fob to the card reader, and finally press # to complete adding the card/fob.
-
Page 11: Restore Default Settings
III. Finally, if Delete all local cards, was entered, then press # to confirm to delete all local cards. 12. Restore default settings When Restore is selected press # to enter. If Restore is not selected, use the 4 & 6 keys to navigate the menu. Once on the restore page, if you want to the restore all settings back to factory default press #, the Outdoor Station will then restart. -
Page 12: Installation Of Outdoor Units
6. Installation of Outdoor Units Page: 10... - Page 13 Contact Details Elite Security Products UK, Unit 7 Target Park, Shawbank Road, Lakeside, Redditch, Worcestershire, B98 8YN Tel: +44(0) 1527 51 51 50 Fax: +44(0) 1527 15 01 43 Email: info@espuk.com Registered in England, Company Registration Number: 02769392, VAT Registration: GB614686525 For more product information please visit www.espuk.com E&OE - Errors and Omissions Excepted.


Need help?
Do you have a question about the ESP Aperta IP A1IPDSM1 and is the answer not in the manual?
Questions and answers