Subscribe to Our Youtube Channel
Summary of Contents for The Mandir Store MWC-08-108-301-603622
- Page 1 Not to scale Assembly Guide #04 Page Scan the QR for the digital This guide works for the following SKUs MWC-08-108-301-603622 MWC-08-108-301-634822 Not to scale © 2023. The Mandir Store®. All Rights Reserved. v2.0...
- Page 2 Gather the required planks K, L, M, N, O and P to assemble the inner drawer => Drawer Left. Required hardware is shown below handle screw minifix pull handle philips screw driver x1 | not included Not to scale © 2023. The Mandir Store®. All Rights Reserved. v2.0...
- Page 3 1.a. screw 8 mini fixes into the pre-drilled holes on planks K, M and O ↓ 1.b. attach side panels K and M against rear panel L and tighten CAM(s) to secure ↓ Not to scale © 2023. The Mandir Store®. All Rights Reserved. v2.0...
- Page 4 Page 1.c. slide the drawer base panel N along the routed lines ↓ 1.d. secure one handle S on the drawer plank O using the provided screws ↓ Not to scale © 2023. The Mandir Store®. All Rights Reserved. v2.0...
- Page 5 1.e. attach the drawer front O on the drawer structure and tighten the CAMs to secure ↓ 1.f. simply rest platform extension plank P on the drawer box ↓ Not to scale © 2023. The Mandir Store®. All Rights Reserved. v2.0...
- Page 6 Assembly Guide #04 Page 1.g. repeat steps 1.a through 1.f to assemble one more drawer ↓ Parts for drawer 2 = K1, L1, M1, N1, O1, P1 = Drawer Right Not to scale © 2023. The Mandir Store®. All Rights Reserved. v2.0...
- Page 7 Assembly Guide #04 Page Step 3: Assemble the base structure Required hardware is shown below leg screw minifix philips screw driver x16 | optional x1 | not included Not to scale © 2023. The Mandir Store®. All Rights Reserved. v2.0...
- Page 8 2.a. (optional) you may choose to replace the rubber legs with SS legs on base plank F ↓ 2.b. screw 4 mini fixes into the pre-drilled holes on parts G and I ↓ Not to scale © 2023. The Mandir Store®. All Rights Reserved. v2.0...
- Page 9 2.c. screw 4 mini fixes into the pre-drilled holes on part H ↓ 2.d. screw 16 mini fixes into the pre-drilled holes on parts J and F ↓ Not to scale © 2023. The Mandir Store®. All Rights Reserved. v2.0...
- Page 10 2.e. attach middle plank H1 to rear plank H, tighten CAM(s) to secure in place ↓ 2.f. attach side plank I to the above assembled structure, tighten CAM(s) to secure it ↓ Not to scale © 2023. The Mandir Store®. All Rights Reserved. v2.0...
- Page 11 2.g. attach side plank G to the above assembled structure, tighten CAM(s) to secure it ↓ 2.h. attach side plank H2 to the above assembled structure, tighten CAM(s) to secure it ↓ Not to scale © 2023. The Mandir Store®. All Rights Reserved. v2.0...
- Page 12 2.j. extend the drawer slides out and slides the two drawers in place. Drawer with front O goes on the left and drawer with front O1 goes on the right ↓ Not to scale © 2023. The Mandir Store®. All Rights Reserved. v2.0...
- Page 13 Gather the required hardware, back panel A and the fully assembled base structure Required hardware is shown below hex bolt hex key / allen key x5 or 6 Not to scale © 2023. The Mandir Store®. All Rights Reserved. v2.0...
- Page 14 3.a. align the holes at the back of the panel A with the holes at the back of the base structure, then secure the panel in place using the hex bolts provided using the hex key provided along with the mandir. Not to scale © 2023. The Mandir Store®. All Rights Reserved. v2.0...
- Page 15 Required hardware is shown below hex bolt hex key / allen key hanger screw philips screw S hook driver x1 | not included Not to scale © 2023. The Mandir Store®. All Rights Reserved. v2.0...
- Page 16 4.a. slide the jharoka hanger onto the placeholder tiles and fasten the screws to secure ↓ 4.b. repeat the same for the other jharoka hanger side pieces ↓ Not to scale © 2023. The Mandir Store®. All Rights Reserved. v2.0...
- Page 17 4.c. using the hex bolts and hex key secure the hood onto the back panel. Note: Make sure the hood is completely flush against the back panel and there are no visible gaps where the hood and the panel meet. Not to scale © 2023. The Mandir Store®. All Rights Reserved. v2.0...
- Page 18 Once the pillars are laid out, peel the double sided tape on the bottom of the pillar to stick the pillar onto the mandir base. Then slide the longer fences into the provided slots ↓ Not to scale © 2023. The Mandir Store®. All Rights Reserved. v2.0...
- Page 19 ↓ 4.g. use the ’S’ hooks to hang the latkans and brass bells onto the jharoka hanger ↓ Not to scale © 2023. The Mandir Store®. All Rights Reserved. v2.0...
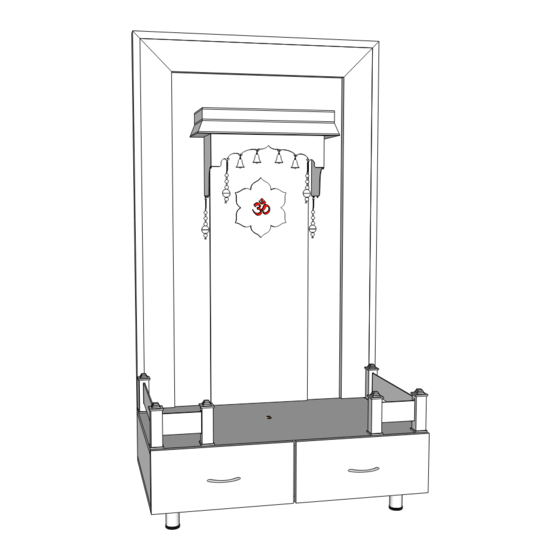
- Page 20 Note: A socket pin converter may be included in your package based on your delivery location Congratulations! You have now completed the mandir assembly. For any questions, comments or suggestions, email us at team@themandirstore.us Not to scale © 2023. The Mandir Store®. All Rights Reserved. v2.0...


Need help?
Do you have a question about the MWC-08-108-301-603622 and is the answer not in the manual?
Questions and answers