Table of Contents
Advertisement
Quick Links
Advertisement
Table of Contents

Subscribe to Our Youtube Channel
Related Manuals for Diamond CFG102/N


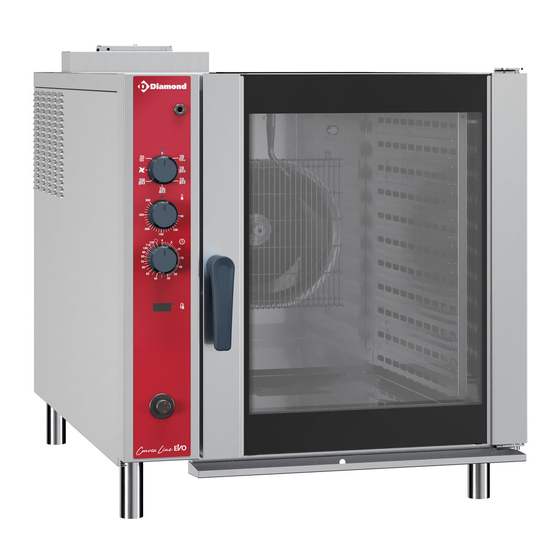
Summary of Contents for Diamond CFG102/N
- Page 1 MOD : CFG102/N Production code : 697018 11 /2023...
- Page 2 CONVECTION oven Electrical and Gas models Installation manual * 595406U00- 2023.11 *Original instructions...
- Page 3 ELECTRIC Model 6 GN 1/1 - Installation dia- gram (597405Y00)
- Page 4 ELECTRIC Model 10 GN 1/1 - Installation dia- gram (597405Z00)
- Page 5 ELECTRIC Model 10 GN 2/1 – Installation dia- gram (597406000)
- Page 6 ELECTRIC Model 20 GN 1/1 – Installation dia- gram (597406100)
- Page 7 ELECTRIC Model 20 GN 2/1 – Installation dia- gram (597406200)
- Page 8 GAS Model 6 GN 1/1 - Installation diagram (597405T00)
- Page 9 GAS Model 10 GN 1/1 - Installation diagram (597405U00)
- Page 10 GAS Model 10 GN 2/1 – Installation diagram (597405V00)
- Page 11 GAS Model 20 GN 1/1 - Installation diagram (597405W00)
- Page 12 GAS Model 20 GN 2/1 - Installation diagram (597405X00)
- Page 13 EI = Electrical Inlet G = Gas connections ⌀1/2″ M – ISO 7/1 CWI = Water Inlet pipe ⌀3/4″ M – ISO 7/1 D = Drain pipe ⌀25 (1″)
- Page 14 Foreword Read the following instructions, including the warranty terms before installing and using the appliance. Visit our website www.electroluxprofessional.com and open the Support section to: Register your product Get hints & tips of your product, service and repair information The installation, use and maintenance manual (hereinafter Manual) provides the user with information necessary for correct and safe use of the appliance.
-
Page 15: Table Of Contents
Contents A WARNING AND SAFETY INFORMATION....................15 General information ........................15 Personal protection equipment ...................... 16 General safety ........................... 16 Safety signs to be placed on the appliance or near its area ..............17 Residual risks ..........................18 Transport, handling and storage ....................19 Installation and assembly ...................... -
Page 16: Awarning And Safety Information
WARNING AND SAFETY INFORMATION General information To ensure safe use of the appliance and a proper understanding of the manual it is necessary to be familiar with the terms and typographical conventions used in the documentation. The following symbols are used in the manual to indicate and identify the various types of hazards: WARNING Danger for the health and safety of operators. -
Page 17: Personal Protection Equipment
Personal protection equipment Summary table of the Personal Protection Equipment (PPE) to be used during the various stages of the appliance's service life. Stage Protective Safety Gloves Glasses Safety garments footwear helmet ● ○ ○ — Transport — ● ○ —... -
Page 18: Safety Signs To Be Placed On The Appliance Or Near Its Area
Disconnect the appliance from the power supply before carrying out any installation, assembly, cleaning or maintenance procedure. • Do not remove, tamper with or make illegible the CE marking, the safety, danger and instruction signs and labels on the appliance. •... -
Page 19: Residual Risks
Danger Meaning caution hot surface danger of electrocution (shown on electrical parts with indication of voltage) Residual risks The appliance has several risks that were not completely eliminated from a design standpoint or with the installation of adequate protection devices. Nevertheless, through this manual the Manufacturer has taken steps to inform operators of such risks, carefully indicating the personal protection equipment to be used by them. -
Page 20: Transport, Handling And Storage
Transport, handling and storage • Transport (i. e. transfer of the appliance from one place to another) and handling (i. e. transfer inside workplaces) must occur with the use of special and adequate means. • Please refer to indications on packaging for stackability during transport, handling and storage. -
Page 21: Water Connection
Water connection • Water connection must be carried out in compliance with the regulations and provisions in force with the country. • The pressure measured upstream of the oven (and downstream of any WATER FILTRATION SYSTEMS installed) must be between 150 – 250 kPa (1,5 – 2,5 bar / 14 – 36psi) measured in dynamic conditions, i.e. -
Page 22: Appliance And Manufacturer's Identification Data
IMPORTANT When installing the appliance, make sure the electrical connection is carried out in compliance with that specified on the dataplate. Control Number: Conforms to: 3050436 NSF/ANSI 4 Appliance and manufacturer's identification data The data plate gives the product identification and technical data. An example of the marking or data plate on the appliance is given below: Control Number: 3050436... -
Page 23: Cgeneral Information
GENERAL INFORMATION Introduction Risk a combination of probabilities and risks of injury or harm to health in a hazardous This manual contains information relevant to various applian- situation. ces. The product images in this guide are only an example. Protection safety measures consisting of the use of The drawings and diagrams given in the manual are not in devices... -
Page 24: Storage
Take care when unpacking and handling of the appliance with room temperatures between – 10 ℃ [14 ℉ and 50 ℃ [122 to not cause any shocks on itself. ℉]. 2. Keep all the documentation contained in the packaging. The place where the appliance is stored must: •... -
Page 25: Installation In Australia
To ensure correct operation of the appliance and maintain safe • Remove the cover from the cardboard enveloping the conditions during use, carefully follow the instructions given in appliance; this chapter. Check and, if necessary, level the appliance after positioning. Incorrect levelling can cause appliance malfunctioning. -
Page 26: Disposal Of Packing
IMPORTANT • Remove the cardboard cover and the corners from the Make sure not to damage the drain when removing appliance. the appliance from the pallet. • Remove the protective film from the panels, taking care not to scratch the surface if scissors or blades are used; All models E.4.2 Disposal of packing... -
Page 27: Water Connection
CAUTION • The drain pipe must be siphoned (height 80 mm) to an open The appliance must be level. drain “O“ (air-break to drain ) conforms to EN61770, whether for installation with wall discharge or floor grating in order to prevent any back-flow from the sewage system Water connection from reaching the piping inside the oven or oven chamber. -
Page 28: Electrical Connection
The required filters are: Before connecting, make sure the voltage and frequency match that given on the dataplate. – Nanofilter Called Water Filter, this is an accessory on request. • Connect the appliance to the power supply in a permanent way with an H05 RN-F type cable. -
Page 29: Safety Devices
4. Fasten with the corresponding cable clamp; Thermal cut-out inside fan motor 5. Remount the panel “P“ and secure with the fixing screws. • If the fan motor overheats, the thermal cut-out trips and blows fuse “F1“, causing the appliance to shut down (see Terminal board type 1 –... -
Page 30: Testing The Gas Inlet Pressure
E.7.3 Testing the gas inlet pressure E.7.6 Replacement of main burner injector The inlet pressure is measured upstream of the gas control To gain access to the main burner injectors, remove the left valve with the appliance operating (after eventual conversion hand side panel. -
Page 31: Injectors And Adjustments / Gas Types
WARNING After conversion, refit the oven outer panels. E.7.8 Injectors And Adjustments / Gas Types Refer to figure A and B of the previous paragraph). 2,25 2,75 Main burner Natural Gas injector Natural Gas See E.7.6 2.60 2.60 3.60 3.30 4.10 4.90 (AUS) -
Page 32: E.7.12 Before Completing The Installation Operations
• CONSTRUCTION TYPE A1: SOLUTION 1 (direct dis- EXHAUST PIPE WITH MANIFOLD UNDER EXTRACTOR charge under extractor hood without manifold) HOOD A = Manifold – accessory C = Oven convector gas exhaust outlet E = Adapter ring for commercial ducting G = Fixing screws * = The commercial pipes must withstand up to 350 ℃... - Page 33 The symbol on the product indicates that this Before disposing of the appliance, make sure to carefully product should not be treated as domestic check its physical condition, and in particular any parts of the waste, but must be correctly disposed of in structure that can give or break during dismantling.
Need help?
Do you have a question about the CFG102/N and is the answer not in the manual?
Questions and answers