Table of Contents

Subscribe to Our Youtube Channel
Related Manuals for Hotpoint HQ9 E1L


Summary of Contents for Hotpoint HQ9 E1L
- Page 1 HQ9 E1L and HQ9 B1L W11213339C In some European factories the letter "W" of the part code mentioned herein will be automatically 21-Apr-2018 01:11:42 EDT | RELEASED replaced by the number "4000" (e.g. "W12345678" becomes "400012345678")
- Page 2 English REFRIGERATOR USER INSTRUCTIONS ............3 In some European factories the letter "W" of the part code mentioned herein will be automatically 21-Apr-2018 01:11:42 EDT | RELEASED replaced by the number "4000" (e.g. "W12345678" becomes "400012345678")
-
Page 3: Table Of Contents
FRENCH DOOR BOTTOM MOUNT REFRIGERATOR USE AND CARE GUIDE Table of Contents REFRIGERATOR SAFETY ..............4 Proper Disposal of Your Old Refrigerator ........7 PARTS AND FEATURES ..............8 INSTALLATION INSTRUCTIONS ...........9 Getting Started .................9 Unpack the Refrigerator ..............9 Location Requirements ..............10 Electrical Requirements ..............10 Remove and Replace Refrigerator Doors ........12 Remove and Replace Freezer/Multi Temperature Door ....14 Refrigerator Levelling ..............15... -
Page 4: Refrigerator Safety
REFRIGERATOR SAFETY Your safety and the safety of others are very important. We have provided many important safety messages in this manual and on your appliance. Always read and obey all safety messages. This is the safety alert symbol. This symbol alerts you to potential hazards that can kill or hurt you and others. All safety messages will follow the safety alert symbol and either the word “DANGER”... - Page 5 SAFETY INSTRUCTIONS IMPORTANT TO BE READ AND OBSERVED Before using the appliance, read these safety WARNING: Do not use mechanical, electric or instructions. Keep them nearby for future reference. chemical means other than those recommended These instructions and the appliance itself provide by the Manufacturer to speed up the defrost important safety warnings, to be observed at all process.
- Page 6 After unpacking the appliance, make sure that it has WARNING: Do not locate multiple portable not been damaged during transport. In the event socket-outlets or portable power supplies at the of problems, contact the dealer or your nearest rear of the appliance After-sales Service.
-
Page 7: Proper Disposal Of Your Old Refrigerator
Proper Disposal of Your Old Refrigerator WARNING Suffocation Hazard Remove doors from your old refrigerator. Failure to do so can result in death or brain damage. IMPORTANT: Child entrapment and suffocation are not problems of the past. Scrapped or abandoned refrigerators are still dangerous—even if they will sit for “just a few days.”... -
Page 8: Parts And Features
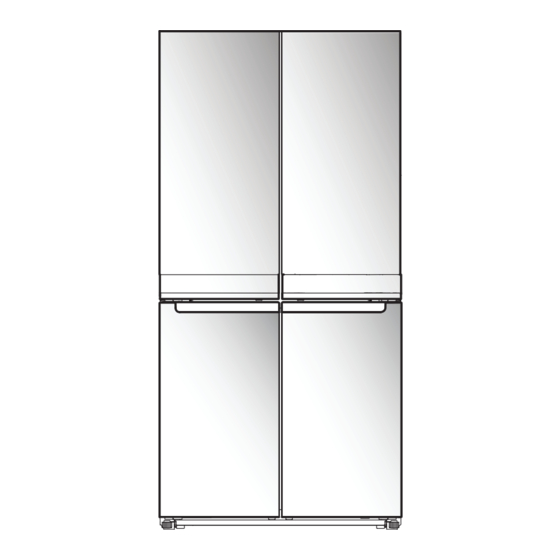
PARTS AND FEATURES Top Light Hinged Seal Balcony Glass Shelf Fresh Crisper Ice Maker Freezer Tray Super Freeze Drawers A . Refrigerator B . Freezer C . Multi Temperature (only with HQ9 B1L) In some European factories the letter "W" of the part code mentioned herein will be automatically 21-Apr-2018 01:11:42 EDT | RELEASED replaced by the number "4000"... -
Page 9: Installation Instructions
In order to receive a more complete assistance, please ■ After you remove all of the packaging materials, clean inside of register your product on http://www.hotpoint.eu/register. your refrigerator before using it. See cleaning instructions in the “Refrigerator Care” section. In some European factories the letter "W" of the part code mentioned herein will be automatically 21-Apr-2018 01:11:42 EDT | RELEASED replaced by the number "4000"... -
Page 10: Location Requirements
Location Requirements Electrical Requirements WARNING WARNING Electrical Shock Hazard Explosion Hazard Plug into a grounded (earthed) outlet. gasoline, away from refrigerator. Do not remove ground prong. Do not use an adapter. Do not use an extension cord. To ensure proper ventilation for your refrigerator, allow for a Failure to follow these instructions can result in death, 1.25 cm space on each side and at the top. - Page 11 Electrical Requirements (Great Britain and Ireland only) IMPORTANT: This refrigerator must be earthed. Fuse Replacement If the main lead of this refrigerator is fitted with a BS1363A, 13 A fused plug, to replace a fuse in this type plug use an A.S.T.A. approved fuse to BS 1362 type and proceed as follows: 1.
-
Page 12: Remove And Replace Refrigerator Doors
Remove and Replace Refrigerator Doors NOTE: Measure the width of your door opening to see whether or not you need to remove refrigerator doors to move refrigerator into your home. If door removal is necessary, see the following instructions. IMPORTANT: If refrigerator was previously installed and you are moving it out of the home, turn refrigerator control off before you begin removing the doors. - Page 13 WARNING Remove Left-Hand Door IMPORTANT: The wiring for the UI run through left-hand door Excessive Weight Hazard hinge, so they must be disconnected before removing door. 1. Using a Phillips screwdriver, remove cover from top hinge. Use two or more people to lift the refrigerator door. Failure to do so can result in back or other injury.
-
Page 14: Remove And Replace Freezer/Multi Temperature Door
3. Using 5 mm socket wrench, remove four internal screws from Remove and Replace Freezer/Multi top hinge and set aside. Temperature Door 1. Keep freezer doors closed until you are ready to lift them free from the cabinet. NOTE: Provide additional support for freezer door while hinges are being removed. -
Page 15: Refrigerator Levelling
Final Steps WARNING Electrical Shock Hazard Plug into a grounded (earthed) outlet. Do not remove ground prong. Do not use an adapter. Do not use an extension cord. Failure to follow these instructions can result in death, fire, or electrical shock. 1. -
Page 16: Using The Controls
Using the Controls The touch-activated controls are located on the left hand refrigerator door. The control panel includes information about various buttons and indicators. Refrigerator and freezer temperature indicator shows the last temperature set point. 1. Sound Indicator 9. Super Freeze Indicator 2. -
Page 17: Lighting The Refrigerator
When adjusting temperature set points, use the following Demo Mode (only for HQ9 B1L) chart as a guide: CONDITION TEMPERATURE ADJUSTMENT This mode is used when refrigerator is on display in a retail shop or if you want to turn the cooling off and deactivate all other Refrigerator too cold Refrigerator setting 1°... -
Page 18: Refrigerator Use
REFRIGERATOR USE Opening and Closing Doors Ice Maker There are two refrigerator compartment doors. The doors can To make ice, fill ice tray with purified water and place Manual ■ be opened and closed either separately or together. There is a Ice maker into Freezer top shelf. -
Page 19: Shelves, Bins And Drawers
SHELVES, BINS AND DRAWERS Shelves and Shelf Frames The shelves in your refrigerator are adjustable to meet your individual storage needs. Storing similar food items together in your refrigerator and adjusting the shelves to fit different heights of items will make finding the exact item you want easier. -
Page 20: Freezer Storage Compartments
For maximum freezer capacity, you may remove the freezer Refrigerator Balconies drawer to expose the freezer shelf. To remove the upper drawer: The balcony on your refrigerator door are adjustable to meet your 1. Grasp the handle of drawer and slide drawer straight out to individual storage needs. -
Page 21: Refrigerator Care
REFRIGERATOR CARE Cleaning Style 2 — Stainless Steel IMPORTANT: WARNING Use recommended stainless steel cleaners and cloths ■ only. Damage to stainless steel finish due to improper use of cleaning products or using non-recommended cleaning products is not covered under the warranty. Avoid exposing stainless steel appliances to caustic or ■... -
Page 22: Lights
Interior Cleaning Moving 1. Unplug refrigerator or disconnect power. When you are moving your refrigerator to a new home, follow these steps to prepare it for the move. 2. Hand wash, rinse, and dry removable parts and interior 1. If your refrigerator has an automatic ice maker: surfaces thoroughly. -
Page 23: Troubleshooting
TROUBLESHOOTING First try the solutions suggested here to possibly avoid a service call. WARNING Electrical Shock Hazard Plug into a grounded (earthed) outlet. Do not remove ground prong. Do not use an adapter. Do not use an extension cord. Failure to follow these instructions can result in death, fire, or electrical shock. - Page 24 TROUBLESHOOTING First try the solutions suggested here to possibly avoid a service call. If you experience Possible Causes Solution The lights do not work. Your refrigerator is equipped with If there is power to refrigerator and lights do not illuminate LED lighting which does not need when a door or drawer is opened, call for service or to be replaced.
- Page 25 TROUBLESHOOTING First try the solutions suggested here to possibly avoid a service call. If you experience Possible Causes Solution Temperature and Moisture Temperature is too warm. The refrigerator has just been Allow 24 hours following installation for the refrigerator to cool installed.
- Page 26 TROUBLESHOOTING First try the solutions suggested here to possibly avoid a service call. WARNING Explosion Hazard To view an animation showing how to adjust and align the doors, refer to the Product Help/FAQ section of the brand website and search for “Door Closing and Door Alignment.” If you experience Possible Causes Solution...
Need help?
Do you have a question about the HQ9 E1L and is the answer not in the manual?
Questions and answers