Cowon PLENUE R2 - Portable Music Player Manual
- User manual (29 pages) ,
- User manual (27 pages)
Advertisement
Before you start
Package Contents

* Actual package contents may differ from the above images.
Names of Parts and Functions

Buttons
- Power ON / OFF product.
Press and hold the![]() button to turn on the product.
button to turn on the product.
While turned on, press and hold the![]() button to turn off the product.
button to turn off the product.
Display ON / OFF 1), 2)
Press the![]() button briefly to turn on/off the screen.
button briefly to turn on/off the screen.
![]()
- Volume UP / DOWN 3)
Adjusts the volume in 140 levels. Each level adjusts the volume by 0.5dB. Press and hold the button to quickly raise or lower the volume.
![]()
- Play / Pause
Press the button to play the track. While playing, press the button to pause the track.
![]()
- Previous Track / Next Track
Press briefly to select the previous or next track.
Rewind / Fast Forward
Press and hold to rewind or fast forward.
![]()
- Multi Button 4)
Touch the Multi Button to quickly navigate to the playback, playlist, settings, or volume control screens.
![]()
 button to turn on the product.


1) Turn on Lock Screen to disable the touch screen. Locked screen can be adjusted in 'Settings  System Locked screen'.
2) If the screen is turned off while the product is turned on, the LED will blink white.
3) If the buttons or touch screen do not respond during use, press and hold the volume + and − buttons to reset for 6 seconds or more.
4) Multi Button can be adjusted in 'Settings System Multi Button'.
* You can restrict control of physical buttons, except the power button, in 'Settings System Button lock'.
Volume Control Screen

Adjust the 140-step volume control by swiping up or down on the volume control screen. Each level adjusts the volume by 0.5dB.
If the Multi Button's function is set to volume adjustment under system settings, you will be redirected to the volume control screen when touched.
Alternatively, touch the volume icon on the top status bar during music playback to be redirected to the volume control screen.
* Listening at high volume(85dB and above) for an extended period of time may harm your hearing.
Basic Use
Power Connection and Charging
- USB cable connects the PC and USB port.

- The LED indicates the status of the battery charge. (Red: Charging, Green: Charging Complete)

- PLENUE R2 can also be charged with an authentic USB DC adapter for smart phones. If 5V/2A or higher USB DC adapters are used, charging will be finished in approximately 3 hours. The charging time may vary if the product is in use while charging.
- Be sure to connect the device directly to a USB port located on the back of the PC. The device may be unable to establish a connection or be charged as the power supply from a front USB port or a non-powered external USB hub may be unstable.
- Fully charge the product before using it for the first time or after a period of disuse.
- For your safety, do not charge the product in an enclosed space such as under a blanket or inside a bag. Charge the product in an open space.
Connecting and Disconnecting from the PC
- Use the USB cable to connect PLENUE R2 to your PC.
- Press and hold the
![]() button to turn on the product.
button to turn on the product. - The connection image appears on the PLENUE R2 screen.
- Also make sure to check My Computer or Windows Explorer to see if PLENUE R2 is properly connected to the PC.
- Use PLENUE R2 to copy the track you wish to listen to.
- When done, click the
![]() icon on the system tray to safely remove PLENUE R2 from the PC.
icon on the system tray to safely remove PLENUE R2 from the PC. - Click the popup message.

- Make sure that PLENUE R2 has been safely disconnected, then remove it from the PC.


- The maximum number of files and folders that can be recognized by the product: 70,000 / 70,000 (microSD)
- Disconnect the product after performing 'Safely remove hardware' function.
- The following message may appear randomly, but it does not indicate that the product is malfunctioning. Please try again.

- If your operating system does not display the'Safe To Remove Hardware'window, disconnect the player after all transfer operations are completed.
- Only simple file transfer operation is available for Linux and Mac OS.

Inserting and Removing the microSD Card
- Properly place the microSD Card in the microSD card slot as shown in the picture. Gently press the card to insert it.

- When the database is automatically refreshed, the music files on the microSD card can be viewed.
- When removing the microSD card, turn off the power then press the microSD card again to remove it.

* For data protection, always turn off the power before removing the microSD card.
Using Headphone Mode
PLENUE R2 provides 'Headphone mode' to increase output for use with high impedance headphones.
- Turn Headphone Mode on and off in 'Settings
![]() Music
Music ![]() Headphone mode'.
Headphone mode'. - The icon in the upper right corner changes based on Headphone mode.
* When Headphone mode is turned on, the output will increase, so please use caution.
Sound Source LED Indicator
The PLENUE R2's LED light changes color according to sound source.
| Color | Sound Source |
 Cyan | Normal Sound |
 Magenta | HD Sound (Sound sources in excess of 48kHz or 24bit or greate ) |
 Yellow | DSD / DXD |
Connecting to Balanced Audio Port
PLENUE R2 has a high quality balanced line-out port that outputs + and - audio signals.
- Connect balanced cable-supporting headphones (or a in-ear headphones) to the balanced line-out port (2.5mm).
![]()
- Connect the receiver to the balanced audio port and check the icon status in the upperright corner of the screen. (
![]() )
)

* The status icon in the upper-right corner of the screen will change when a receiver is connected to the unbalanced audio port. ( ![]() )
)
* Balanced and unbalanced output cannot be generated at the same time.
Using Bluetooth
You can connect to a Bluetooth-supported device to listen to music. Bluetooth settings are located under 'Settings Bluetooth'.
- Enable Bluetooth.
![]()
- Search for device to be paired.
![]()
- Place device within 1 meter of product.
- Select and connect to discovered device.
![]()
- When connected to Bluetooth, the Bluetooth connection icon turns blue. (
![]() )
)
- When connected to Bluetooth, the Bluetooth connection icon turns blue. (
- Select
![]() to edit the name of the connected device.
to edit the name of the connected device.
![]()


 )
) to edit the name of the connected device.
- You can select a connected device to terminate the Bluetooth connection.
- Select
![]()
![]() to terminate a device pairing.
to terminate a device pairing. - If a password or PIN is required when pairing, select the
![]() button, and then enter "0000" when prompted.
button, and then enter "0000" when prompted.

 to terminate a device pairing.
  button, and then enter "0000" when prompted.
 Call Alarm
While the PLENUE R2 is connected to your smartphone, you will receive notifications for incoming calls during music playback.
- Enable Bluetooth.
![]()
- Select the Call Alarm button to change to call alarm mode. (
![]() )
)
![]()
- Enable Bluetooth on your smartphone and pair with the PLENUE R2.
![]()
- If you receive a call during music playback, an alarm will sound and the top icon will change. (
![]() )
)
![]()

 )
)

 )
)
- The call alarm function is only available when connected to a wired receiver.
- If you answer a call on your smartphone, the Bluetooth connection between your phone and the PLENUE R2 will be terminated.
Firmware Upgrade
The firmware uses built-in programs in the hardware and upgrades to improve product capabilities and fix bugs in the software. PLENUE R2 may use the firmware to adjust product performance or methods of use without prior notice, and minor malfunctions in the firmware may occur.
How to upgrade the firmware
- Download the latest firmware from the SUPPORT section of the website (http://www.COWON.com).
- Use the USB Cable to connect PLENUE R2 to the PC.
- Unzip the downloaded firmware and copy it to the root folder of PLENUE R2.
- Once the product is safely disconnected, remove the USB cable.
- When you turn on the product, the firmware upgrade process will start.
- When firmware upgrade is complete, turn on the power and go to 'Settings
![]() System
System ![]() Information' to check the version of the installed firmware.
Information' to check the version of the installed firmware.
- Fully charge the player before upgrading the firmware.
- Do not turn the player off before the firmware update has been completed. It may damage the product, and will void any warranty.
- Back up any important data before the firmware upgrade as any data stored on the device may be deleted during the process. Our company is not responsible for any loss of data, for any reason.
Using the Product
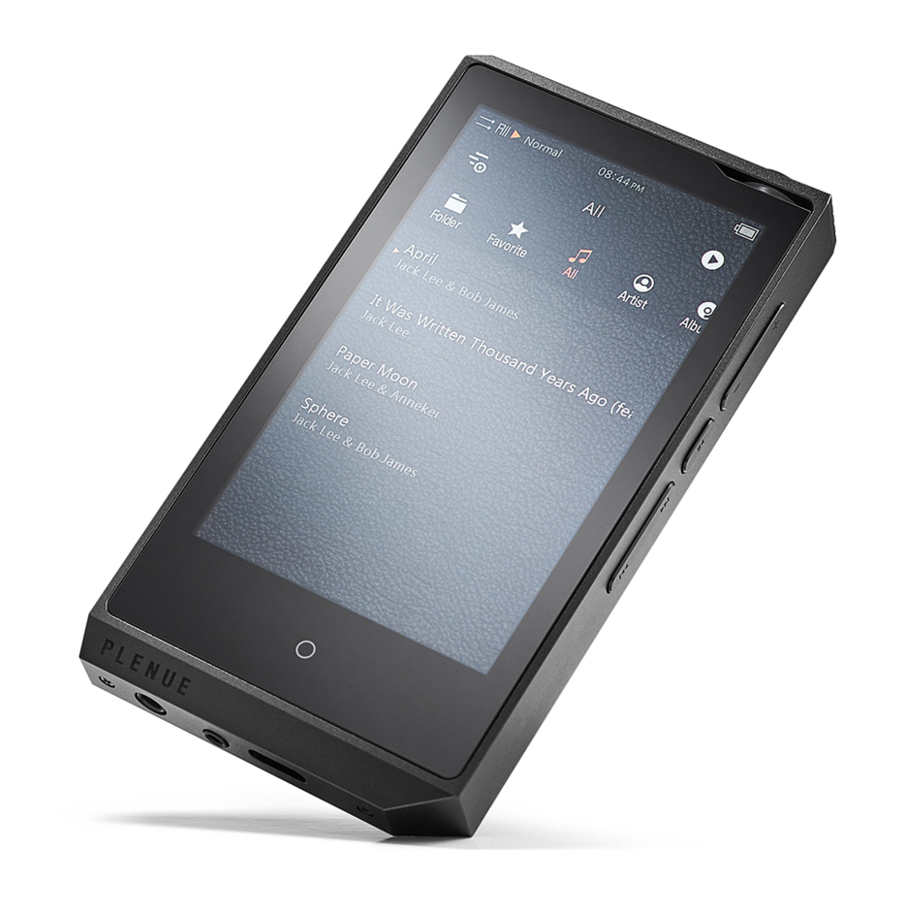
Playback Screen

- Play / Pause the track.
- Press briefly to go to the previous track. Press and hold to rewind.
- Press briefly to go to the next track. Press and hold to fast forward.
- Drag the bar to the desired point in the track.
- Navigate to the Music Selection Screen.
- Go to the volume control screen.
- Adjust the playback settings.
- If this icon is displayed, click on the album artwork to see the lyrics in the album information screen.
- Enable looping.
- Enable shuffling.
- Choose to play a track, all tracks, or a folder.
* When the AI Audio is activated, the AI logo appears on the volume, JetEffect, and Shuffle.
![]()
Music Selection

Select a folder, artist, or album to view the corresponding track list.
 | View track lists by folder. |
 | View track lists added to Favorites. |
 | View all tracks saved in the product. |
 | View track lists by artist. |
 | View track lists by album. |
 | View track lists by genre. |
 | View track lists by CUE/SACD. |
 | View track lists by new files. |
* In the Track List Screen, press and hold  navigate to the Initial Track List Screen.
Playback Settings

- Navigate to Detailed Settings.
- Add the current track to Favorites.
- Select the preset for JetEffect 7.
- Replay a section of the track.
- Activate auto rotation.
- Set the Headphone mode On or Off.
- Skip the silent part of the beginning and the ending for a track. (max 500ms)
- Set the skip interval in various units. (Extended function of 'previous track/next track')
- You can enable or disable Bluetooth.
- Select the skin on the playback screen.
- Select the level meter.
- Show time elapsed or time remaining. 1)
- Select the background image.
1) Select the Elapsed+, you can hide the progress bar above the album art.
* PLENUE R2 provides Gapless Playback to remove gaps between tracks during playback. Gapless Playback is applied in all situations without additional setup.
* Some gap may exist if the music file or album images are large.
Detailed Settings
JetEffect 7 Settings
- In Detailed Settings, select JetEffect 7.
- Select User 1 / User 2 / User 3 / User 4 and set the user presets.
![]()
- EQ : Change the tone by adjusting the level of each frequency.
![]()
- BBE+: Select and apply BBE sound effect.
![]()
- SE : Select and apply Chorus and Reverb effects.
![]()


* Press the  button to set the EQ and EQ filter values for all 10 bands. Touch the desired value to quickly change the settings
| Select from 50 presets for JetEffect 7. | Normal / BBE / BBE ViVA / BBE ViVA 2 / BBE Mach3Bass / BBE MP / BBE Headphone / BBE Headphone 2 / BBE Headphone 3 / Rock / Jazz / Classic / Ballad / Pop / Club / Funk / Hip Hop / Techno / Blues / Metal / Dance / Rap / Wide / X-Bass / Hall / Vocal / Maestro / Feel the Wind / Mild Shore / Crystal Clear / Reverb Room / Reverb Club / Reverb Stage / Reverb Hall / Reverb Stadium / Reverb Chamber / Reverb Room 2 / Reverb Club 2 / Reverb Hall 2 / Reverb Auditorium / Reverb Cathedral / Reverb Stadium 2 / Reverb Canyon / Reverb Long / Chorus 1 / Chorus 2 / Chorus 3 / Unison 1 / Unison 2 / Flange | |
| You can manually adjust BBE, 3D Surround, etc. using 16 different user presets. | User 1 / User 2 / User 3 / User 4... User 161) | |
| JetEffect 7 is the most sophisticated and powerful sound technology. It brings listeners closer to the natural presence and impact of a "live performance" than ever before. | BBE | Sound effect that refines the sound quality. (Phase correction) |
| Mach3Bass | Provide deeper, tighter, and more musically accurate bass frequency. | |
| 3D Surround | Provide the three-dimensional surround sound effect. | |
| MP Enhance | Restore and enhances the harmonics lost through compression. | |
| Chorus | Sound effect that enriches the audio. | |
| Reverb | Maximize the natural and live presence of the sound. | |
* You may hear distortion or noise when using extreme settings of JetEffect.
* Using JetEffect to play files of high quality, such as 24bit/192kHz, may slow the overall operation.
* For detailed information about BBE, please see the introduction to BBE on our homepage(www.COWON.com).
1) In "Settings  Display User Presets", you can extend presets up to 16.
Music
Skip interval: Set the skip interval in various units. (Extended function of 'previous track/next track') Choose an interval of Track/2/3/4/5/10/20/30 seconds.
Seek interval: Set the search speed for Fast Forward/Rewind. Choose an interval of 3/5/10/20/30 seconds for the search speed.
Resume: Turn the setting on/off to resume the last track when the power is turned on.
Remove silence: Turn the setting on/off to skip the silent part of the beginning or the ending for a track.
Headphone mode: Select Headphone mode to increase the output for use with headphones.
DAC filter rolloff: You can adjust the sound by changing the filter type of the DAC.
Display
Language: Select the system language from 17 different languages.
Brightness: Adjust the brightness of the screen in 10 levels.
User preset: Change the number of user presets.
Show song change: If a playing song is changed when the screen is off, the screen turns on automatically and shows the information of a newly changed song for 5 seconds.
Timer
Sleep timer: The product turns off after the set amount of time.
Auto off: If there is no activity for a set amount of time, the product automatically turns off.
Auto display off: If there is no activity for a set amount of time, the screen automatically turns off.
Time: Set the current time.
Bluetooth
You can set the PLENUE R2's Bluetooth function.
AI Audio
AI Volume: Normalize the volume consistently for the audio file that has been played before. (Based on Normal Preset)
AI JetEffect: Automatically match the best JetEffect with each audio file.
AI Shuffle: Analyze your playback pattern and arrange the playlist based on the preference level.
Shuffle by preferences: Arrange the playlist based on the priority level set for preferences.
Shuffle by time: Arrange the playlist based on the priority level set for current time.
Reset AI Volume: Select whether to [Reset AI Volume].
Reset AI Shuffle: Select whether to [Reset AI Shuffle].
System
Hearing Protection: Hearing Protection can be set.
Multi Button: Customize the multi button functions.
Button lock: Restrict the operation of physical buttons while the screen is turned off.
Lock Screen : Restrict the touch display operation.
Audio L/R : Adjust the stereo balance of the audio.
LED: Turn the LED light on or off on the upper power button when the screen is turned off.
USB mode: Select MSC/DAC to use the USB DAC.
* Playback of some files may have limitations using USB DAC depending on PC specifications.
* An OS of Windows 7 / 8 / 10 is recommended for a USB DAC, but it may not work properly in Windows XP or lower versions.
USB DAC Power: You can set the power supply method for the USB DAC feature.
Database update: Refresh the internal database in the product.
Load defaults: Reset all settings to the default.
Format internal memory: Internal memory can be formatted by pressing and holding for 5 seconds.
Formatting deletes all data in the internal memory, so please use when necessary.
Information : Check the firmware version, available memory, and memory used.
Product Specification
| Model Name | PLENUE R2 | |||
| Product Capacity | Built-in Memory 1) : 128GB / External Memory: microSD SDXC | |||
| Display | 3.7"AMOLED Touch Display (480x800) | |||
| Dimensions & Weight | 61.5mm(W) x 112.9mm(H) x 13.9mm(D) / 154g | |||
| Case | Premium High-Strength Metal Body | |||
| Buttons | POWER, PLAY/PAUSE, VOL+, VOL- FF, REW, Multi Button | |||
| CPU | ARM Cortex A9 1.2GHz Dual-Core | |||
| Audio | File Formats | DXD / DSD(DFF, DSF, SACD-ISO) / FLAC / WAV / AIFF / ALAC / APE / MP3 / WMA / OGG / WV / TTA / DCF | ||
| Audio Codecs | DXD: ~352.8/384kHz DSD Native: ~11.2MHz (DSD64, DSD128, DSD256)2) FLAC, WAV, AIFF, ALAC, WV(WavPack), ~32bit/384kHz
| APE: Fast, Normal, High and Extra High compression rates (~24bit/384kHz) TTA: ~24bit/384kHz MP3: MPEG 1/2/2.5 Layer 3, ~320kbps WMA: ~320kbps, ~96kHz OGG: ~Q10, ~16bit/192kHz | ||
| Bluetooth | 3.0 (Supported profiles: A2DP, AVRCP / Supported codecs: SBC, aptX) | |||
| Track Information | CUE sheet, SACD-ISO (2Ch) | |||
| Lyrics | LRC, LDB, Lyrics3, ID3 Tag Lyrics (Time Information Yes/No) | |||
| JetEffect 7 | 66 Presets (50 Presets + 16 User Presets) | |||
| EQ | 10 Band Equalizer (EQ Filter) | |||
| BBE+ | BBE, Mach3Bass, 3D Surround, MP Enhance | |||
| Special Effect | Chorus (8 modes), Reverb (9 modes) | |||
| Audio Characteristics | DAC | CS43131 X 2 (Dual DAC) | ||
| SNR | 130dB Unbalance / 136dB Balance | |||
| THD+N | 0.0004% Unbalance / 0.0005% Balance (24bit, 48kHz) | |||
| Stereo Crosstalk | -128dB Unbalance / -148dB Balance | |||
| Output | 2.0Vrms Unbalance / 4.0Vrms Balance | |||
| Output Impedance | 0.6Ω Unbalance / 1.2Ω Balance | |||
| Volume | 140 Levels | |||
| Clock | Precision Clock TCXO (Phase Jitter 1.0ps) | |||
| Battery & Power | Battery | Built-in Rechargeable Lithium Polymer Battery 3,000mAh / 3.7V | ||
| Playback Time | Approximately 20 hours (MP3, 128kbps) / 18.5 hours (24bit, 96kHz, FLAC) 3) | |||
| Charging Time | Approximately 3 hours (with 5V/2A or higher USB Type-C DC adapter) | |||
| Output Port | Earphone Jack (3.5mm) / Optical Output (3.5mm) / Balanced Audio Port (2.5mm) | |||
| Player | Various Skins for the Playback Screen, Analog Level Meter, Matrix Browser, Multi-Favorite | |||
| System Requirement | CPU | Pentium lll 500MHz or higher | ||
| OS | Windows 10 / 8 / 7 / Vista / XP / 2000 / ME: All functions supported MAC OS 10.x / Linux v2.4 or higher: File transfer supported | |||
| USB Port | 2.0 High Speed (recommended) | |||
1) Actual capacity may vary due to system memory used by the product.
2) Native DSD (DFF/DSF/SACD-ISO) tracks do not support Bluetooth, Optical Output, or JetEffect.
3) The playback time is based on the company's own test standards, thus it may differ from the actual playback time.
Troubleshooting
- I am still confused even after reading the manual.
COWON website(www.COWON.com) provides support for users of COWON products with FAQ (Frequently Asked Questions). Users are strongly encouraged to check out the website for further information regarding product usages and firmware upgrades. For individual inquiries, please contact us on-line as we will try to help you as best as we can. - The player does not turn on.
Verify the battery level or that the device is connected to a power supply. Charge the battery for a certain period and turn on if the battery is completely discharged. If the buttons or touch screen do not respond during use, press and hold the volume + and − buttons to reset for 6 seconds or more. - I can't hear any sound.
Check if the volume is set to "0". Check if there is any file available in the player. If there is no file in the player, you will not hear any sound. Please note that corrupted files will result in a noise or discontinued playback. Make sure the earphones are connected properly. Impurities in the earphone jack can cause a noise. - I've set the incorrect language, and now I can't operate the device.
If you've set the incorrect system language, connect the device to your computer, delete the 'SYSTEM' folder of the device, and then reboot the device. You will be able to select the language the same as the initial setup.
* If you've set user EQ profiles, be sure to back up the profiles before deleting. - Files that I have stored do not appear in the list.
Each mode shows you a list of playable files only. To view all files that you have stored, select the Browser mode. Please note that System folder will not appear in the Browser. - Computer cannot recognize the player when connected.
If connection is unstable due to frequent disconnects, connect directly to the USB port on the main board of the PC. - Memory capacity of the player is different or smaller than specified.
The memory capacity indicated by Windows may be different from that indicated by the memory manufacturer. The actual capacity will be reduced from the original size because some space of the memory should be used as the system area for normal operation. - The player does not play properly when memory is full.
Part of the memory is used for settings and system memory in the product. If files are saved in this space, the product may not function properly. Therefore, please keep a minimum of 100MB of free memory while using the product. - After formatting the product on my PC, it can no longer be read by my PC, the memory has been reduced, or the file transfer rate is slower.
The built-in memory of the product is already formatted and does not require additional formatting. However, if formatting is necessary, please do so by using the internal memory formatting function included within the product; when formatting by connecting the product to a PC via USB cable, use a utility that supports large-capacity FAT32 and set the default allocation size to 32KB, or format as exFAT to avoid a decline in memory size or speed. This product does not support formatting on MAC OS.
Precautions
As these precautions are provided for the correct use of the product as well as user safety, be sure to familiarize yourself with them. The company will not be held responsible for any accident that may occur due to the failure to heed these precautions. The following information applies to all products manufactured or produced by our company.
- Do not use this product for other purposes than those described in this manual.
- Handle manual, product package materials, accessories, etc with care to prevent cuts and injuries to your body.
- Do not view videos, pictures and texts stored in your player while driving a vehicle for your safety. Operating other features of the player is also dangerous and may cause fatal accidents while driving.
- The wearing of earphones while operating a vehicle, exercising, or walking may impair, mask or prevent recognition of emergency signals, alarms, and announcements. Doing so may also be unlawful depending on the region.
- Listening at high volume(85dB and above) for an extended period of time may harm your hearing.
- For your protection, use the player in a well lit area where LCD screen will not overly strain your eyes.
- Do not attempt to disassemble the player. Disassembly will void the warranty and the unit will be permanently disqualified from any warranty services.
- For your safety, be sure to always use genuine cables provided by our company.
- If you are using a product that comes with an AC power adaptor, please use the genuine charger offered by COWON.
- When connecting to a PC, use only USB ports on the mother board or a USB Host card. Using an external USB hub may not guarantee proper operation(e.g. USB ports on a keyboard or an external USB hub).
- Do not mix directions when connecting cables to your player or PC. Connecting cables incorrectly may damage your player or PC. Also, do not bend or press connection cables with heavy objects.
- Take extra care not to apply external shock or pressure when using products with displays(LCD, AMOLED, or Touch Pad). Warranty may be voided if damage occurs due to the aforementioned circumstances.
- Do not drop or expose the product to hard impact. This may result in malfunctions and/or unit failure, voiding the warranty.
- Be careful not to be torn or ruptured by any sharp materials, such as animals' teeth.
![burn hazard]() Be sure to avoid charging the product in the vicinity of a heating apparatus or in a high-temperature environment. To minimize the risk of damage or fire, never cover the device with any objects (charging or during operation.blanket, towel, etc.) or block the natural heat dissipation while
Be sure to avoid charging the product in the vicinity of a heating apparatus or in a high-temperature environment. To minimize the risk of damage or fire, never cover the device with any objects (charging or during operation.blanket, towel, etc.) or block the natural heat dissipation while- If you smell something burning or feel excessive heat while using the product, press the RESET button to stop operation and contact the place of purchase.
- If you find any abnormalities with the battery such as swelling, press the RESET button immediately to stop the operation and contact the place of purchase.
- Do not expose the player to water or keep it in a damp or humid location for an extended period of time. If the player is damaged from moisture as described above, product failure is then classified as a user's misuse.
![shock hazard]() Touching the player with wet hands may cause damages and malfunctions. Handle the power plug only with dry hands (otherwise an electric shock may occur).
Touching the player with wet hands may cause damages and malfunctions. Handle the power plug only with dry hands (otherwise an electric shock may occur).- Using the player in places with high occurrences of static electricity may cause malfunctions.
- Keep the player away from magnets and direct magnetic fields, as they can cause malfunctions.
- This product can be connected via Bluetooth up to a distance of about 10 meters. The following conditions may cause noise, signal interruption, or abnormal operation:
- If signal transmission is interrupted (holding the product in hand, placing the product in a bag, etc.)
- If signal is obstructed by an obstacle (person, metal, wall, etc.)
- If other wireless devices are being used in the vicinity (wireless LAN, microwave oven, smartphone, etc.)
![]()
Be sure to disconnect the power supply to the PC and USB power adaptor during lightning or thunder storm, to prevent danger to the user or the risk of fire hazards.- Do not expose the player in either cold weather of under 0℃(32℉) or hot temperature over 40℃(104℉) such as inside automobiles. This may cause fatal damages to your player.
- Keep the player in cool and ventilated places, away from direct sunlight as it may cause deformation and damages to internal circuitry or LCD screen.
- Do not use detergent or other chemicals on the product surface as it may cause fading. In this case, wipe the soiled area carefully with a soft cloth.
- In case of using this device primarily for a storage device, it is recommended to back up all data before use. Our company is not responsible for any loss of data, for any reason.
- All data stored in the player may become deleted when being serviced. Our company is not responsible for any loss of data that occurs during repair. Be sure to back up data to a safe place before sending your device for repairs.
- When formatting the built-in memory, select the file system specified in the manual(e.g. FAT32 / FAT16 / NTFS).
- The price of the product may fluctuate due to unexpected commercial conditions. Our company is not obligated to provide cash compensation for any reason.
- <For MAC OS users>
EJECT' procedure must be performed when removing the product from the Mac.
 Be sure to avoid charging the product in the vicinity of a heating apparatus or in a high-temperature environment. To minimize the risk of damage or fire, never cover the device with any objects (charging or during operation.blanket, towel, etc.) or block the natural heat dissipation while
 Touching the player with wet hands may cause damages and malfunctions. Handle the power plug only with dry hands (otherwise an electric shock may occur).
Documents / Resources
References
Download manual
Here you can download full pdf version of manual, it may contain additional safety instructions, warranty information, FCC rules, etc.
Advertisement


Need help?
Do you have a question about the PLENUE R2 and is the answer not in the manual?
Questions and answers