Table of Contents
Advertisement
Advertisement
Table of Contents

Related Manuals for Cowon PLENUE D


Summary of Contents for Cowon PLENUE D
- Page 1 USER’S GUIDE ver. 1.1 EN...
- Page 2 THANK YOU FOR PURCHASING A COWON PRODUCT. We do our utmost to deliver DIGITAL PRIDE to our customers. This manual contains information on how to use the product and the precautions to take during use. If you familiarize yourself with this manual, you will have a more enjoyable digital experience.
-
Page 3: Copyright Notice
General + COWON and PLENUE are registered trademarks of COWON SYSTEMS, Inc. + COWON SYSTEMS, Inc. owns the copyright to this manual, and any unauthorized distribution of its contents, whether in part or in its entirety, is strictly prohibited. + COWON SYSTEMS, Inc. complies with laws and regulations related to records, disks, videos and games. Users are also encouraged to comply with the relevant laws and regulations. -
Page 4: Table Of Contents
CONTENTS Before you start! Using the Product Precautions Playback Screen Package Components Music Selection Names of Parts and Functions Playback Settings Buttons Detailed Settings Basic Use Additional Power Connection and Charging Product Specification Connecting and Disconnecting the PC Inserting and Removing the microSD Card Troubleshooting Firmware Upgrade... -
Page 5: Before You Start
The company will not be held responsible for any accident that may occur due to the failure to heed these precautions. The following information applies commonly to all products manufactured and produced by COWON SYSTEMS, Inc. + Do not use this product for other purposes than those described in + Take extra care not to apply external shock or pressure when using this manual. - Page 6 + In case of using this device primarily for a storage device, it is recommended to back up all data before use. COWON SYSTEMS, + Keep the player away from magnets and direct magnetic fields, as they can cause malfunctions.
-
Page 7: Package Contents
Before You Start! PACKAGE CONTENTS Quick Guide PLENUE D Micro USB Cable Warranty * Actual package contents may differ from the above images. -
Page 8: Names Of Parts And Functions
Before You Start! NAmES OF PARTS AND FUNCTIONS Power Button Volume Up (+) Volume Down (−) Play / Pause REW / Previous Track Earphone Jack FF / Next Track microSD Card Touch Display Micro USB Port... -
Page 9: Buttons
Before You Start! BUTTONS Power On / Off Previous Track / Next Track Press and hold the button to turn on the product. While turned on, Press briefly to select the previous or next track. press and hold the button to turn off the product. Rewind / Fast Forward Display On / Off Press and hold to rewind or fast forward. -
Page 10: Basic Use
2. The LED indicates the status of the battery charge. (Red - Charging, Green - Charging Complete) - PLENUE D can also be charged with an authentic Micro USB DC adapter for smart phones. If 5V/1A or higher Micro USB DC adapters are used, charging will be finished in approximately 3.5 hours. -
Page 11: Connecting And Disconnecting The Pc
CONNECTING AND DISCONNECTING FROm THE PC - The maximum number of files and folders that can be recognized 1. Use the Micro USB cable to connect PLENUE D to your PC. by the product 2. The connection image appears on the PLENUE D screen. -
Page 12: Inserting And Removing The Microsd Card
Basic Use INSERTING AND REmOvING THE microSD CARD 1. Properly place the microSD Card in the microSD card slot as shown in the picture. Gently press the card to insert it. 2. When the database is automatically refreshed, the music files on the microSD card can be viewed. 3. -
Page 13: Firmware Upgrade
- Do not turn the player off before the firmware update has been completed. It may damage the product, and will void any warranty. - Back up any important data before the firmware upgrade as any data stored on the device may be deleted during the process. COWON... -
Page 14: Using The Product
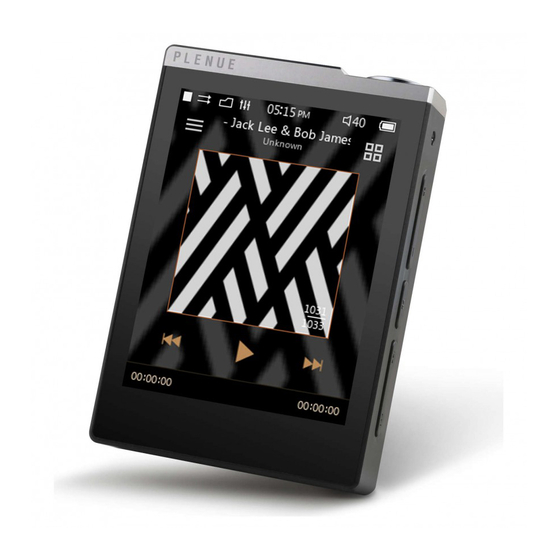
Using the Product PlAYBACK SCREEN Play / Pause the track. Press briefly to go to the previous track. Press and hold to rewind. Press briefly to go to the next track. Press and hold to fast forward. Drag the bar to the desired point in the track. Navigate to the Music Selection Screen. -
Page 15: Music Selection
Using the Product mUSIC SElECTION View track lists by folder. Move to the music playback screen. View track lists by artist. View various functions associated with music selection. View track lists by album. Move the selected song to the top of the playlist. -
Page 16: Playback Settings
Select the skin on the playback screen. Settings. Add the current track to Favorites. Replay a section of the - PLENUE D provides Gapless Playback to remove track. gaps between tracks during playback. Gapless Playback is applied in all situations without Select the preset for additional setup. -
Page 17: Detailed Settings
Using the Product DETAIlED SETTINGS JetEffect 5 Settings 1. In Detailed Settings, select JetEffect 5 . 2. Select User 1 / User 2 / User 3 / 3. EQ : Change the tone by 4. BBE : Select and apply BBE 5. -
Page 18: Detailed Settings
* You may hear distortion or noise when using extreme settings of JetEffect. * Overrall operation speed may be adversely affected when using JetEffect while playing high-resolution music files (e.g. 24bit, 192kHz). * For detailed information about BBE, please see the introduction to BBE on our homepage(www.COWON.com). -
Page 19: Detailed Settings
Using the Product DETAIlED SETTINGS Display Music Skip interval : Set the skip interval in various units. (Extended Language : Select the system language from 17 different languages. function of ‘previous track/next track’) Choose an interval of Font : Change the display font. Track/2/3/4/5/10/20/30 seconds. -
Page 20: Additional
Additional PRODUCT SPECIFICATION PLENUE D Model Name Product Capacity Built-in Memory : 32GB / External Memory : microSD Card Display 2.8” Wide Angle Touch LCD (240x320) Dimensions & 53.1mm(W) x 77.2mm(H) x 14.9mm(D) / 94g Weight POWER, PLAY/PAUSE, VOL+, VOL-, FF, REW... - Page 21 Additional PRODUCT SPECIFICATION 123dB THD+N 0.004% (24bit, 48kHz) Stereo Crosstalk -105dB Audio Characteristics Output 1Vrms Output Impedance 0.5Ω 100 levels Volume Battery Built-in rechargeable lithium polymer battery Battery & Power Playback Time Approximately 100 hours (MP3) / 51 hours (24bit, 96kHz, FLAC) Charging Time Approximately 3.5 hours (with 5V/1A or higher Micro USB DC adapter) Output Port...
-
Page 22: Troubleshooting
Impurities in the earphone jack can cause a noise. not require additional formatting. For proper file transfer speeds, the PLENUE D’s internal storage and any external microSD cards (32GB or + Files that I have stored do not appear in the list. - Page 23 www.COWON.com...
Need help?
Do you have a question about the PLENUE D and is the answer not in the manual?
Questions and answers
my plenue only plays mono on all my headphones