Advertisement
Quick Links
• 2 1/2" thick deck capability–order RP31845.
• Capacidad para bordes de 2 1/2" de grosor–ordene RP31845.
• Pour une installation dans une surface de 2 1/2 po, commandez le kit RP31845.
Specify Finish/Especifíque el Acabado/Précisez le Fini:
TM
BB=Brilliance
Brass/Bronce Brilliance
TM
Brilliance
/Noir lustré et laiton Brilliance
TM
Bronce Brilliance
/Chrome et laiton Brilliance
WHPC=White with Chrome/Blanco con Cromo/Blanc avec Chrome; (No Suffix is Required for Chrome/El sufijo no es requerido para el Cromo/Aucun suffixe n'est requis pour
le fini chromé)
Installation Instructions
Remove nut. Insert body assembly through selected hole in sink.
Secure body assembly to sink with nut. From under the sink
screw the bottle into the body assembly shank. Insert pump and
head down into the body assembly. Attach head assembly to
Instrucciones para la Instalación
Quite la tuerca. Introduzca el ensamble del cuerpo a través del
hoyo seleccionado en el fregadero. Fije el ensamble del cuerpo a
éste con una tuerca. Desde la parte de abajo del fregadero
atornille la botella dentro de la espiga de ensamble del cuerpo.
Introduzca la bomba y la cabeza hacia abajo dentro del ensamble
Instructions D'Installation
Enlevez l'écrou. Introduisez le corps dans le trou de l'évier prévu
à cet effet. Fixez le corps à l'évier au moyen de l'écrou. Par-
dessous l'évier, vissez la bouteille dans la prise du corps. Par le
haut, introduisez la pompe et la tête dans le corps. Fixez la tête
à la pompe si elle s'est détachée au cours de l'installation.
®
RP30395
Vented Funnel
Embudo con Ventiladero
Entonnoir
RP21907
Base & Gasket
Base con Empaque
Base et Joint
RP21945
Nut
Tuerca
Écrou
TM
TM
/Laiton Brilliance
; GB=Gloss Black/Negro Brillante/Noir lustré; GBBB=Gloss Black with Brilliance
TM
; GBPC=Gloss Black with Chrome/Negro Brillante con Cromo/Noir lustré et chrome; PCBB=Chrome with Brilliance
TM
; WH=White/Blanco/Blanc; WHBB=White with Brilliance
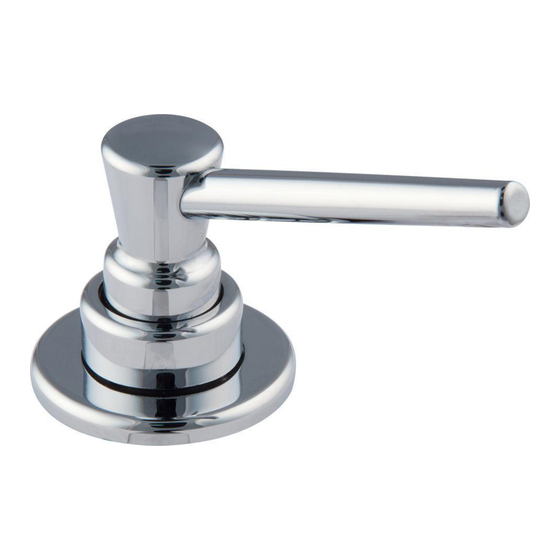
RP1001 SOAP DISPENSER
RP1001 DISPENSADOR DE JABÓN
RP1001 DISTRIBUTEUR DE SAVON
TM
Brass/Blanco con Bronce Brilliance
pump if it has become detached during installation. NOTE: To
fill, lift the head and pump assembly out of the bottle and pour
not more than 10 oz. into bottle. It is not necessary to remove
the bottle to refill. Use the funnel to help prevent spills.
del cuerpo. Conecte el ensamble de la cabeza en la bomba si
se desprendió durante la instalación. NOTA: Para llenar, alce la
cabeza y el ensamble de la bomba fuera de la botella y vierta
no más de 10 oz. en la botella. No es necesario sacar la botella
para llenarla. Use el embudo para prevenir derrames.
NOTE – Pour remplir le distributeur, écartez la tête et la pompe
de la bouteille en les soulevant et versez au plus 10 onces de
savon ou de lotion dans la bouteille. Il n'est pas nécessaire
d'enlever la bouteille pour la remplir. Employez l'entonnoir pour
ne rien renverser.
1
RP21905
Head Assembly
Ensamble de Cabeza
Tête
RP21908
Pump
Bomba
Pompe
RP21906
Body Assembly
Ensamble del Cuerpo
Corps
RP21904
Bottle
Bottela
Bouteille
TM
Brass/Negro Brillante con Bronce
TM
Brass/Cromo con
TM
TM
/Blanc avec Laiton Brilliance
11/01/2023 Rev. B
Advertisement

Subscribe to Our Youtube Channel
Related Manuals for Delta RP1001


Summary of Contents for Delta RP1001
- Page 1 RP1001 SOAP DISPENSER RP1001 DISPENSADOR DE JABÓN RP1001 DISTRIBUTEUR DE SAVON ® RP21905 Head Assembly Ensamble de Cabeza Tête RP30395 Vented Funnel RP21908 Embudo con Ventiladero Pump Entonnoir Bomba Pompe RP21907 Base & Gasket Base con Empaque RP21906 Base et Joint...
-
Page 2: Cleaning And Care
Any labor charges incurred by the purchaser to repair, replace, install or remove this product are not covered by this warranty. Delta Faucet Company shall not be liable for any damage to the faucet resulting from rea- sonable wear and tear, outdoor use, misuse (including use of the product for an unintended application), freezing water, abuse, neglect or improper or incorrectly performed installation, maintenance or repair, including failure to follow the applicable care and cleaning instructions. - Page 3 Delta por parte de un comprador que es propietario pero no vive en la vivienda residencial en la que se instaló...
-
Page 4: Instructions De Nettoyage
La preuve d’achat (original du reçu du premier acheteur montrant la date d’achat) et la documentation attestant la date de réception du produit par le premier acheteur ou son représentant autorisé (installateur, etc.) doivent être présentées à Delta Faucet Company pour toutes les demandes en vertu de la garantie, sauf si le produit a été enregistré auprès de Delta Faucet Company ou si le produit est un produit recertifié Delta®... - Page 5 Now you can power off the mess without making a bigger one. Felicitaciones, su grifo tiene una nueva característica. La tecnología de Delta® ShieldSpray™ corta los sucios persistentes con un chorro intenso y contiene la salpicadura con un protector de agua innovador.
- Page 6 Cleaning and Care Care should be given to the cleaning of this product. Although its finish is extremely durable, it can be damaged by harsh abrasives or polish. To clean, simply wipe gently with a damp cloth and blot dry with a soft towel. Limpieza y Cuidado de su Llave Tenga cuidado al limpiar este producto.
- Page 7 MOUNT FAUCET TO DECK INSTALE LA LLAVE DE AGUA EN EL BORDE MONTEZ LE ROBINET SUR LA PLAGE Insert D Insert D Insert faucet tubes and shank through mounting hole in sink; and, place Secure faucet to sink with mounting bracket (2) and nut (3),ensure parts are faucet (1) over mounting hole.
- Page 8 SOAP DISPENSER INSTALLATION OPTIONAL / OPCIONAL / FACULTATIVE OPTIONAL / OPCIONAL / FACULTATIVE INSTALACIÓN DEL DISPENSADOR DEL JABÓN INSTALLATION DE DISTRIBUTEUR DE SAVON Note: Soap dispenser not included with all models. Optional Escutcheon Installation Optional Escutcheon Installation Remove nut (1). Separate head (2) from body (3). Insert body (3) and gasket (4) through selected hole in sink.
- Page 9 When cutting the supply tubing the installer accepts the responsibility to do so in a way that allows a leak-free joint to be created. Delta is not responsible for tubing that is cut too short or cut in a way that will not allow for a leak-free joint.
- Page 10 L’installateur qui sectionne le tube d’alimentation a la responsabilité de le faire d’une manière qui permettra la réalisation d’un joint étanche. Delta se dégage de toute responsabilité dans l’éventualité...
- Page 11 Flush Supply Lines Solenoid Installation Because your sprayer has been factory assembled to the hose, Slide tube (15) into the top solenoid nipple (16). Rotate clip (17) over tube and nipple we do not recommend removing to flush the lines. Instead, if to secure connection.
- Page 12 Push clip (21) onto shank as shown to ensure clip is tight onto shank. Ensure LED Push hose end (19) onto solenoid assembly outlet (18). Attach clip (20) over hoses wire (22) is properly pushed in to solenoid. Make sure wire extends away from as shown.
- Page 13 For Models With 3 Function Wand En los Modelos con Mango de 3 Funciones Pour les modèles munis d’une Poignée à 3 Fonctions 90º Sprayer will lock into position when brought into proximity of the spout magnet. The WIth the wand undocked, press button 1 to use the Shieldspray mode. sprayer can be removed by either pulling directly out from the spout or by twisting 90°...
- Page 14 3 red flashes before solenoid opens or closes - replace batteries. 5. Auto Shut-off—the faucet will automatically shut off after running for 4 minutes. Guía del LED Sugerencias rápidas para su llave de agua/grifo Delta Touch ® ®...
-
Page 15: Maintenance
Maintenance If faucet exhibits very low flow A. Remove and clean aerator (1) (Note: some models require wrench (2) to remove aerator.), or B. Unscrew hose from spray head and clean debris from screen - the screen is located just inside the spray (3). Note: Not all spray heads have a screen. C. - Page 16 106559 Rev. F...
- Page 17 106559 Rev. F...
- Page 18 Any labor charges incurred by the purchaser to repair, replace, install or remove this product are not covered by this warranty. Delta Faucet Company shall not be liable for any damage to the faucet resulting from rea- sonable wear and tear, outdoor use, misuse (including use of the product for an unintended application), freezing water, abuse, neglect or improper or incorrectly performed installation, maintenance or repair, including failure to follow the applicable care and cleaning instructions.
- Page 19 Delta por parte de un comprador que es propietario pero no vive en la vivienda residencial en la que se instaló...
- Page 20 La preuve d’achat (original du reçu du premier acheteur montrant la date d’achat) et la documentation attestant la date de réception du produit par le premier acheteur ou son représentant autorisé (installateur, etc.) doivent être présentées à Delta Faucet Company pour toutes les demandes en vertu de la garantie, sauf si le produit a été enregistré auprès de Delta Faucet Company ou si le produit est un produit recertifié Delta®...
Need help?
Do you have a question about the RP1001 and is the answer not in the manual?
Questions and answers