Table of Contents

Related Manuals for MTF DM2 1400i


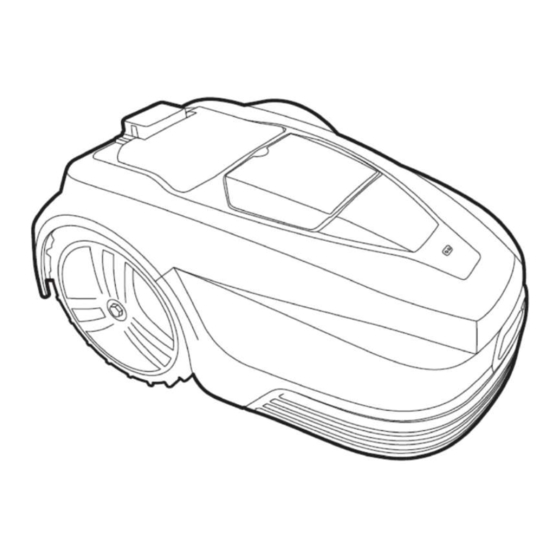
Summary of Contents for MTF DM2 1400i
- Page 1 MTF DM2 600i MTF DM2 1400i MTF DM2 2500i ROBOTICKÁ SEKAČKA Návod k obsluze ROBOTICKÁ KOSAČKA Návod na obsluhu ROBOT LAWNMOWER Operating Manual Mountfield a.s. Mirošovická 697 CZ 251 64 Mnichovice 2023/05 - No. :832C EN/CZ/SK...
-
Page 2: Important Safeguards
ROBOT LAWNMOWER TRANSLATION OF THE ORIGINAL OPERATING MANUAL IMPORTANT SAFEGUARDS IMPORTANT: READ ALL INSTRUCTIONS BEFORE USE. RETAIN INSTRUCTIONS FOR FUTURE REFERENCE. WARNING: Basic safety precautions should always be observed when using an electrical appliance to reduce the risk of fire, electrical shock or serious injury. Please read this manual carefully. -
Page 3: Personal Safety
Protection class III. Do not dispose electrical products with general household waste. Please check with your local authorities for recycling advice. Conformity mark - Complies with all relevant European directives. Thank you for choosing our product. Robot mowers work by making regular small cuts of the grass to maintain a set height. To do this they must be able to mow the grass multiple times per day every day. -
Page 4: Electrical Safety
• Keep all body parts, especially hands and feet, away from the blade at all times. • Warning, the blade will continue to move after the motor is switched off. • Ensure that the blade has fully stopped before: - clearing a blockage, - adjusting the cutting height, - lifting or carrying the mower, - tilting the mower to move,... -
Page 5: Battery Safety
• If the power cord is damaged during use, press the "STOP" button to stop the robotic lawnmower and unplug the power cord. • Keep extension cords at a safe distance from moving hazardous parts to prevent damage to the cords, which can result in contact with live parts. - Page 6 • Inclinometer. If the robotic lawnmower works on an area with a slope exceeding 37%, the robotic lawnmower blocks the movement in the given direction and returns so that it does not tip over. In the event of a rollover or lifting, the robotic lawnmower stops the cutting blade. •...
- Page 7 WHAT“S IN THE BOX 1 Boundary wire x100 m / 150 m / 200 m* 5 Blade screws x10 9 Charging rods x2 2 Boundary wire pegs x120 / 180 / 240 * 6 Wire splicer x4 10 Charging station 3 Charge station ground screw x4 7 Power supply 11 Robot Mower...
- Page 8 Obtuse angles Curves Don't cross wires No right angles No acute angles There may be parts of your garden which will be challenging or even impossible for your Robot Mower. Your Robot Mower will not stray beyond the boundary wire you must lay around your garden. It will change direction on making contact with things like: •...
- Page 9 RECTIFYING OR AVOIDING PROBLEM AREAS OBSTACLES SUCH AS TREE ROOTS ON LAWN If a tree root is protruding into One solution is to take the Alternatively, remove the tree the perimeter of your cutting perimeter around the tree root, root and fill any resulting uneven area it would present a problem leaving this area unmowed.
-
Page 10: Installing The Charging Station
INSTALLING THE CHARGING STATION Find a location with access to power, ensuring the The location of the charging station should be flat mower can leave the charging station in an anti- and secure, without risk of movement, if placed clockwise direction. Don“t peg the plate down yet. next to a border edge that is unstable it can slump and cause the station to be uneven, this will cause problems for the mower when returning to... - Page 11 You will need to strip the plastic sheath from the The charging stand has a hood at the back (shown end of the wire before connecting. Twisting the in grey) that hinges forwards. exposed wires after exposing helps ensure a good connection.
- Page 12 When you have completed your boundary wire it Feed the power lead up through the other side of must return to the charging station and be fed up the base station. through the unit and plugs in at the black terminal. Pay attention to the cable fittings as there is a Push the power cable into place.
- Page 13 Then screw on the outer ring to secure the cable in Once the base station has been fully wired, it can be place and prevent water ingress. secured in place with the four screws provided. Use the allen key provided to screw them in securely ensuring they are fully inserted and flush with the station base.
-
Page 14: Laying The Boundary Wire
LAYING THE BOUNDARY WIRE Keep the wire straight for at least the first 2 m. This Place the pegs at intervals of about 1m on straight is to allow the mower to return to the charging and even ground, 30cm to 50cm on bends and stand with ease. -
Page 15: Operating The Mower
OPERATING THE MOWER Place the mower on the base station with the Press the STOP button wheels on the grips and the two pins engaged into the front of the mower. Note: the mower will require to be charged to at least 70% capacity before it will leave its station. -
Page 16: Control Panel
CONTROL PANEL CUTTING HEIGHT ADJUSTMENT 1. Open the knob lid. 2. Cutting height can be adjusted from 2.5 cm to 5.5 cm by rotating the adjustment knob. GETTING STARTED Set the cutting height The first cut of the season or long thick wet grass will need the highest setting (5.5 cm). Gradually reduce to desired height once all ground has been covered. - Page 17 First time out The control panel will ask for setting a PIN code when the first time power on. Please remember the PIN code you set. Pressing the start button and closing the flap will cause the mower to start a perimeter circuit after which it will begin randomly mowing the lawn.
- Page 18 Power on Power off 1. Press the power button for 3 seconds. 1. Press the power button for 3 seconds. 2. Enter the 4-letter PIN code you set. 3. The mower will now await further instruction in standby mode. Start mowing 1.
- Page 19 Work time setting This is the amount of time the mower will be active. This includes charging time. For example: if set to 8 hours and the mower is set to operate from 8:00pm it will operate until 4:00am. In this time it may mow for 1 hour charge for 2 hours mow again for 1 hour;...
- Page 20 Charging 1. Place the mower in the station (or press HOME button). 2. Mower will charge up to 100% and then go into standby. 3. Mower will get charged again if battery is lower than 75%. The mower charges on its station through the two charging rods. These rods insert into the front of the mower.
- Page 21 Spiral mow 1. Place the mower in the garden. The mower can be placed within the perimeter boundary and that the spiral mow function will 2. Press OK button to enter sub-menu 1. mow in relatively uniform spiral pattern for 5 3.
- Page 22 Rain mode Rain mode sets if the mower will go out in rain or not. Disabling this will allow the mower to continue to work in the rain. WARNING avoid activation during heavy rain and storms. Wet grass will cause additional load for the mower and mowing time may be reduced.
- Page 23 PIN code Change PIN code 1. PIN code should be entered after powering on, 1. Press OK button to enter sub-menu 1. pressing STOP button, and before clearing error 2. Select „setting“ to enter sub-menu 2. status and changing PIN code. 3.
- Page 24 Work log Save power & LED indicator The backlight will switch off after 2 minutes in the mower will power off after 8 minutes, respectively, without user interference. 1. Press OK button to enter sub-menu 1. 2. Select „setting“ to enter sub-menu 2. 3.
- Page 25 REPAIRING THE BOUNDARY WIRE If the boundary wire gets cut or breaks for any The clip has two channels in it. Push one end into reason (indicated by solid red light on charging one channel and the other end into the other. The station), you need to locate and repair it.
-
Page 26: Replacing The Blades
REPLACING THE BLADES 1. Switch the mower of 6. Place blade over raised screw-hole. 2. Wear protective gloves 7. Use a Phillips screwdriver to secure the cutting blade to the blade. The cutting blade must rotate 3. Turn the mower upside-down. freely. -
Page 27: Troubleshooting
TROUBLESHOOTING Error message Cause Solution Mower outside Mower is outside the perimeter. Place the mower inside the perimeter. Mower lifted Mower is lifted away from the Move the mower to a flat part of ground. the lawn. Mower tilted Mower is tilted too much. Move the mower to a flat part of the lawn. -
Page 28: Maintenance
MAINTENANCE 1. Check and clean mower regularly once a week. 2. When you first start using the mower, the blade plate, protections plate and blades should be checked once a month. 3. It is important that the blades and blade plate rotate easily. 4. -
Page 29: Technical Specification
TECHNICAL SPECIFICATION Model DM2 600i DM2 1400i DM2 2500i Battery Li-ion 22,2 V 2600 mAh Li-ion 22,2 V 5200 mAh Li-ion 22,2 V 5200 mAh Adapter ⎓ 25,5 V 2,0 A / 100 - 240 V ~50/60 Hz 1,5 A Blade motor speed 3200 –... - Page 30 že stroj: responsibility that the machine: ROBOTICKÁ SEKAČKA ROBOTICKÁ KOSAČKA ROBOT LAWNMOWER Model: MTF DM2 600i / MTF DM2 1400i / MTF DM2 2500i spĺňa požiadavky stanovené complies with requirements odpovídá nařízením směrnic: smernicami: established by Directives: 2006/42/EC, 2014/30/EU, 2014/35/EU, 2014/53/EU, 2011/65/EU, 2000/14/ES odpovídá...
Need help?
Do you have a question about the DM2 1400i and is the answer not in the manual?
Questions and answers
Robotické kosačky Robotická kosačka MTF DM 1400 pri parkovani stále chce ísť dopredu nevypne ju