Advertisement
Quick Links
Assembly Instructions
Model:
Description:
Part Number:
Assembly Time:
Before you beign, read thought these instructions and check that
all parts are present. Please note that MB Quart cannot assume any
responsibility for damage resulting from incorrect installation.
No.
1
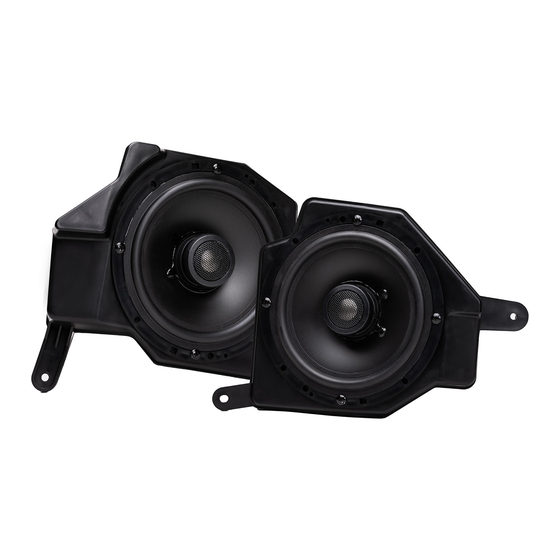
6.5in Coaxial Lower Dash Speakers
2
6.5in Lower Dash Speaker Enclosure
4
Speaker Harness
No.
1
6.5in Midbass Lower Dash Speakers
2
6.5in Lower Dash Speaker Enclosure
4
Speaker Harness
1
Bojo or Panel Tool
2
Philips Screwdriver
3
8, 10, 13mm Socket
4
Rachet
Jeep JL (Wrangler) & JT (Gladiator)
Front Speaker Install
JC1-116E & JW1-116E
120 Min (2-Hours)
JC1-116E Parts List
Component Name
JW1-116E Parts List
Component Name
Tools Required
Page 1 of 28
Parts List
Parts List
Qty
2
2
2
Qty
2
2
2
Advertisement

Subscribe to Our Youtube Channel
Related Manuals for MB QUART JC1-116E


Summary of Contents for MB QUART JC1-116E
- Page 1 Part Number: 120 Min (2-Hours) Assembly Time: Before you beign, read thought these instructions and check that all parts are present. Please note that MB Quart cannot assume any responsibility for damage resulting from incorrect installation. Parts List JC1-116E Parts List Component Name 6.5in Coaxial Lower Dash Speakers...
- Page 2 Dash Disassembly ● Unclip and remove panel below the steering column ● Remove (2) Phillips screws ● Unclip, unplug, and remove the climate control panel Page 2 of 28...
- Page 3 Dash Disassembly ● Remove (2) Phillips screws securing the radio trim panel, then unclip and remove ● Remove (1) Phillips screw securing the front dash pad, carefully unclip and remove by pulling forward toward the front seats Page 3 of 28...
- Page 4 Dash Disassembly ● Carefully unclip the instrument panel shroud along the bottom and remove ● Unclip the lower steering column shroud and move toward steering wheel Page 4 of 28...
- Page 5 Dash Disassembly ● Unclip and remove the panel on the side of the dash ● Remove (5) Phillips screws that are exposed ● Unclip kick panel cover Page 5 of 28...
- Page 6 Dash Disassembly ● Remove (1) Phillips screw from lower left dash ● Remove (2) Phillips screws near steering column ● Remove (2) Phillips screws on the top of the left dash then unclip and disconnect wiring on back of light switch to remove panel from vehicle Page 6 of 28...
- Page 7 Lower Speaker Removal ● Remove (4) 10mm bolts below steering column. (one is hidden behind the cross brace behind the left down support) ● Remove (1) 8mm bolt below the speaker and this will free the lower support brace to aid in the removal of the speaker enclosure ●...
- Page 8 Lower Speaker Removal ● Disconnect harness from the enclosure and module mounted on the back side, then remove from vehicle ● Remove the module from the OEM enclosure Page 8 of 28...
- Page 9 Dash Disassembly ● Install the module on the new enclosure using the OEM hardware ● On passenger side remove (4) Phillips screws Page 9 of 28...
- Page 10 Dash Disassembly ● Unclip and remove the panel on the side of the dash ● Using a panel tool carefully remove the grab handle cover (starting on the left) Page 10 of 28...
- Page 11 Dash Disassembly ● Remove (2) 10mm bolts securing the grab handle and set handle aside ● Unclip the airbag cover panel ● Remove (2) Phillips screws that have been exposed Page 11 of 28...
- Page 12 Dash Disassembly ● Remove glove box by opening and lifting the upper tab and removing the latch on the left side ● Remove three Phillips screws that have been exposed ● Looking in the glovebox cavity up high, remove two 13mm bolts securing the back of the passenger side airbag Page 12 of 28...
- Page 13 Dash Disassembly ● Carefully unclip the air bag. (this does NOT need to be removed from the vehicle) ● Lifting the airbag slightly will expose (5) Phillips screws that need to be removed Page 13 of 28...
- Page 14 Dash Disassembly ● Remove (3) Phillips screws holding the passenger speaker enclosure, then disconnect wires and remove from vehicle Page 14 of 28...
- Page 15 Upper Speaker Replacement ● Install new speaker enclosure and secure with (3) Phillips screws ● Connect the speaker enclosure to the wiring Note – If just replacing the pods, but not adding amplifiers, then you will connect to OEM plug, but if you are adding amplifiers, then you will connect to the new harness.
- Page 16 Upper Speaker Replacement ● Lifting the airbag slightly and install (5) Phillips screws ● Remove (2) Phillips screws, disconnect wiring and remove speaker from vehicle ● Carefully clip the airbag into place Page 16 of 28...
- Page 17 Upper Speaker Replacement ● Looking in the glovebox cavity up high, install (2) 13mm bolts securing the back of the passenger side airbag ● Install (3) Phillips screws at bottom of glovebox opening ● Install glovebox by installing bottom hinge and pivoting up. (Also install left side gear arm) Page 17 of 28...
- Page 18 Upper Speaker Replacement ● Install (2) Phillips screw at the bottom of the passenger airbag ● Clip the airbag cover panel into place ● Install (2) 10mm bolts securing the grab handle Page 18 of 28...
- Page 19 Upper Speaker Replacement ● Slide ears on cover into slot and snap grab handle cover into place ● Install (5) Phillips screws on the side of dash ● Clip the passenger side dash cover into place Page 19 of 28...
- Page 20 Upper Speaker Replacement ● Install (4) Phillips screws on the top of the air bag ● Connect the speaker enclosure to the wiring Note – If just replacing the pods, but not adding amplifiers, then you will connect to OEM plug, but if you are adding amplifiers, then you will connect to the new harness.
- Page 21 Lower Speaker Install ● Install (3) Phillips screw to secure the enclosure ● Install (1) 8mm bolt below the speaker ● Install (4) 10mm bolts below steering column. (one is hidden behind the cross brace behind the left down support) Page 21 of 28...
- Page 22 Dash Reassembly ● Connect and install driver side dash ● Install (2) Phillips screws on the top of the left dash ● Install (1) Phillips screw from lower left dash Page 22 of 28...
- Page 23 Dash Reassembly ● Install (1) Phillips screw from lower left dash ● Clip kick panel cover into place ● Install (5) Phillips screws on driver side of dash Page 23 of 28...
- Page 24 Dash Re-assembly ● Clip the dash side panel into place ● Clip the steering column shroud into place ● Install (2) Phillips screws on shroud Page 24 of 28...
- Page 25 Dash Re-assembly ● Clip the instrument panel shroud into place ● Install (4) Phillips screws on the driver side securing instrument panel shroud ● Clip top of dash into place Page 25 of 28...
- Page 26 Dash Re-assembly ● Install (1) Phillips screw ● Clip the radio shroud into place and install (2) Phillips screws ● Connect the wiring Page 26 of 28...
- Page 27 Dash Re-assembly ● Connect the wiring and clip the climate control panel into place ● Install and clip in place the lower steering column cover Page 27 of 28...
- Page 28 This equipment complied with FCC radiation exposure limits set forth for an uncontrolled environment. This equipment should be installed and operated with a minimum distance of 20cm between the radiator and your body. JC1-116E REV 01 Page 28 of 28...
Need help?
Do you have a question about the JC1-116E and is the answer not in the manual?
Questions and answers