
Subscribe to Our Youtube Channel
Related Manuals for Dometic Seastar JackPlate

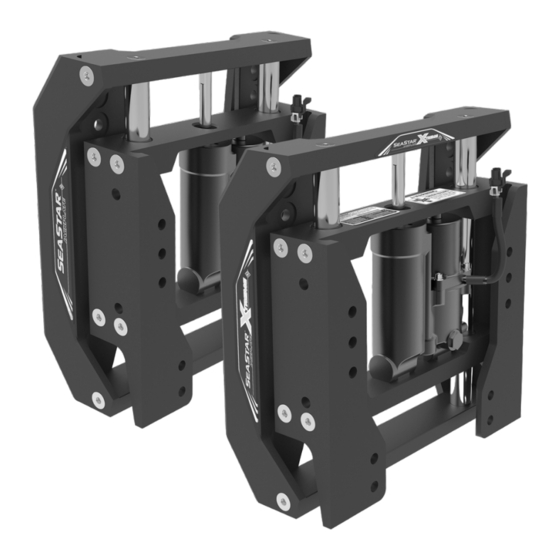
Summary of Contents for Dometic Seastar JackPlate
- Page 1 SEASTAR HYDRAULIC JACKPLATES SeaStar Jackplate & SeaStar Jackplate Xtreme Installation and owner’s manual — Book 91 [REVISION C] Form No. 469449 | ©2021 Dometic Corporation...
- Page 2 To the Installer and End User (Owner) Thank you for choosing a SeaStar Hydraulic Jackplate by Dometic. These Installation Instructions contain all the information that you and others will require for the safe installation and use of your Jackplate. Throughout this manual, information for the safe installation and operation of the Jackplate will be distinguished in one of the following ways;...
-
Page 3: Table Of Contents
4.2 Return Goods Procedure ......... 18 4.3 Technical Support ........... 18 Introduction Congratulations on your purchase of a SeaStar Jackplate. You have chosen to install one of the sleekest and most durable engine Jackplates available. Prepare for increased performance, gains in fuel economy and the ability to run in shallow water. - Page 4 This page left intentionally blank.
-
Page 5: Safety Information
If you have any questions regarding any of these warnings, contact Dometic. 1.1 Before Installation The safe operation of the SeaStar Jackplate is dependent upon proper installation and maintenance, common sense, safe judgment and the knowledge/expertise of the operator. Every installer/user of the Jackplate should know the following requirements before installing/ using the SeaStar Jackplate. -
Page 6: Prior To Each Use
1.3 Prior to Every Use 1. Verify immediate response when switch is engaged (UP/DOWN). 2. Inspect the Jackplate(s) for damage, cracks, deformation, wear and binding. Check for loose mounting bolts and/or nuts. 3. Confirm that there is no interference between the SeaStar Jackplate(s) and the steering cylinder(s), tiebars, steering hoses, outboard engine, outboard engine hoses or any combination of these parts by performing the CLEARANCE CHECKS as detailed... -
Page 7: Maintenance
1.6 Maintenance WARNING Any work being performed with this system MUST be completed by a qualified mechanic with a working knowledge of the system. After FIRST use and every 100 hours or 6 months thereafter (whichever comes first). 1. Ensure the transom bolts and engine bolts are torqued to their recommended values. -
Page 8: Trailering And Storage
1.8 Trailering and Storage 1. The SeaStar Jackplate will maintain position during operation and short term storage, however it should not be relied on to provide long term support over extended storage or trailering conditions. 2. During storage or trailering, the outboard motor must be... -
Page 9: Jackplate Installation
2.0 JACKPLATE INSTALLATION WARNING Before proceeding with the installation, read these instructions thoroughly. Dometic cannot accept responsibility for installations Failure to adhere to these where instructions have not been followed, where substitute instructions may result in loss of parts have been used, or where modifications have been made boat control, leading to possible to our products. - Page 10 Check the outboard engine manufacturer’s instructions carefully for specifications regarding connection hardware. Ensure the outboard engine manufacturer’s requirements are followed. The following parts are included with your SeaStar Jackplate product. If any of these components are missing, contact your dealer or Dometic.
-
Page 11: Mount Jackplate To Boat
2.2 Mount Jackplate to Boat NOTICE The following procedure outlines the process of first mounting the Jackplate on the boat, followed by installing the engine to the Jackplate. If desired, the Jackplate can first be installed on the engine, followed by installation on the boat. The order of installation may be altered but individual steps must be followed and all warnings and cautions must be followed. - Page 12 3. If the Jackplate setback is 10 inches or more, or if the outboard engine output is 250 horsepower or more, it is recommended to use 6 mounting bolts at the transom connection. Additional mounting bolts should be used in the upper holes on the Jackplate hole pattern.
- Page 13 4 X BOLT 4 X NUT WITH NYLON LOCKING FEATURE 4 X WASHER OR TRANSOM STIFFENER 4 X WASHER NOTE ALL HARDWARE TO BE SUPPLIED OR APPROVED BY THE OUTBOARD ENGINE MANUFACTURER TRANSOM JACKPLATE TRANSOM BRACKET Figure 7. Jackplate to transom connection. 6 X BOLT 6 X NUT WITH NYLON LOCKING FEATURE...
-
Page 14: Install Relay Wiring Harness
2.3 Install Relay Wiring Harness CAUTION 1. Find a dry and accessible place to mount the Relay Wiring Harness. Use the mounting holes on the relay brackets to Before operating the Jackplate, secure the harness to the boat. check mounting bolt clearances and ensure that shift and throttle cables, electrical lines, tiebars, MOUNTING... - Page 15 Main Wiring Diagram ACTUATOR DOWN ACTUATOR UP RELAY RELAY ROCKER SWITCH BLUE/WHITE GREEN/WHITE 16 AWG WIRE POWER SUPPLY BLACK BLACK BLACK 10A FUSE BLACK CIRCUIT BREAKER – HYDRAULIC ACTUATOR BATTERY Figure 11. Main Wiring diagram.
-
Page 16: Install Rocker Switch
2.4 Install Rocker Switch 1. Cut an appropriate rectangular opening in the dashboard or console panel where the rocker switch is to be mounted. NOTICE Position the rocker switch so that it is within easy reach of the operator. ROCKER NOTICE SWITCH The switch leads from the relay... -
Page 17: Mount Outboard To Jackplate
2.5 Mount Outboard to Jackplate NOTICE 1. Using an appropriate hoist and lifting eye, lift the outboard into place. Jackplate position can be extended 2. Select the hole set on your outboard engine that will best suit or retracted during installation to the boat and application. -
Page 18: Clearance Checks
Check for interference between the SeaStar Jackplate and the steering cylinder(s), tiebars, steering hoses, outboard engine, engine hoses or any other components. 3. If any interference exists, action must be taken to do one of... -
Page 19: Troubleshooting Guide
3.0 TROUBLESHOOTING GUIDE FAULT CAUSE SOLUTION 1. Unit leaks down over short • Internal fluid bypass. • Actuate Jackplate several times in extend and retract direction. period of time. 2. Unit fails to reach limit of • Mechanical interference • Check for interference between moving with other components. - Page 20 6. Does not run in one • Faulty relay. • Check for correct function of relays on harness. On activation of the switch in direction. either direction, there should be an audible click in the relay and continuity across relay lines when switching. Replace faulty relay if necessary.
-
Page 21: Warranty
4.0 WARRANTY 4.1 Statement of 2-Year Limited Warranty ® The SeaStar Solutions warrants its products to be free from defects in materials and workmanship for a period of two years from the date of original retail purchase, provided, however, the warranty period for SeaStar Solutions ®... -
Page 22: Return Goods Procedure
4.2 Return Goods Procedure Contact our warranty department at Marine.Warranty@dometic.com for instructions. 4.3 Technical Support Phone: 604-248-3858 email: seastar@dometic.com Hours: Monday to Friday 05:00 – 15:30 PST Authorized Service Centers & Distributors For a current listing of all our authorized service centers and... - Page 23 Notes _______________________________________________ _______________________________________________ _______________________________________________ _______________________________________________ _______________________________________________ _______________________________________________ _______________________________________________ _______________________________________________ _______________________________________________ _______________________________________________ _______________________________________________ _______________________________________________ _______________________________________________ _______________________________________________ _______________________________________________ _______________________________________________ _______________________________________________ _______________________________________________ _______________________________________________ _______________________________________________ _______________________________________________...
- Page 24 Mobile living made easy. DOMETIC VANCOUVER 3831 NO.6 ROAD RICHMOND, B.C. CANADA V6V 1P6 www.dometic.com © 2021 DOMETIC PRINTED IN CANADA 06/22 ISO 10592 Please scan FORM NO. 469449 REV. C this QR code and watch our latest Boating Safety video.
Need help?
Do you have a question about the Seastar JackPlate and is the answer not in the manual?
Questions and answers