Table of Contents
Advertisement
Quick Links
MODEL T33858
6-GAL OIL-FREE QUIET SERIES
PANCAKE AIR COMPRESSOR
OWNER'S MANUAL
(For models manufactured since 03/23)
COPYRIGHT © APRIL, 2023 BY GRIZZLY INDUSTRIAL, INC.
WARNING: NO PORTION OF THIS MANUAL MAY BE REPRODUCED IN ANY SHAPE
OR FORM WITHOUT THE WRITTEN APPROVAL OF GRIZZLY INDUSTRIAL, INC.
#CS22673 PRINTED IN CHINA
V1.04.23
***Keep for Future Reference***
Advertisement
Table of Contents

Related Manuals for Grizzly T33858


Summary of Contents for Grizzly T33858
- Page 1 (For models manufactured since 03/23) COPYRIGHT © APRIL, 2023 BY GRIZZLY INDUSTRIAL, INC. WARNING: NO PORTION OF THIS MANUAL MAY BE REPRODUCED IN ANY SHAPE OR FORM WITHOUT THE WRITTEN APPROVAL OF GRIZZLY INDUSTRIAL, INC. #CS22673 PRINTED IN CHINA V1.04.23...
- Page 2 This manual provides critical safety instructions on the proper setup, operation, maintenance, and service of this machine/tool. Save this document, refer to it often, and use it to instruct other operators. Failure to read, understand and follow the instructions in this manual may result in fire or serious personal injury—including amputation, electrocution, or death.
-
Page 3: Table Of Contents
Table of Contents INTRODUCTION ..........................2 Contact Info ..........................2 Manual Accuracy ........................2 Identification ..........................3 Controls & Components ......................4 Machine Data Sheet ........................6 SECTION 1: SAFETY ........................8 Safety Instructions for Machinery ....................8 Additional Safety for Air Compressors ..................10 SECTION 2: POWER SUPPLY ...................... -
Page 4: Introduction
ID label (see below). This information is required for us to provide proper tech support, and it helps us determine if updated documentation is available for your machine. Manufacture Date Serial Number Model T33858 (Mfd. Since 03/23) -
Page 5: Identification
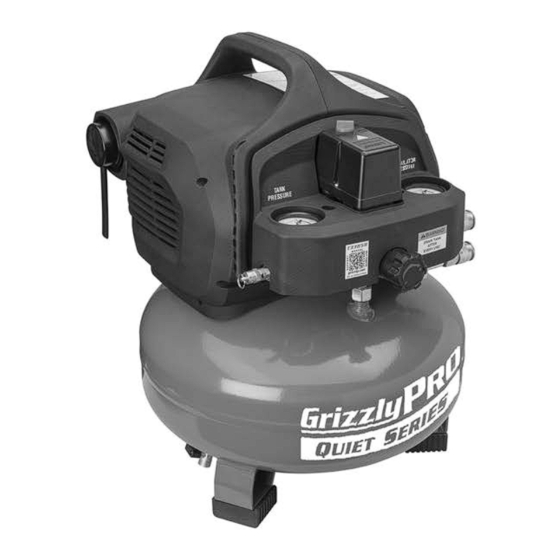
Pressure Gauge Regulator Pressure Gauge Air Filter Quick-Connect Ports Safety Relief Valve Regulator Machine Foot Drain (1 of 3) Valve Tank To reduce your risk of serious injury, read this entire manual BEFORE using machine. Model T33858 (Mfd. Since 03/23) -
Page 6: Controls & Components
Understanding these exceeds 150 PSI (cut-out pressure). items and how they work will help you understand the rest of the manual and minimize your risk of injury when operating this machine. Model T33858 (Mfd. Since 03/23) - Page 7 M. Regulator Knob: Adjusts pressure of air delivered to quick-connect ports. Turn clock- wise to increase pressure and counterclock- wise to decrease pressure. Figure 3. Location of pump and exhaust tube (shroud and control panel removed for clarity). Model T33858 (Mfd. Since 03/23)
-
Page 8: Machine Data Sheet
Power.Cord.Included.............................. Yes Power.Cord.Length.............................. 72.in. Power.Cord.Gauge............................14.AWG Plug.Included................................Yes Included.Plug.Type..............................5-15 Switch.Type............................Pressure.Switch Motors: Main Horsepower............................1-1/2.HP Phase............................. Single-Phase Amps................................12A Speed..............................3400.RPM Type..........................Capacitor-Start.Induction Power.Transfer............................Direct Bearings......................Shielded.&.Permanently.Lubricated Model T33858 (Mfd. Since 03/23) Model T33858 Page 1 of 2... - Page 9 Construction Information Tank................................Steel Valves................................. Brass Motor/Pump.Shroud..........................Plastic Paint.Type/Finish............................ Enamel Other Specifications: Country.of.Origin..............................China Warranty................................1.Year Serial.Number.Location............................ID.Label Sound.Rating...............................62.dB Features: Sound.Rating.of.Only.62.dB.at.10.ft. 6-Gallon.Tank.with.Maximum.Airflow.of.3.5.SCFM.at.90.PSI Oil-Free.Twin.Cylinders Ball-Valve.Drain.Control Included.Air.Regulator.for.Airflow.Adjustment Two.Quick-Coupler.Hose.Connections Model T33858 (Mfd. Since 03/23) Page 2 of 2 Model T33858...
-
Page 10: Section 1: Safety
Never operate under the influence of drugs or injury or blindness from flying particles. Everyday alcohol, when tired, or when distracted. eyeglasses are NOT approved safety glasses. Model T33858 (Mfd. Since 03/23) - Page 11 Make sure they are properly installed, you experience difficulties performing the intend- undamaged, and working correctly BEFORE ed operation, stop using the machine! Contact our operating machine. Technical Support at (570) 546-9663. Model T33858 (Mfd. Since 03/23)
-
Page 12: Additional Safety For Air Compressors
Do not use compres- moving or servicing to prevent impact injuries, soft sor to inflate low-pressure objects that are likely to tissue injuries, and burns. burst (like children’s toys). -10- Model T33858 (Mfd. Since 03/23) -
Page 13: Section 2: Power Supply
-11- Model T33858 (Mfd. Since 03/23) - Page 14 Two-prong outlets do not meet the grounding requirements for this machine. Do not modify or use an adapter on the plug provided—if it will not fit the outlet, have a qualified electrician install the proper outlet with a verified ground. -12- Model T33858 (Mfd. Since 03/23)
-
Page 15: Section 3: Setup
Grizzly or the shipping agent. You MUST have the original pack- Inventory (Figure 6) aging to file a freight claim. -
Page 16: Site Considerations
Figure 7. Minimum working clearances. Children and visitors may be seriously injured if unsuper- vised around this machine. Lock entrances to the shop or disable start switch or power connection to prevent unsupervised use. -14- Model T33858 (Mfd. Since 03/23) -
Page 17: Test Run
After running compressor for 15 minutes, move pressure switch lever to OFF position to turn machine OFF. Eye injury hazard! Always wear safety glasses when Turn drain valve handle to closed position. handling pressurized air system. -15- Model T33858 (Mfd. Since 03/23) - Page 18 11. Open drain valve to drain moisture from tank, then close drain valve. Releasing air through safety relief valve Congratulations! Test Run is complete. can be extremely loud. Protect hearing with ANSI-approved hearing protection in following step. -16- Model T33858 (Mfd. Since 03/23)
-
Page 19: Section 4: Operations
Regardless of the content in this sec- 14. Disconnects hose from compressor. tion, Grizzly Industrial will not be held liable for accidents caused by lack of training. 15. Opens drain valve to drain any condensation from tank. -
Page 20: Choosing Air Hose
Figure 14. Example of male and female fittings. at least 20 feet away from the operation. The outlet ports on the T33858 are universal Diameter quick-connect couplers with a coupling size of "... -
Page 21: Connecting Air Tool
Airflow Delivery (CFM) The first consideration when choosing an air tool The Model T33858 has a regulator and pressure is whether or not the air delivery is compatible with gauge for controlling and observing your line pres- your compressor. Smaller compressors, capable sure, allowing for very little setup. - Page 22 Connect other end of hose to air tool. Figure 19. Example of pushing coupler sleeve to release plug. Note: Refer to air tool instructions for speci- fications, method of connection, and proper use of tool. -20- Model T33858 (Mfd. Since 03/23)
-
Page 23: Section 5: Accessories
Includes a case. serious personal injury or machine damage. To reduce this risk, only install accessories recommended for this machine by Grizzly. NOTICE Refer to our website or latest catalog for additional recommended accessories. -
Page 24: Section 6: Maintenance
The Model T33858 is an oil-free air compres- sor, so no lubrication is necessary. Refer to the • Damaged safety relief valve, pressure switch, instructions of any attached air tools to determine or drain valve. -
Page 25: Draining Tank
— If filter is dirty or clogged, or there has been a drop in efficiency of compressor, replace cap. Proceed to Step 4. Replace filter, then install cap (refer to part #77 in Parts beginning on Page 35). -23- Model T33858 (Mfd. Since 03/23) -
Page 26: Checking For Leaks
Note: If a fitting or valve continues to leak — If bubbles do not form, repeat at different after preceding steps, replace part. location. — If bubbles do form, proceed to Fixing Leaks. -24- Model T33858 (Mfd. Since 03/23) -
Page 27: Machine Storage
If machine will be stored in/near direct sunlight, use cover that will block UV rays. DISCONNECT MACHINE FROM POWER! Releasing air through safety relief valve can be extremely loud. Protect hearing with ANSI-approved hearing protection while performing following step. -25- Model T33858 (Mfd. Since 03/23) -
Page 28: Section 7: Service
3. Fix/replace fan cover; replace loose/damaged fan. 4. Motor bearings at fault. 4. Test by rotating shaft; rotational grinding/loose shaft requires bearing replacement. 5. Compressor pump at fault. 5. Compressor piston rod/bearings/crankshaft is worn. Rebuild or replace pump. -26- Model T33858 (Mfd. Since 03/23) - Page 29 7. Head gasket or valve body gasket leaking. 7. Remove cylinder head and replace gasket(s). 8. Worn pump piston rings. 8. Inspect and replace pump piston rings. 9. Broken crankshaft or connecting rod. 9. Replace or rebuild compressor pump. -27- Model T33858 (Mfd. Since 03/23)
- Page 30 1. Replace air filter (Page 23). knocking. 2. Excess carbon build-up on piston or valves. 2. Take compressor to authorized service center. 3. Piston assembly loose. 3. Inspect and repair piston and connecting rod. -28- Model T33858 (Mfd. Since 03/23)
-
Page 31: Inspecting Check Valve
Figure 26. Location of filter assembly base and shroud cap screws. Use safety relief valve to reduce tank pres- sure to less than 10 PSI. Open drain valve to release any remaining air (see Figure 25). -29- Model T33858 (Mfd. Since 03/23) - Page 32 Seal ring pro- vides sufficient sealing. 11. Install motor/pump shroud with screws removed in Steps 5–6. 12. Install filter assembly. Figure 28. Location of check valve cap (control 13. Close drain valve. panel removed for clarity). -30- Model T33858 (Mfd. Since 03/23)
-
Page 33: Adjusting Cut-In/Cut-Out Settings
To adjust cut-in/cut-out settings: Cut-In/ Cut-Out Operate compressor and record cut-in and Adjustment cut-out pressures. Screw DISCONNECT MACHINE FROM POWER! Figure 31. Location of cut-in/cut-out adjustment screw. -31- Model T33858 (Mfd. Since 03/23) - Page 34 If compressor does not automatically turn OFF at 150 PSI, turn machine OFF before pressure reaches 155 PSI. Adjust pressure switch settings until cut- out pressure is 150 PSI or lower. -32- Model T33858 (Mfd. Since 03/23)
-
Page 35: Section 8: Wiring
Technical Support at (570) 546-9663. The photos and diagrams included in this section are best viewed in color. You can view these pages in color at www.grizzly.com. -33- Model T33858 (Mfd. Since 03/23) -
Page 36: Wiring Diagram
Wiring Diagram MOTOR 120V START CAPACITOR CBB65 110uF 250V PRESSURE Neutral 5-15 Plug SWITCH LEFOO LF19-1H Ground 120 VAC Figure 34. Pressure switch wiring. Figure 35. Start capacitor wiring. READ ELECTRICAL SAFETY -34- Model T33858 (Mfd. Since 03/23) ON PAGE 33! -
Page 37: Section 9: Parts
SECTION 9: PARTS To order parts, contact MEGA by phone at (832) 415-6995 or email at CS@megacompressor.com. Main -35- Model T33858 (Mfd. Since 03/23) - Page 38 PIPE NIPPLE 1/4" PT FLANGE NUT M5-.8 PIPE FITTING NUT G 3/8" CRANKCASE LEFT GASKET 7.5 X 14.5 X 1.5MM PAPER BALL BEARING 6203-2RS POWER CORD 14G 3W 72" 5-15P STATOR FILTER ROTOR PIPE FITTING G 1/4" -36- Model T33858 (Mfd. Since 03/23)
-
Page 39: Labels & Cosmetics
Safety labels help reduce the risk of serious injury caused by machine hazards. If any label comes off or becomes unreadable, the owner of this machine MUST replace it in the original location before resuming operations. For replacements, contact (800) 523-4777 or www.grizzly.com. -37-...
Need help?
Do you have a question about the T33858 and is the answer not in the manual?
Questions and answers