Huawei SUN2000-250KTL Series User Manual
Hide thumbs
Also See for SUN2000-250KTL Series:
- User manual (111 pages) ,
- User manual (123 pages) ,
- Quick start manual (74 pages)

Related Manuals for Huawei SUN2000-250KTL Series


Summary of Contents for Huawei SUN2000-250KTL Series
- Page 1 SUN2000-(250KTL, 280KTL, 300KTL, 330KTL) Series User Manual Issue Date 2023-06-30 HUAWEI TECHNOLOGIES CO., LTD.
- Page 2 Notice The purchased products, services and features are stipulated by the contract made between Huawei and the customer. All or part of the products, services and features described in this document may not be within the purchase scope or the usage scope. Unless otherwise specified in the contract, all statements, information, and recommendations in this document are provided "AS IS"...
-
Page 3: About This Document
Indicates a potentially hazardous situation which, if not avoided, could result in equipment damage, data loss, performance deterioration, or unanticipated results. NOTICE is used to address practices not related to personal injury. Issue 07 (2023-06-30) Copyright © Huawei Technologies Co., Ltd. - Page 4 Updated 8.3 Power-Off for Maintenance. Updated 9 Alarm Reference. Issue 04 (2023-03-30) Updated 2.2 Networking Application. Updated 5.4 Connecting an AC Output Power Cable. Updated 5.6 Connecting DC Input Power Cables. Issue 07 (2023-06-30) Copyright © Huawei Technologies Co., Ltd.
- Page 5 7 Power-On and Commissioning. Updated 9 Alarm Reference. Updated 10 Technical Specifications. Updated C Grid Codes. Updated E Contact Information. Issue 01 (2022-10-09) This issue is used for first office application (FOA). Issue 07 (2023-06-30) Copyright © Huawei Technologies Co., Ltd.
-
Page 6: Table Of Contents
5.1 Precautions....................................40 5.2 Preparing Cables................................... 41 5.3 Connecting a PE Cable................................ 44 5.4 Connecting an AC Output Power Cable........................45 5.5 Requirements for AC Power Cable Stripping Outside the Compartment............52 Issue 07 (2023-06-30) Copyright © Huawei Technologies Co., Ltd. - Page 7 10 Technical Specifications.....................98 A Crimping an OT or DT Terminal..................103 B Domain Name List of Management Systems...............106 C Grid Codes..........................107 D Resetting Password......................115 E Contact Information......................116 F Acronyms and Abbreviations....................118 Issue 07 (2023-06-30) Copyright © Huawei Technologies Co., Ltd.
-
Page 8: Safety Information
The equipment is damaged due to force majeure such as earthquakes, floods, volcanic eruptions, debris flows, lightning strikes, fires, wars, armed conflicts, typhoons, hurricanes, tornadoes, and other extreme weather conditions. ● The equipment is operated beyond the conditions specified in this document. Issue 07 (2023-06-30) Copyright © Huawei Technologies Co., Ltd. -
Page 9: Personal Safety
D ANGER During operations, use dedicated insulated tools to prevent electric shocks or short circuits. The dielectric withstanding voltage level must comply with local laws, regulations, standards, and specifications. Issue 07 (2023-06-30) Copyright © Huawei Technologies Co., Ltd. - Page 10 Professionals: personnel who are familiar with the working principles and structure of the equipment, trained or experienced in equipment operations and are clear of the sources and degree of various potential hazards in equipment installation, operation, maintenance Issue 07 (2023-06-30) Copyright © Huawei Technologies Co., Ltd.
-
Page 11: Electrical Safety
WARNING For the equipment that needs to be grounded, install the ground cable first when installing the equipment and remove the ground cable last when removing the equipment. Issue 07 (2023-06-30) Copyright © Huawei Technologies Co., Ltd. - Page 12 ● Only qualified professionals can replace a damaged cable. ● Do not scrawl, damage, or block any labels or nameplates on the equipment. Promptly replace labels that have worn out. Issue 07 (2023-06-30) Copyright © Huawei Technologies Co., Ltd.
-
Page 13: Environment Requirements
1.3 Environment Requirements D ANGER Do not expose the equipment to flammable or explosive gas or smoke. Do not perform any operation on the equipment in such environments. Issue 07 (2023-06-30) Copyright © Huawei Technologies Co., Ltd. - Page 14 Do not install the equipment in an area conducive to the growth of microorganisms such as fungus or mildew. ● Do not install the equipment in an area with strong vibration, noise, or electromagnetic interference. Issue 07 (2023-06-30) Copyright © Huawei Technologies Co., Ltd.
-
Page 15: Mechanical Safety
Equipment with scratches must not be exposed for an extended period of time. ● Do not perform operations such as arc welding and cutting on the equipment without evaluation by the Company. Issue 07 (2023-06-30) Copyright © Huawei Technologies Co., Ltd. - Page 16 When moving the equipment, assign dedicated personnel to take care of it. ● Choose sea or roads in good conditions for transportation as transportation by railway or air is not supported. Avoid tilt or jolt during transportation. Issue 07 (2023-06-30) Copyright © Huawei Technologies Co., Ltd.
- Page 17 If a single ladder is used, do not climb higher than the fourth rung of the ladder from the top. ● If you use a single ladder to climb up to a platform, ensure that the ladder is at least 1 m higher than the platform. Issue 07 (2023-06-30) Copyright © Huawei Technologies Co., Ltd.
- Page 18 Drilling Holes ● Obtain consent from the customer and contractor before drilling holes. ● Wear protective equipment such as safety goggles and protective gloves when drilling holes. Issue 07 (2023-06-30) Copyright © Huawei Technologies Co., Ltd.
- Page 19 To avoid short circuits or other risks, do not drill holes into buried pipes or cables. ● When drilling holes, protect the equipment from shavings. After drilling, clean up any shavings. Issue 07 (2023-06-30) Copyright © Huawei Technologies Co., Ltd.
-
Page 20: Overview
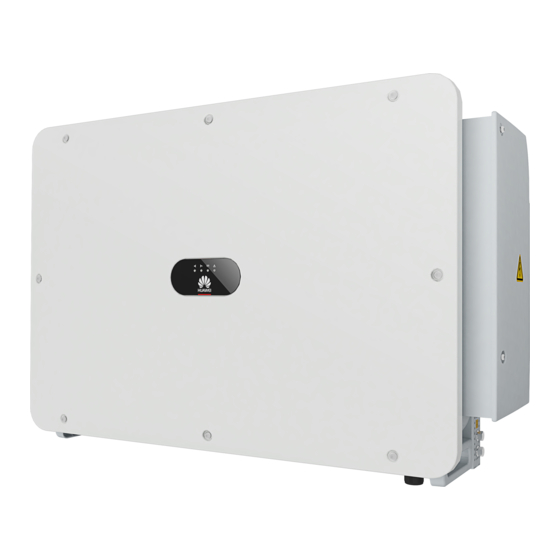
PV strings into AC power and feeds the power into the power grid. 2.1 Model Number Description This document involves the following product models: ● SUN2000-250KTL-H1 ● SUN2000-250KTL-H3 ● SUN2000-280KTL-H0 ● SUN2000-300KTL-H0 ● SUN2000-330KTL-H1 ● SUN2000-330KTL-H2 Figure 2-1 Model number Issue 07 (2023-06-30) Copyright © Huawei Technologies Co., Ltd. -
Page 21: Networking Application
NO TICE The MBUS communication is applicable to medium-voltage grid connection scenarios and non-low-voltage public grid connection scenarios (industrial environment). Issue 07 (2023-06-30) Copyright © Huawei Technologies Co., Ltd. - Page 22 Figure 2-3 MBUS networking application (double-winding transformer +SmartMBUS CCO) (A) PV strings (B) SUN2000s (C) AC combiner box (D) Transformer station (E) Power grid (F) SmartMBUS CCO01B (G) SmartLogger (H) Management system Issue 07 (2023-06-30) Copyright © Huawei Technologies Co., Ltd.
- Page 23 (G) Power grid (H) Management system Figure 2-5 RS485 networking application (A) PV strings (B) SUN2000s (C) AC combiner box (D) Transformer station (E) Power grid (F) SmartLogger (G) Management system Issue 07 (2023-06-30) Copyright © Huawei Technologies Co., Ltd.
- Page 24 The SUN2000 supports the IT earthing system in PV-only scenarios. The use of the SUN2000 in other types of earthing systems, such as TT, TN-C, and TN-C-S, is not recommended. (If such an earthing system is encountered, contact the Company's engineers.) Issue 07 (2023-06-30) Copyright © Huawei Technologies Co., Ltd.
-
Page 25: Appearance
(13) DC switch 2 (DC SWITCH 2) (14) Tracking system power cable hole (15) AC output power cable holes NO TE Note [1]: The silkscreen on some models is MAIN SWITCH. The actual product silkscreen may vary. Issue 07 (2023-06-30) Copyright © Huawei Technologies Co., Ltd. - Page 26 AUX. SWITCH, the PV connection indicator is steady green and the alarm indicator is steady red. This is normal and no alarm needs to be handled.) Blinking red A minor alarm was generated. fast Issue 07 (2023-06-30) Copyright © Huawei Technologies Co., Ltd.
- Page 27 Table 2-1 DC SWITCH description Switch Description The DC SWITCH is on and can turn off for protection. SWITCH TRIP The DC SWITCH is automatically turned off. (The switch handle is between ON and OFF.) Issue 07 (2023-06-30) Copyright © Huawei Technologies Co., Ltd.
-
Page 28: Circuit Diagram
The DC power is converted into three-phase AC power through an inverter circuit. Surge protection is supported on both the DC and AC sides. Figure 2-9 Circuit diagram 2.5 Working Modes The SUN2000 can work in Standby, Operating, or Shutdown mode. Issue 07 (2023-06-30) Copyright © Huawei Technologies Co., Ltd. - Page 29 ● In Standby or Operating mode, the SUN2000 enters Shutdown mode after detecting a fault or shutdown command. ● In Shutdown mode, the SUN2000 enters Standby mode after detecting a startup command or that the fault is rectified. Issue 07 (2023-06-30) Copyright © Huawei Technologies Co., Ltd.
-
Page 30: Label Description
Fan operation warning High voltage exists after the SUN2000 is powered on. Do not touch the fans when the SUN2000 is working. Fan replacement The power connector of the fan must warning be disconnected before fan replacement. Issue 07 (2023-06-30) Copyright © Huawei Technologies Co., Ltd. - Page 31 SUN2000-(250KTL, 280KTL, 300KTL, 330KTL) Series User Manual 2 Overview Symbol Name Meaning SUN2000 ESN label Indicates the SUN2000 serial number. Weight label The SUN2000 needs to be carried by four persons or using a forklift. Issue 07 (2023-06-30) Copyright © Huawei Technologies Co., Ltd.
-
Page 32: Storage Requirements
● Do not tilt the package or place it upside down. ● To avoid personal injury or device damage, stack inverters with caution to prevent them from falling over. Issue 07 (2023-06-30) Copyright © Huawei Technologies Co., Ltd. - Page 33 Figure 3-2 Maximum number of pile-up layers allowed ● If the solar inverter has been stored for more than two years, it must be checked and tested by professionals before being put into use. Issue 07 (2023-06-30) Copyright © Huawei Technologies Co., Ltd.
-
Page 34: Installation
If the inverter is installed in a place with abundant vegetation, in addition to routine weeding, harden the ground underneath the inverter using cement or gravel (recommended area: 3 m x 2.5 m). Issue 07 (2023-06-30) Copyright © Huawei Technologies Co., Ltd. - Page 35 500 m of the coast or prone to sea breeze. Regions prone to sea breeze vary with weather conditions (such as typhoons and monsoons) or terrains (such as dams and hills). Issue 07 (2023-06-30) Copyright © Huawei Technologies Co., Ltd.
- Page 36 Do not install the inverter on flammable building materials. ● Do not install the inverter on a mounting structure that may generate resonance. ● Ensure that the installation surface is solid enough to bear the weight of the inverter. Issue 07 (2023-06-30) Copyright © Huawei Technologies Co., Ltd.
-
Page 37: Clearance Requirements
4 Installation Figure 4-2 Mounting structure requirements 4.2.2 Clearance Requirements Dimensions Figure 4-3 Dimensions Installation Clearance Requirements Reserve sufficient clearance around the SUN2000 for installation and heat dissipation. Figure 4-4 Clearance Issue 07 (2023-06-30) Copyright © Huawei Technologies Co., Ltd. - Page 38 Figure 4-5 Horizontal installation mode (recommended) Figure 4-6 Triangle installation mode (not recommended) (1) Air baffle NO TE Stacked installation is not allowed. Issue 07 (2023-06-30) Copyright © Huawei Technologies Co., Ltd.
- Page 39 Figure 4-8 Recommended air baffle dimensions Preinstall the air baffle on the mounting bracket and then install the mounting bracket with the air baffle on the wall support. Figure 4-9 Installing an air baffle Issue 07 (2023-06-30) Copyright © Huawei Technologies Co., Ltd.
-
Page 40: Angle Requirements
Figure 4-10 Installation angle 4.3 Preparing Tools Table 4-2 Personal protective equipment (PPE) Safety helmet Goggles Protective shoes Reflective vest Insulated gloves Protective gloves Dust mask Insulated shoes Issue 07 (2023-06-30) Copyright © Huawei Technologies Co., Ltd. - Page 41 Phillips insulated Insulated torque Torx key insulated torque torque socket wrench screwdriver screwdriver (M4/M10/M12, (M3) (M3/M4) including an extended socket) Hammer drill Hammer drill bit Utility knife Marker (Ф14 mm) Insulated ladder Issue 07 (2023-06-30) Copyright © Huawei Technologies Co., Ltd.
- Page 42 CT75A-FJB7 (AVIC (AVIC JONHON) JONHON) Table 4-6 Measurement instruments Clamp meter Steel measuring Level Multimeter tape DC voltage measurement range ≥ 1500 V Insulation resistance tester (output voltage > 1500 V) Issue 07 (2023-06-30) Copyright © Huawei Technologies Co., Ltd.
-
Page 43: Checking Before Installation
After unpacking the inverter, check that the contents are intact and complete. If any damage is found or any component is missing, contact your supplier. NO TE For details about the number of contents, see the Packing List in the packing case. Issue 07 (2023-06-30) Copyright © Huawei Technologies Co., Ltd. -
Page 44: Moving The Sun2000
● When you need to temporally place the SUN2000 on the ground, use foam, cardboard, or other protection material to prevent damage to its enclosure. Figure 4-11 Moving the SUN2000 NO TE If the installation position is high, you can hoist the SUN2000. Issue 07 (2023-06-30) Copyright © Huawei Technologies Co., Ltd. -
Page 45: Installing The Sun2000 On A Support
● M12x40 bolt assemblies are delivered with the SUN2000 and bound to the mounting bracket. If the bolt length does not meet the installation requirements, prepare M12 bolt assemblies by yourself and use them together with the delivered M12 nuts. Issue 07 (2023-06-30) Copyright © Huawei Technologies Co., Ltd. -
Page 46: Installing The Sun2000 On A Pole Clamp
Step 3 Secure the SUN2000. Figure 4-15 Securing the SUN2000 ----End 4.7 Installing the SUN2000 on a Pole Clamp Figure 4-16 Pole-clamp installation (1) Square bolt clamp (2) Inverter mounting beam (3) Vertical pole Issue 07 (2023-06-30) Copyright © Huawei Technologies Co., Ltd. -
Page 47: Electrical Connections
● Only certified electrician can perform electrical terminations. ● Operation personnel must wear PPE when connecting cables. ● Before connecting cables to ports, leave enough slack to reduce the tension on the cables and prevent poor cable connections. Issue 07 (2023-06-30) Copyright © Huawei Technologies Co., Ltd. -
Page 48: Preparing Cables
Select cables in accordance with local cable specifications (green-and-yellow cables are only used for protective earthing). 5.2 Preparing Cables Figure 5-1 Cable connections (configure the components in the dotted box as required) Issue 07 (2023-06-30) Copyright © Huawei Technologies Co., Ltd. - Page 49 The SUN2000 has an internal residual current monitoring unit (RCMU). Its external AC switch should be a three-phase circuit breaker or any other AC load circuit breaker to safely disconnect the SUN2000 from the power grid. Issue 07 (2023-06-30) Copyright © Huawei Technologies Co., Ltd.
- Page 50 Single-core outdoor – S: 120–150 (single-core) cable and M12 OT/DT customer terminal – S ≥ S/2 ● Aluminum alloy cable or copper-clad aluminum cable: – S: 150–400 – S ≥ S/2 Issue 07 (2023-06-30) Copyright © Huawei Technologies Co., Ltd.
-
Page 51: Connecting A Pe Cable
Preferentially connect the PE cable for the SUN2000 to the ground point on the enclosure. The ground point in the maintenance compartment is used for connecting to the PE wire of a multi-core AC power cable. Issue 07 (2023-06-30) Copyright © Huawei Technologies Co., Ltd. -
Page 52: Connecting An Ac Output Power Cable
The SUN2000 is integrated with a comprehensive residual current detection unit to distinguish fault current from residual current. Upon detecting that the residual current exceeds the threshold, the SUN2000 immediately disconnects from the power grid. Issue 07 (2023-06-30) Copyright © Huawei Technologies Co., Ltd. - Page 53 The resulting device damage is not covered by the warranty. ● In the quick scheduling scenario with MBUS communication networking, connect AC power cables in the maintenance compartment from left to right in the sequence of L1, L2, and L3. Issue 07 (2023-06-30) Copyright © Huawei Technologies Co., Ltd.
- Page 54 (2) RS485 communications port (3) Ground point on the enclosure (4) AC terminal block Procedure Step 1 Open the maintenance compartment door and install the support strut. Remove the accessories and set them aside. Issue 07 (2023-06-30) Copyright © Huawei Technologies Co., Ltd.
- Page 55 Figure 5-4 Opening a maintenance compartment door (1) Position for binding the ground screw Step 2 Connect the AC output power cables based on the cable type. Figure 5-5 Specifications of the crimped OT/DT terminal Issue 07 (2023-06-30) Copyright © Huawei Technologies Co., Ltd.
- Page 56 PE cable when the AC output power cable is subject to a pulling force due to force majeure. ● After cables are connected, prevent them from contacting the inter-phase baffle plates. Issue 07 (2023-06-30) Copyright © Huawei Technologies Co., Ltd.
- Page 57 Figure 5-9 Multi-core cable connection (using a three-core cable as an example) Step 3 If the system is configured with a tracking system, connect the power cable of the tracking system. Issue 07 (2023-06-30) Copyright © Huawei Technologies Co., Ltd.
- Page 58 Step 4 Clear foreign matter from the maintenance compartment, close the maintenance compartment door, and check that the cable holes at the bottom of the maintenance compartment are sealed. Figure 5-11 Closing a door ----End Issue 07 (2023-06-30) Copyright © Huawei Technologies Co., Ltd.
-
Page 59: Requirements For Ac Power Cable Stripping Outside The Compartment
Step 6 Connect the AC power cable. Step 7 Close the maintenance compartment door, and seal the cable inlet of the maintenance compartment and cable top outlet of the electrical conduit with fireproofing materials. Issue 07 (2023-06-30) Copyright © Huawei Technologies Co., Ltd. - Page 60 ● The armored layer of the cable must be grounded according to the design requirements. ● Wires between the maintenance compartment and electrical conduit must not be exposed to the air. Protective measures must be taken. Figure 5-12 Cable protection Issue 07 (2023-06-30) Copyright © Huawei Technologies Co., Ltd.
-
Page 61: Connecting Dc Input Power Cables
● The polarities of electric connections must be correct on the DC input side. The positive and negative terminals of a PV string must be connected to corresponding positive and negative DC input terminals of the SUN2000. Issue 07 (2023-06-30) Copyright © Huawei Technologies Co., Ltd. - Page 62 The SUN2000 provides 28 DC input terminals, which are controlled by its two DC switches. DC SWITCH 1 controls the DC input terminals PV1–PV14 and DC SWITCH 2 controls the DC input terminals PV15–PV28. Figure 5-14 DC terminals controlled by DC SWITCH 1 Issue 07 (2023-06-30) Copyright © Huawei Technologies Co., Ltd.
- Page 63 Connect to PV2–PV4, PV6–PV12, PV16–PV18, PV21–PV23, and PV26– PV16–PV18, PV21–PV23, and PV26– PV28. PV28. Connect to PV2–PV4, PV6–PV12, Connect to PV2–PV4, PV7–PV13, PV16–PV18, PV21–PV23, and PV25– PV16–PV18, PV20–PV23, and PV25– PV28. PV28. Issue 07 (2023-06-30) Copyright © Huawei Technologies Co., Ltd.
- Page 64 PV16–PV18, PV20–PV23, and PV25– PV28. PV28. Connect to PV1–PV4, PV6–PV13, Connect to PV1–PV4, PV6–PV18, PV15–PV18, PV20–PV23, and PV25– PV20–PV23, and PV25–PV28. PV28. Connect to PV1–PV18, PV20–PV23, Connect to PV1–PV18 and PV20– and PV25–PV28. PV28. Issue 07 (2023-06-30) Copyright © Huawei Technologies Co., Ltd.
- Page 65 If the insulation resistance is greater than or equal to 1 MΩ, the insulation resistance is normal. ● If the insulation resistance is less than 1 MΩ, troubleshoot the insulation fault of the cable or PV string. Issue 07 (2023-06-30) Copyright © Huawei Technologies Co., Ltd.
- Page 66 SUN2000-(250KTL, 280KTL, 300KTL, 330KTL) Series User Manual 5 Electrical Connections Figure 5-16 Testing the insulation resistance Step 2 Connect DC input power cables. Figure 5-17 Connecting DC input power cables Issue 07 (2023-06-30) Copyright © Huawei Technologies Co., Ltd.
-
Page 67: Connecting Signal Cables
RS485B OUT, differential signal– RS485 differential signal– PE, shield layer PE, shield layer grounding grounding RS485-2 RS485A, RS485 RS485B, RS485 Used to connect an differential signal+ differential signal– RS485 slave device. Issue 07 (2023-06-30) Copyright © Huawei Technologies Co., Ltd. - Page 68 Step 1 Connect the RS485 communications cables. Figure 5-19 Connecting communications cables NO TICE Use a plug to block the unused cable hole with the waterproof rubber ring, and then tighten the locking cap. ----End Issue 07 (2023-06-30) Copyright © Huawei Technologies Co., Ltd.
-
Page 69: Check Before Power-On
DC power cable DC power cables are connected correctly and securely. Unused port ● Unused DC terminals are sealed with sealing plugs. ● Unused COM and USB ports are plugged with waterproof plugs. Issue 07 (2023-06-30) Copyright © Huawei Technologies Co., Ltd. -
Page 70: Power-On And Commissioning
When the grid connection indicator is steady green (the SUN2000 is connected to the power grid), do not turn on the DC switch. Otherwise, the SUN2000 may be damaged because insulation resistance detection is not performed. Issue 07 (2023-06-30) Copyright © Huawei Technologies Co., Ltd. - Page 71 If the PV connection indicator is off, turn off the AUX. SWITCH and contact technical support engineers. Step 5 If the SUN2000 is running properly, turn off the AUX. SWITCH. Issue 07 (2023-06-30) Copyright © Huawei Technologies Co., Ltd.
-
Page 72: Commissioning Methods And Process
The SUN2000 can be commissioned on the SmartLogger WebUI or FusionSolar app. You are advised to use the SmartLogger WebUI for deployment commissioning and use the app for password resetting and alarm viewing. Issue 07 (2023-06-30) Copyright © Huawei Technologies Co., Ltd. -
Page 73: Commissioning The Sun2000 (Using The Smartlogger)
For details about software upgrade, see the SmartLogger3000 User Manual. 7.3.3 Commissioning Using Deployment Wizard Procedure Step 1 Set basic parameters. Figure 7-3 Setting basic parameters Step 2 Connect to Huawei devices. Issue 07 (2023-06-30) Copyright © Huawei Technologies Co., Ltd. - Page 74 Settings > SN List > Template to download the SN list template. Return to the deployment wizard, click Upload, and upload the configured template file. Figure 7-5 Downloading the SN list template Issue 07 (2023-06-30) Copyright © Huawei Technologies Co., Ltd.
- Page 75 Step 4 Connect to power meters. Set related parameters by referring to "Setting Meter Parameters" in the SmartLogger3000 User Manual . Figure 7-8 Connecting to power meters Step 5 Connect to EMIs. Issue 07 (2023-06-30) Copyright © Huawei Technologies Co., Ltd.
- Page 76 SUN2000-(250KTL, 280KTL, 300KTL, 330KTL) Series User Manual 7 Power-On and Commissioning Figure 7-9 Connecting to EMIs Step 6 Connect to a Huawei network management system (NMS). Set related parameters by referring to "Setting Parameters for Connecting to the Management System" (content related to a Huawei NMS) in the SmartLogger3000 User Manual .
-
Page 77: Parameters Settings
Figure 7-12 Connecting to third-party devices Step 9 Click Finish. Figure 7-13 Completing the configuration ----End 7.3.4 Parameters Settings Choose Monitoring > Inverter > Running Param., set running parameters, and click Submit. Issue 07 (2023-06-30) Copyright © Huawei Technologies Co., Ltd. -
Page 78: Commissioning The Sun2000 (Using The App)
Step 3 Connect the USB flash drive to the USB port. The system automatically identifies the USB flash drive and executes all commands specified in the boot script file. View the LED indicator to determine the operating status. Issue 07 (2023-06-30) Copyright © Huawei Technologies Co., Ltd. - Page 79 After the restart, the indicator is blinking green slowly for 1 minute and then it becomes steady green, which indicates that the upgrade is successful. ----End Issue 07 (2023-06-30) Copyright © Huawei Technologies Co., Ltd.
-
Page 80: System Maintenance
● Do not open the maintenance compartment door on rainy or snowy days. If you need to, take protective measures to prevent rain or snow from entering the maintenance compartment. If protective measures cannot be taken, do not open the maintenance compartment door. Issue 07 (2023-06-30) Copyright © Huawei Technologies Co., Ltd. - Page 81 SUN2000 is damaged Company's service months status or deformed. engineers. ● Check whether the SUN2000 generates abnormal sounds during operation. ● Check whether all SUN2000 parameters are correctly set during operation. Issue 07 (2023-06-30) Copyright © Huawei Technologies Co., Ltd.
- Page 82 SUN2000. weeding as season SUN2000 required. ● Clean the site promptly after weeding. Figure 8-1 Removing the baffle plate of the air intake vent Issue 07 (2023-06-30) Copyright © Huawei Technologies Co., Ltd.
-
Page 83: Shutdown And Power-Off
● Before power-off for maintenance, do not touch the energized components of the SUN2000. Otherwise, electric shocks or arcs may occur. Issue 07 (2023-06-30) Copyright © Huawei Technologies Co., Ltd. - Page 84 ● If the SUN2000 does not emit abnormal smell or smoke and is intact, repair or restart it based on the alarm handling suggestions. Do not stand in front of the SUN2000 during the restart. Figure 8-2 Power-off for maintenance ----End Issue 07 (2023-06-30) Copyright © Huawei Technologies Co., Ltd.
-
Page 85: Replacing A Fan
Place down the handle. Unscrew the connectors. Disconnect the cables. Pull out the fan tray. Figure 8-3 Pulling out the fan tray Step 2 Remove the cable ties from the faulty fan. Issue 07 (2023-06-30) Copyright © Huawei Technologies Co., Ltd. - Page 86 (4) Remove the cable ties from FAN 4. Step 3 Remove the faulty fan. Figure 8-5 Removing a fan (using FAN 1 as an example) Step 4 Install a new fan. Issue 07 (2023-06-30) Copyright © Huawei Technologies Co., Ltd.
- Page 87 Clean the fan tray and ensure that no foreign matter is left. Align the fan tray with the installation position. Push in the fan tray until the fan baffle plate is flush with the SUN2000 enclosure. Issue 07 (2023-06-30) Copyright © Huawei Technologies Co., Ltd.
-
Page 88: Replacing The Sun2000
If the original packaging is available, put the SUN2000 inside it and then seal it using adhesive tape. ● If the original packaging is unavailable, put the SUN2000 inside a suitable hard cardboard box and seal it properly. Step 3 Dispose of the SUN2000. Issue 07 (2023-06-30) Copyright © Huawei Technologies Co., Ltd. -
Page 89: Resetting And Turning On The Dc Switch
Low insulation resistance alarm on the FusionSolar app. Log in to the FusionSolar app, choose Alarm > Active alarm, and choose Low insulation resistance to enter the Alarm details screen. Issue 07 (2023-06-30) Copyright © Huawei Technologies Co., Ltd. - Page 90 In this case, the fault location status on the Alarm details screen is Conditions not met. Perform the following steps to connect PV strings to the SUN2000 one by one to locate the fault. Issue 07 (2023-06-30) Copyright © Huawei Technologies Co., Ltd.
- Page 91 If the Low insulation resistance alarm is still reported 1 minute after the DC side is powered on, the fault did not occur on the disconnected PV module. Go to Step Issue 07 (2023-06-30) Copyright © Huawei Technologies Co., Ltd.
- Page 92 Step 7 Set the DC SWITCH to ON. If the SUN2000 status is Shutdown: Command, choose Maintenance > Inverter ON/OFF on the home screen and send a startup command. ----End Issue 07 (2023-06-30) Copyright © Huawei Technologies Co., Ltd.
-
Page 93: Alarm Reference
Minor alarm: Some components of the inverter are faulty but the inverter can still connect to the grid and generate power. ● Warning: The inverter works properly. The output power decreases or some authorization functions fail due to external factors. Issue 07 (2023-06-30) Copyright © Huawei Technologies Co., Ltd. - Page 94 PV25, PV26, PV27, and PV28. Cause ID = 13–18 Too many PV modules are connected in series in n PV string, and the MPPT open-circuit voltage exceeds the limit at the current altitude. Issue 07 (2023-06-30) Copyright © Huawei Technologies Co., Ltd.
- Page 95 2. Check whether the PV string is shaded. 3. Check whether the open-circuit voltage of the PV string is normal. 4. Check whether PV modules in the PV string are connected in reverse polarity. Issue 07 (2023-06-30) Copyright © Huawei Technologies Co., Ltd.
- Page 96 PV+ of the device and the ground should be less than 0 V to clear the alarm.) 4. If the alarm occurs repeatedly, contact your dealer or technical support. Issue 07 (2023-06-30) Copyright © Huawei Technologies Co., Ltd.
- Page 97 3. If the fault persists for a long time, check the connection between the AC switch and power cables. Issue 07 (2023-06-30) Copyright © Huawei Technologies Co., Ltd.
- Page 98 AC cables. 4. If the AC cables are correctly connected and the alarm persists and affects the operation of the plant, contact the local power operator. Issue 07 (2023-06-30) Copyright © Huawei Technologies Co., Ltd.
- Page 99 2. If the alarm occurs frequently, check whether the power grid frequency is within the allowed range. If not, contact the local power operator. Issue 07 (2023-06-30) Copyright © Huawei Technologies Co., Ltd.
- Page 100 3. Check the output impedance of the insulation between the PV array to ground. If there is the PV array and the a short circuit or lack of insulation, ground is poor. rectify it. Issue 07 (2023-06-30) Copyright © Huawei Technologies Co., Ltd.
- Page 101 2. Reinstall the fan and turn on the is insufficient, or the air AC and DC switches. If the fault channel is blocked. persists after the device runs for 15 minutes, replace the external fan. Issue 07 (2023-06-30) Copyright © Huawei Technologies Co., Ltd.
- Page 102 About expire. to Expire 2101 Local Major Cause ID = 1 Replace the digital signature Access certificate immediately. The digital signature Certifica certificate has expired. Expired Issue 07 (2023-06-30) Copyright © Huawei Technologies Co., Ltd.
- Page 103 3. Check that the fastening torque of wiring terminals meets the requirement. 4. Turn on the AC switch and DC switch, and restart the inverter. If the fault persists, contact the vendor or technical support. Issue 07 (2023-06-30) Copyright © Huawei Technologies Co., Ltd.
- Page 104 ● The flash memory is Faulty AC and DC switches. If the fault insufficient. persists, replace the monitoring board ● The flash memory has or contact your dealer or technical bad sectors. support. Issue 07 (2023-06-30) Copyright © Huawei Technologies Co., Ltd.
-
Page 105: Technical Specifications
SUN200 SUN200 SUN200 SUN200 SUN200 0-250KT 0-280KT 0-300KT 0-330KT 0-330KT 0-250KT L-H3 L-H0 L-H0 L-H1 L-H2 L-H1 Maximu 1500 V m input voltage Maximu 65 A m input current (per MPPT) Issue 07 (2023-06-30) Copyright © Huawei Technologies Co., Ltd. - Page 106 275 kVA 308 kVA 330 kVA 330 kVA 330 kVA 275 kVA apparent power Maximu 275 kW 308 kW 330 kW 330 kW 330 kW 275 kW m active power (cosφ = Issue 07 (2023-06-30) Copyright © Huawei Technologies Co., Ltd.
- Page 107 Item SUN200 SUN200 SUN200 SUN200 SUN200 SUN200 0-250KT 0-280KT 0-300KT 0-330KT 0-330KT 0-250KT L-H3 L-H0 L-H0 L-H1 L-H2 L-H1 Input DC Supported switch Anti- Supported islanding protectio Output Supported overcurre protectio Issue 07 (2023-06-30) Copyright © Huawei Technologies Co., Ltd.
- Page 108 Display and Communication Item SUN200 SUN200 SUN200 SUN200 SUN200 SUN200 0-250KT 0-280KT 0-300KT 0-330KT 0-330KT 0-250KT L-H3 L-H0 L-H0 L-H1 L-H2 L-H1 Display LED indicators RS485 Supported MBUS Supported Supported WLAN Supported +App Issue 07 (2023-06-30) Copyright © Huawei Technologies Co., Ltd.
- Page 109 5000 m (derated when the altitude is greater than 4000 m) operating altitude Relative 0%–100% RH humidity Input CT75A-1T-34/CT75A-1T-35 (AVIC HH4SFD4TMS/HH4SMD4TMS terminal JONHON) Output Waterproof terminal+OT/DT terminal terminal IP rating IP66 Self- 4.8 W consump tion at night (sleep mode) Issue 07 (2023-06-30) Copyright © Huawei Technologies Co., Ltd.
-
Page 110: A Crimping An Ot Or Dt Terminal
● Do not mix up the aluminum and copper sides of a copper-to-aluminum washer. Ensure that the aluminum side of the washer contacts the aluminum wiring terminal, and that the copper side contacts the terminal block. Issue 07 (2023-06-30) Copyright © Huawei Technologies Co., Ltd. - Page 111 ● Wrap the wire crimping area with heat shrink tubing or insulation tape. The heat shrink tubing is used as an example. ● Use a heat gun carefully to avoid heat damage to the equipment. Issue 07 (2023-06-30) Copyright © Huawei Technologies Co., Ltd.
- Page 112 (4) OT terminal (5) Hydraulic pliers (6) Heat gun Figure A-3 Crimping a DT terminal (1) Cable (2) Core wire (3) Heat shrink tubing (4) DT terminal (5) Hydraulic pliers (6) Heat gun Issue 07 (2023-06-30) Copyright © Huawei Technologies Co., Ltd.
-
Page 113: B Domain Name List Of Management Systems
The list is subject to change. Table B-1 Domain names of management systems Domain Name Data Type Scenario intl.fusionsolar.huawei.co Public IP address FusionSolar hosting cloud NOTE The domain name is compatible with cn.fusionsolar.huawei.com (Chinese mainland). Issue 07 (2023-06-30) Copyright © Huawei Technologies Co., Ltd. -
Page 114: C Grid Codes
Brazil Support 16149- medium MV800 -voltage power grid BRASIL- Brazil Support ANEEL- power MV800 grid KOREA- South Support MV800 Korea power grid TAIPOWER- Taiwan Support MV800 Power medium -voltage power grid Issue 07 (2023-06-30) Copyright © Huawei Technologies Co., Ltd. - Page 115 Support MV800 power grid Malaysian- Malaysia Support MV800 power grid Bangladesh- Banglad Support MV800 power grid Vietnam- Vietnam Support MV800 medium -voltage power grid Cambodia- Cambodi Support MV800 a power grid Issue 07 (2023-06-30) Copyright © Huawei Technologies Co., Ltd.
- Page 116 Support power grid EN50438_IE- Ireland Support MV800 power grid EN50549- Ireland Support MV800 power grid IRELAND- Ireland Support EN50549- power MV800 grid Northern Norther Support Ireland- n Ireland MV800 power grid Issue 07 (2023-06-30) Copyright © Huawei Technologies Co., Ltd.
- Page 117 POLAND- Poland Support EN50549- power MV800 grid CZECH- Czech Support EN50549- Republic MV800 power grid EN50438-TR- Turkey Support MV800 power grid Macedonia- Republic Support MV800 of North Macedo power grid Issue 07 (2023-06-30) Copyright © Huawei Technologies Co., Ltd.
- Page 118 -voltage power grid Nicaragua- Nicarag Support MV800 power grid Panama- Panama Support MV800 power grid SAUDI- Saudi Support MV800 Arabia power grid LEBANON- Lebanon Support MV800 medium -voltage power grid Issue 07 (2023-06-30) Copyright © Huawei Technologies Co., Ltd.
- Page 119 Jordan- Jordan Support Transmission- high- HV800 voltage power grid Egypt ETEC- Egypt Support MV800 power grid KENYA_ETHI Kenya Support OPIA-MV800 low- voltage power grid and Ethiopia medium -voltage power grid Issue 07 (2023-06-30) Copyright © Huawei Technologies Co., Ltd.
- Page 120 Ethiopia medium -voltage power grid NAMIBIA_MV Namibia Support power grid Cameroon- Camero Support MV800 medium -voltage power grid Ghana- Ghana Support MV800 medium -voltage power grid Issue 07 (2023-06-30) Copyright © Huawei Technologies Co., Ltd.
- Page 121 KAZAKHSTAN Kazakhs Support -MV800 power grid Mauritius- Mauritiu Support MV800 s power grid NO TE The grid codes are subject to change. The listed codes are for reference only. Issue 07 (2023-06-30) Copyright © Huawei Technologies Co., Ltd.
-
Page 122: D Resetting Password
10 minutes, all parameters of the inverter remain unchanged.) ----End NO TICE You are advised to reset the password in the morning or at night when the solar irradiance is low. Issue 07 (2023-06-30) Copyright © Huawei Technologies Co., Ltd. -
Page 123: E Contact Information
To ensure faster and better services, we kindly request your assistance in providing the following information: ● Model ● Serial number (SN) ● Software version ● Alarm ID or name ● Brief description of the fault symptom Issue 07 (2023-06-30) Copyright © Huawei Technologies Co., Ltd. - Page 124 SUN2000-(250KTL, 280KTL, 300KTL, 330KTL) Series User Manual E Contact Information NO TE EU Representative Information: Huawei Technologies Hungary Kft. Add.: HU-1133 Budapest, Váci út 116-118., 1. Building, 6. floor. Email: hungary.reception@huawei.com Issue 07 (2023-06-30) Copyright © Huawei Technologies Co., Ltd.
-
Page 125: F Acronyms And Abbreviations
F Acronyms and Abbreviations Acronyms and Abbreviations AUX. Auxiliary light emitting diode MBUS monitoring bus maximum power point MPPT maximum power point tracking potential induced degradation photovoltaic RCMU residual current monitoring unit Issue 07 (2023-06-30) Copyright © Huawei Technologies Co., Ltd.
Need help?
Do you have a question about the SUN2000-250KTL Series and is the answer not in the manual?
Questions and answers