Advertisement
Quick Links
Advertisement

Related Manuals for Branch Ergonomic Chair


Summary of Contents for Branch Ergonomic Chair
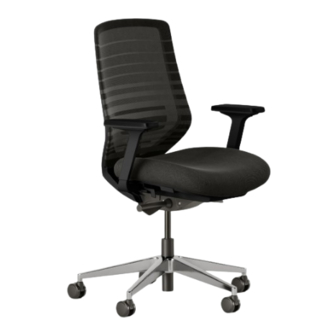
- Page 1 Ergonomic Chair Assembly Guide...
- Page 3 The new way of working you’ve been waiting for. Scan here for a digital copy of your assembly guide.
- Page 4 Caution Use this product only for seating one person at a time. Some screws may be preassembled. If preassembled, ignore assembly instructions. Do not use this chair as a step stool/ladder, or on uneven floor surfaces. Do not sit on any part of the chair except the seat. Do not use chair unless all bolts, screws, and knobs are tightened.
- Page 5 Components Backrest (x1) Seat (x1) Mechanism (x1) Armrest (x2) Back Bolt Armrest Bolt Spring 20mm (x3) 30mm (x2) Washer (x3) 5 Star Base (x1) Cylinder (x1) Casters (x5) Flat Allen Key 811-3$<-0 (x1) Washer (x5) Nut (x2)* 5mm (x1) *pre-installed in armrests...
- Page 6 With the 5 Star Base upside-down, push the Casters (x5) into each hole with a fair amount of force (they should ‘pop’ in). Once completed, turn over so the casters are on the floor and insert the Cylinder into the 5 Star Base with the larger end on the bottom. Set the assembled base aside for now - we’ll get back to it later!
- Page 7 Back Bolt Spring Washer Flat Washer First, thread each of the Back Bolts (x3) with a Spring Washer (x3) and then a Flat Washer (x3). With the Backrest and Mechanism upside down, slide the seat back into the slot of the Mechanism.
- Page 8 Grab the chair frame that you assembled in Step 2, and insert it into the Cylinder. Push down firmly to secure.
- Page 9 Armrest Bolt & Washer Pre-inserted Hex Nut Lock Lever Adjustment Button With the Cushion upside down, insert Armrests (x2) into the sides of the chair, making sure the armrest Adjustment Buttons face the front of the seat (the same direction as the Lock Levers shown above).
- Page 10 Seat Depth Adjustment Pull Grab the seat you assembled in Step 4. On the right side of the Cushion, hold the Seat Depth Adjustment Pull open while sliding the seat onto the chair frame. Ensure the track on the bottom of the seat engages on both sides of the Mechanism. Push the seat all the way back to the base until you hear a click, and release the Pull to secure.
- Page 11 (optional) To install: Attach Headrest to the top rear of the chair back frame. Align the holes on the headrest base to the chair frame, insert both Screws, and tighen with the Allen Key.
- Page 12 All done! Go ahead, try it out. You may experience what we call an “ahhh” sensation. That’s completely normal. You’re now well equipped for whatever the workday throws at you. Now, don’t be shy. Show us how it looks! @branchfurniture #officebybranch...
- Page 13 User Guide Seat Height: Seat Tilt & Lock: Paddle-shaped lever on the right side Paddle-shaped lever on left side To raise: To recline: While taking your weight Twist the lever and lean off the chair, lift lever up. back. Twist again to lock. To lower: To return upright: While seated, lift lever up.
- Page 14 User Guide Cont. Armrest Depth: Seat Depth: Top of each armrest Square lever on right side below cushion To adjust depth: To adjust depth: While seated, grasp top of Pull out and hold lever armrest and slide it while sliding seat forward forward or backward.
-
Page 15: Faq And Troubleshooting
FAQ & Troubleshooting Issue Phase Suggestion The armrest bolts don’t Assembly The bolts attaching the armrests to the chair should permit seem fully tightened. them to slide. Use the locking levers to tighten. I can’t get the seat onto Assembly Pull out the square lever on the side of the seat before the chair frame. - Page 16 Contact Have a question, comment, or suggestion? hello@branchfurniture.com branchfurniture.com...
Need help?
Do you have a question about the Ergonomic Chair and is the answer not in the manual?
Questions and answers