Table of Contents
Advertisement
Available languages
Available languages
Quick Links
Advertisement
Table of Contents

Related Manuals for Costway SP37860US


Summary of Contents for Costway SP37860US
- Page 1 Folding Treadmill Tapis Roulant Pliable SP37860US USA office: Fontana AUS office: Truganina GBR office: Ipswich FRA office: Saint Vigor d'Ymonville THIS INSTRUCTION BOOKLET CONTAINS IMPORTANT SAFETY INFORMATION. PLEASE READ AND KEEP FOR FUTURE REFERENCE.
-
Page 2: Before You Start
Before You Start Please read all instructions carefully. Retain instructions for future reference. Separate and count all parts and hardware. Read through each step carefully and follow the proper order. We recommend that, where possible, all items are assembled near to the area in which they will be placed in use, to avoid moving the product unnecessarily once assembled. - Page 3 ◆When exercising, please clip the safety lock cable clip to the (2) Those who have deformed arthritis, rheumatism and gout. clothes to prevent safe shutdown in case of emergency. (3) Those with abnormalities such as osteoporosis. ◆If you feel uncomfortable or abnormal during use, please stop (4) Those with circulatory system disorders (heart disease, vascular exercising and consult a doctor.
- Page 4 Prohibition! Prohibition! ◆Do not use in a state where the casing is cracked, or detached ◆People who don't usually exercise should not suddenly do (internal structure is exposed) or the welded part is detached. intense exercise. - Otherwise an accident or injury may occur. ◆Do not use it after eating, when you are tired, when you have just ◆Do not jump up or down during exercise.
-
Page 5: Grounding Instructions
◆In the event of a power failure, pull out the power plug 2. Product Introduction immediately. - Otherwise, accident or injury may occur when power is restored. ◆When pulling out the power plug, do not hold the wire part, but pull out the power plug. -
Page 6: Technical Specification
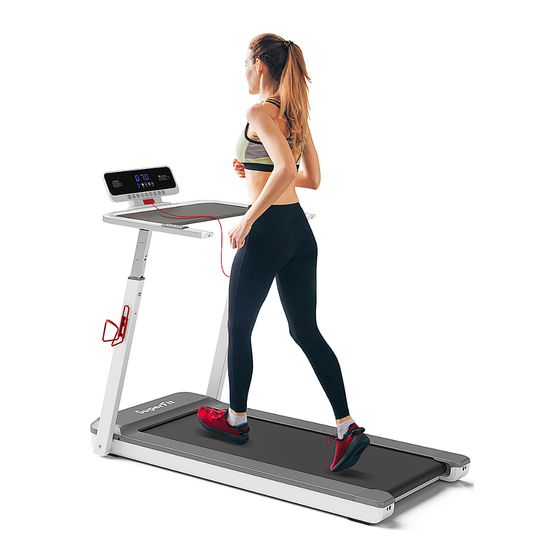
Technical Specification 3. Installation Procedure Working Voltage AC110V 50/60Hz 1) Take the machine out of the packing box Maximum Load 265LBS and place it flat on the carpet or cushion. Folding Size 55”x26.5”x5” As shown in step ①, use ratchet wrench to loosen the screws under the left and right Expanding Size 55”x26.5”x37”~49.5”... -
Page 7: Folding Instruction
Riser height adjustment 4) Install drink holder. As shown in step ⑦, install the drink holder on the right riser, and secure it with two "M4x4mm" cross pan head screws. 5) As shown, after the installation is completed, you can put the ratchet wrench in the pocket under the table Riser extension adjustment: As shown in step ①, loosen the screws to facilitate the next adjustment of the... - Page 8 4. Exercise Suggestions & Guidelines Warm up There should be 5-10 minutes of warm-up exercise before each operation. Breathe Do not hold your breath during operation. In general, inhale through your nose and exhale forcefully through your mouth when you are preparing to restore the movement.
-
Page 9: Stretching Exercises
Stretching Exercises 4. Quadriceps Stretch Hold the wall with your right hand for balance, then stretch your left No matter what speed you are walking at, it is best to do stretching hand back, grab your left ankle and slowly pull it toward your exercises first. - Page 10 ● Key Function Instruction Pause/Resume: Short press to pause or resume running 1) Setting Keys Including 4 keys: “SMART”, “BACK”, “SET”, “NEXT” Speed 3: Short press during running and adjust the speed to 3 (Km/h or Mile/h). If the maximum speed limit is exceeded, the adjustment is ineffective SMART: Speed 5: Short press during running and adjust the speed to 5...
-
Page 11: Troubleshooting
Parameter Adjustment 6. Troubleshooting 1. Enter the Parameter Setting Interface If you have any other questions, please contact our customer Remove the safety key and long press to enter parameter setting service. interface. Then the heart rate window shows Uxx, and the main display window shows parameters. -
Page 12: Product Maintenance
7. Product Maintenance Error messages on electronic meter and elimination methods 1. Lubrication Problem Possible Cause Method After the running belt has been used for a period of time, it must be lubricated with a specially configured methyl-silicone oil. The signal line is not plugged in, plug Bad communication it in again Advice:... - Page 13 3. Adjust the tightness of the running belt. All treadmills need to be adjusted before leaving the factory and after installation, but there may be slack after a period of use. Such as: the user pauses and Loosen slips when running. When this phenomenon occurs, adjust the Loosen running belt adjustment bolts in a clockwise direction with a half Tighten...
- Page 14 Retrieve Password Gymax App Instruction Manual If E-mail users forget Passwords, users can click "Forget Password" on the mailbox login interface to jump to the Password retrieval interface, and then reset Passwords. This document is applicable to the Android version and iOS version of the official APP of Gymax.
- Page 15 Sports Scenes Starting exercise Connecting services Selecting the device page, such as "Start" on the "Treadmill" On the home page, users can freely choose the device type to interface, users enter the running free, as shown below: connect. After connecting successfully, then user can select the 1.
- Page 16 Sports Plan 4. When users finish the exercise, the Gymax App will show users' total running distance. Users can click "Add More Training Plans" to add users' own sports plans. 5. Users can share the sports data to the community or save it to the phone album.
- Page 17 2. When the goal is reached, the exercise automatically ends. 2. And then start training with a fitness coach. Exercise Record The user can view the exercise data record in the device page. Training Course (me-exercise data) 1. Users can select courses in the interface of training course.
- Page 18 Sports Mall Users can purchase satisfied sports devices. Community dynamic 1.In sports community, users can share dynamic communication with each other. 2. Users can comment dynamics in community. 3. Users can post dynamics. 4. Users can remove the released dynamics in Me-My Dynamic.
- Page 19 Settings System Settings Users can click "Me" to enter the set up, including unit, feedback, terms of agreement, privacy agreement and clear cache, etc. Feedback Users can submit suggestions and the problem for improving the product. Clear Cache Users can clean up the system cache Unit settings (metric or imperial according to users' needs, including standard)
- Page 20 ◆Veuillez éteindre le tapis de course après l'exercice. ◆Veuillez maintenir la circulation de l'air intérieur lorsque vous utilisez le tapis de course. ◆Lorsque vous faites de l'exercice, veuillez attacher le clip du câble de verrouillage de sécurité aux vêtements pour empêcher un arrêt sûr en cas d'urgence.
- Page 21 ◆Si vous ressentez des vertiges, des douleurs thoraciques, des (14) Ceux qui se sentent anormaux dans leur corps et ont besoin nausées ou un essoufflement pendant l'exercice, veuillez arrêter de se reposer. immédiatement l'exercice et consulter un préparateur physique. (15) Ceux qui sont manifestement en mauvaise condition physique. (16) Les utilisateurs à...
- Page 22 ◆Ne l'utilisez pas ou ne le rangez pas dans des endroits où la Évitez tout contact avec l'eau ! température est élevée, comme autour de la cuisinière en plein ◆Ne pas asperger le corps principal ou la partie opérationnelle soleil, ou sur le dessus d'appareils de chauffage tels que les tapis avec de l'eau ou tout autre liquide conducteur.
-
Page 23: Instructions De Mise À La Terre
Ne jamais utiliser avec des Instructions de mise à la terre ! mains mouillées ! ◆Le produit doit être mis à la terre. En cas de dysfonctionnement ◆Ne pas retirer ou insérer la fiche d'alimentation avec les mains de l'appareil, la mise à la terre fournira le chemin de moindre mouillées. -
Page 24: Spécifications Techniques
2. Introduction des Produits Spécifications Techniques Tension de fonctionnement AC110V 50/60Hz Charge maximale 265LBS Taille de pliage 55”x26,5”x5” Écran d'affichage Taille d'expansion 55”x26,5”x37”~49,5” Table Verrouillage Holding heartbeat tablet Surface de roulement 16,5”x43,5” de sécurité Cover for handrail tube Tenue de la Puissance du moteur 3,0 HP Couvercle du tube de la... -
Page 25: Procédure D'installation
3. Procédure d'Installation 4) Installez le porte-boisson. Comme indiqué à 1) Sortez la machine du carton d'emballage l'étape ⑦, installez le porte-boisson sur la et posez-la à plat sur le tapis ou le coussin. colonne montante droite, et fixez-le avec deux Comme indiqué... - Page 26 Réglage de la hauteur de la colonne montante Réglage de l'extension des colonnes montantes : Comme indiqué à l'étape ①, desserrez les vis des colonnes montantes gauche et droite de 3 à 5 tours dans le sens inverse des aiguilles d'une montre à...
- Page 27 Exercices d'étirement 4. Suggestions et Directives pour l'Exercice Quelle que soit la vitesse à laquelle vous marchez, il est préférable Échauffement de commencer par des exercices d'étirement. Les muscles chauds Il faut prévoir 5 à 10 minutes d'exercice d'échauffement avant sont plus faciles à...
-
Page 28: Instructions De Manipulation
4. Étirement des quadriceps ● Instructions sur les Fonctions des Touches Tenez le mur avec votre main droite pour vous équilibrer, puis 1) Touches de Paramétrage tendez votre main gauche vers l'arrière, attrapez votre cheville gauche et tirez-la lentement vers vos fesses, jusqu'à ce que vous Incluant 4 touches : "SMART", "BACK", "SET", "NEXT". - Page 29 Réglage des Paramètres Pause/Reprise : Appuyez brièvement pour mettre en pause ou 1. Entrer dans l'interface de paramétrage reprendre la course. Retirez la clé de sécurité et appuyez longuement pour accéder à l'interface de paramétrage. La fenêtre de fréquence cardiaque affiche Vitesse 3 : Appuyez brièvement pendant la course et réglez la alors Uxx, et la fenêtre d'affichage principal affiche les paramètres.
-
Page 30: Dépannage
6. Dépannage Messages d'erreur sur le compteur électronique et méthodes d'élimination Si vous avez d'autres questions, veuillez contacter notre service clientèle. Problem Possible Cause Method Problème Cause possible Méthode Mauvaise La ligne de signal n'est pas communication branchée, rebranchez-la. Branchez dans la prise Pas d'alimentation de courant Le fil du moteur est... - Page 31 ★Utiliser la vitesse de 1km/h (0,6mph) pour faire fonctionner le 7. Entretien des Produits tapis roulant afin d'appliquer uniformément l'huile de méthyl-silicone, et marcher légèrement sur la bande de roulement de gauche à 1. Lubrification droite, et l'huile de méthyl-silicone peut être complètement absorbée Après une certaine période d'utilisation, la bande de roulement doit par la bande de roulement après environ quelques minutes.
- Page 32 5. Réglage de la courroie du moteur (comme indiqué ci-dessous) Tous les tapis roulants ont été réglés avant de quitter l'usine et Desserrer après l'installation, mais il peut y avoir du mou et du glissement Desserrer après une période d'utilisation, ce qui est principalement réglé par l'utilisateur.
- Page 33 Manuel d’Instructions de Gymax App Récupération de Mot de Passe Si les utilisateurs oublient leurs mots de passe, ils peuvent cliquer sur « Mot de passe oublié » dans l’interface de connexion par e-mail Ce manuel s’applique à la version Android et à la version IOS de pour accéder à...
- Page 34 Scènes Sportives Commencer l’Exercice Connexion des services Sélectionnez la page de l’appareil, par exemple « Démarrer » sur Sur la page d’accueil, les utilisateurs peuvent librement choisir le l’interface « Tapis roulant », les utilisateurs obtiennent un accès type d’appareil à connecter. Après avoir réussi à connecter les gratuit au trajet, comme indiqué...
- Page 35 Plan Sportif 4. Lorsque les utilisateurs ont fini de s’entraîner, l’APP Gymax affiche le kilométrage total des utilisateurs. Les utilisateurs peuvent cliquer sur « Ajouter d’autres plans d’entraînement » pour ajouter les plans sportifs des utilisateurs. 5. Les utilisateurs peuvent partager des données sportives avec la communauté...
- Page 36 2. Lorsque l’objectif est atteint, l’exercice se termine 2. Et puis commencer à s’entraîner avec un instructeur de fitness. automatiquement. Cours de Formation Record d’Exercice 1. Les utilisateurs peuvent sélectionner des cours dans l’interface L’utilisateur peut afficher le record des données d’entraînement sur des cours de formation.
- Page 37 Centre Sportif Les utilisateurs peuvent acheter leur équipement de sport intelligent préféré. Dynamique Communautaire 1. Dans la communauté sportive, les utilisateurs peuvent partager une communication dynamique entre eux. 2. Les utilisateurs 3. Les utilisateurs 4. Les utilisateurs peuvent commenter peuvent publier peuvent supprimer les les dynamiques de des dynamiques.
- Page 38 Return / Damage Claim Instructions DO NOT discard the box / original packaging. In case a return is required, the item must be returned in original box. Without this your return will not be accepted. Take a photo of the box markings. A photo of the markings (text) on the side of the box is required in case a part is Paramètres d’unité...
Need help?
Do you have a question about the SP37860US and is the answer not in the manual?
Questions and answers
Treadmill won’t start. Panel lights up and continuously flashes different “P” codes and beeps. Have tried unplugging from outlet, turning switch at the bottom on and off, removing the key and more.
@Gina it is not the safety lock. We have tried that and it’s not just the E07 code
It won’t stop beeping when I plug it in and I can’t start it. It just beeps. I’ve tried unplugging it and it still beeps and won’t start.
The Costway SP37860US keeps beeping and does not start because the safety lock is not in place. When the safety lock is removed or not properly attached, the screen displays "E07" and the buzzer sounds "BI-BI-BI" as a safety feature.
This answer is automatically generated