
Subscribe to Our Youtube Channel
Related Manuals for Wisdom Insight P7m-LCR


Summary of Contents for Wisdom Insight P7m-LCR
- Page 1 Owner’s Manual Insight P7m-LCR Insight P9m-LCR LCR Planar Magnetic Soundbar Loudspeaker...
-
Page 2: Table Of Contents
Dimensions | 24 DOCUMENT CONVENTIONS This document contains general safety, installation, and operation instructions for the Wisdom Audio Insight P7M/P9Mm Loudspeaker. It is important to read this document before attempting to use this product. Pay particular attention to: WARNING: Calls attention to a procedure, practice, condition or the like that, if not correctly performed or adhered to, could result in injury or death. -
Page 3: Introduction
Your Insight P7m/P9m series loudspeaker are specifically designed to avoid the compromises inherent in conventional speaker designs. Each P7m or P9m Series speakers is customized to fit the width of your specific TV. Before ordering, contact Wisdom Audio Sales for specific details on sizes and customization. -
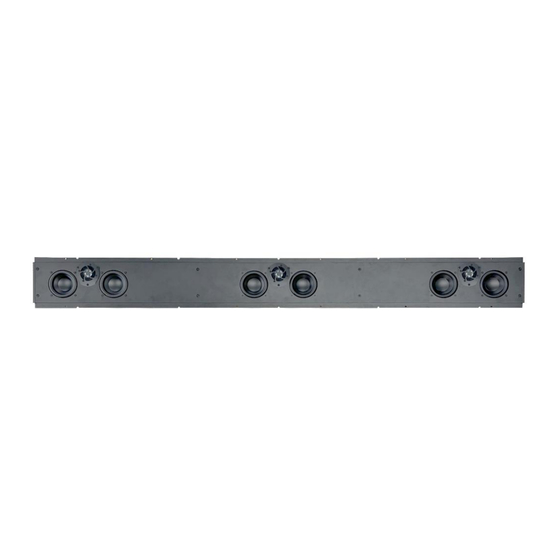
Page 4: Overview
Overview P9m-LCR Front View (Grille On) P9m-LCR Front View (Grille Off) – Do Not Remove the Grille! The grille is an integral part of the design; moreover, the planar magnetic film should never be touched, as it is tensioned precisely at the factory. -
Page 5: Unpacking And Installing The Insight P7M/P9M
Unpacking and Installing the P7m/P9m The Wisdom Audio Insight P7m/P9m speaker is a substantial piece of equipment. Please exercise caution when unpacking your P7M/P9Mm to ensure that you do not strain yourself from its (perhaps unexpected) weight. CAUTION: Do not attempt to lift your P7m/P9m while bending or twisting from the waist. Use your legs for lifting, not your back. -
Page 6: Mounting Options
Mounting Options for the P7m/P9m Series There are 2 mounting options for the P7m/P9m Series. You must select one of these two options when ordering the loudspeaker. • WMA-IS - Insight Soundbar Wall Mount (any size) PN# 942100 • VESA-IS - Insight Soundbar Vesa TV Mount (any size) PN# 942200 Mounting the P7m/P9m on the Wall Using the WMA-IS WMA-IS Speaker Side Bracket... - Page 7 Please note that this guide assumes the wall surface is flat. If not, shims must be applied to the rear of the mounting bracket so that the mounting bracket is uniformly secured to the wall and flat (not distorted). The mounting steps are as follows: 1.
- Page 8 Mounting the P7m/P9m on the Wall Using the VESA-IS The Vesa can be used with standard Vesa mount patterns on most TVs. The Vesa mount allows the soundbar to be mounted to the TV for use with swivel and articulating mounts. Ensure that your TV can handle the weight of the soundbar before attempting to attach it.
- Page 9 1. Prepare the wiring behind the TV: a. Locate the area with the three sets speaker cables coming out of the wall. b. Remove the screw down terminal from the speaker and pre-wire the connector. Run the wire along the articulating mount with the other wires from the TV as needed. 2.
- Page 10 3. Assemble the 2 Slide Plates to the Spider Plate using the included 10mm nuts. They are mirror images of each other. At this time, they should only be finger tight. They will need to slide and pivot for final adjustment. Bottom Slide Plate Top Slide Plate With 10mm Nuts...
- Page 11 4. Attach the completed bracket to the rear of the soundbar: a. Place the soundbar face down on a protective blanket or other work surface b. Remove the four (4) Phillips screws in the rear case of the soundbar c. Attach the rear panel bracket on the soundbar using the four screws d.
- Page 12 6. Prepare the Vesa Rails a. There are 2 lengths of Vesa Rails. Depending on the size of your TV, pick the correct size. i. For most 65” TV the short rail will be correct. ii. For most 75” and larger, the long rail will be correct. b.
- Page 13 d. The Rails should line up with the TV mounting locations. The rails can be moved slightly up or down as needed. Final Height adjustment will be done at the end and any gap will be eliminated. Top Holes Bottom Slots INSIGHT P7m/P9m-LCR WISDOMAUDIO.COM...
- Page 14 e. Place the TV Mount over the Vesa Rails and scew the TV mount and Vesa Rails to the TV. Tighten all TV mount screws to lock the rails into place. INSIGHT P7m/P9m-LCR WISDOMAUDIO.COM...
- Page 15 f. Tighten the Slide Plates using a 10mm wrench and the two (2) bolts. This will lock the speaker to the TV aligned to the front of the TV and centered on the Vesa mounting pattern. 8. Mount the Soundbar to the TV Vesa Rails a.
- Page 16 b. Using two (2) people, place the soundbar into position. It may be helpful to have a third person to help line up and hold the speaker. INSIGHT P7m/P9m-LCR WISDOMAUDIO.COM...
- Page 17 c. Thread on the 10mm bolt on each side BEFORE letting go of the speaker and tighten wth the 10mm wrench. INSIGHT P7m/P9m-LCR WISDOMAUDIO.COM...
- Page 18 9. Adjust the height to create a tight fit to the TV (against the foam tape applied in the second step). a. Tightening the top nut will raise the soundbar tighter to the TV b. Loosening the top nut will lower the soundbar c.
- Page 19 e. Tighten the lock screw once the correct height is obtained. 10. Check all connections and attach wiring a. Check all bolts and screws that they are tight and make any adjustments to the soundbar position before finalizing the wiring. b.
-
Page 20: Care & Maintenance
The warranty will not apply to any Wisdom Audio products that has been misused, abused, altered, or installed and calibrated by anyone other than an authorized Wisdom Audio dealer. -
Page 21: Obtaining Service
There are other stipulations that may apply to shipping charges. There is no other express warranty on Wisdom Audio products. Neither this warranty nor any other warranty, express or implied, including any implied warranties of merchantability or fitness, shall extend beyond the warranty period. - Page 22 If the packaging to protect the unit is, in our opinion or that of our dealer, inadequate to protect the unit, we reserve the right to repackage it for return shipment at the owner’s expense. Neither Wisdom Audio nor your dealer can be responsible for shipping damage due to improper (that is, non-original) packaging.
-
Page 23: Specifications
Specifications All specifications are subject to change at any time to improve the product. P7m-LCR Dual Woofer + Spherical PMD Center “MTM”; Single Woofer + Spherical PMD L+R “MT” Designed for 65” to 77” nominal diagonal TV sizes • absolute minimum width is 56.4” (1433mm) •... -
Page 24: Dimensions
• absolute minimum width is 56.4” (1433mm) • absolute maximum width is 70.4” (1788mm) • absolute minimum width is 65.42” (1661mm) • absolute maximum width is 90.8” (2306mm) For more information, see your Wisdom Audio dealer or contact Wisdom Audio: INSIGHT P7m/P9m-LCR WISDOMAUDIO.COM... - Page 25 WISDOM and the stylized W are registered trademarks of Wisdom Audio. Wisdom Audio 1572 College Parkway, Suite 164 Carson City, Nevada 89706 USA (775) 887-8850 (775) 887-8820 wisdomaudio.com Insight P7m/P9m OM © 5/2023 Wisdom Audio, Inc. All rights reserved. Printed in U.S.A.
Need help?
Do you have a question about the Insight P7m-LCR and is the answer not in the manual?
Questions and answers