Volvo 120 Instruction Manual
2-door cars
Hide thumbs
Also See for 120:
- Operating instructions manual (34 pages) ,
- Operating & service manual (34 pages) ,
- Supplement to instruction manual (6 pages)
Table of Contents
Advertisement
Quick Links
Advertisement
Table of Contents

Related Manuals for Volvo 120


Summary of Contents for Volvo 120
- Page 1 WWW.PlandeGraissage.ORG...
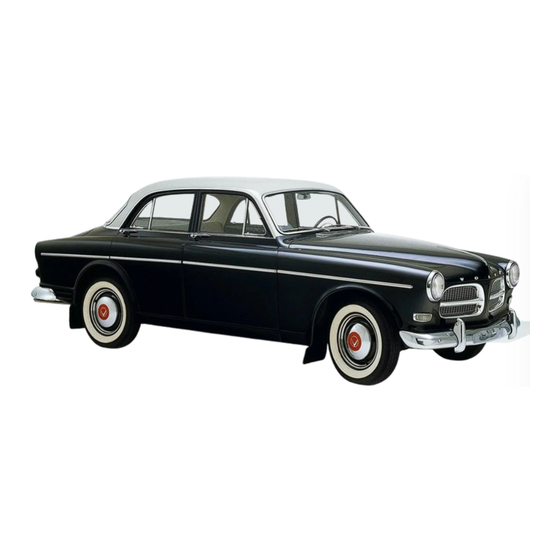
- Page 2 VOLVO 120 2-DOOR CARS (120S) DESCRIPTION OPERATING INSTRUCTIONS SERVICING AB VOLVO GOTEBORG SWEDEN Service Cables: Volvo, Goteborg, Sweden Reprinting permitted if source quoted WWW.PlandeGraissage.ORG...
-
Page 3: Table Of Contents
CONTENTS BEFORE YOU START DRIVING YOUR NEW VOLVO PLEASE VOLVO SERVICE READ THROUGH THIS INSTRUCTION BOOK CAREFULLY. Page IT CONTAINS ALL THE INFORMATION YOU NEED TO The Volvo Service Organization BE ABLE TO DRIVE AND SERVICE YOUR VEHICLE IN THE Warranty and Service Booklet BEST POSSIBLE WAY. -
Page 4: The Volvo Service Organization
In order to get the most out of the invested capital represented by a car, it must be looked after and serviced regularly. Volvo has gone to a great deal of trouble i n the design and selection of material to ensure that the car in question only requires a minimum of servicing. -
Page 5: Description
DESCRIPTION Type designations This instruction book deals with cars having the follow- ing type designations (note that certain variations are not to be found on certain markets): Type designation Engine Gearbox 20 A 13-134 13 -334 M 40 13-194 20 A M 40 13-394 B 20... -
Page 6: Engine
DESCRIPTION Engine Air preheating Certain variations of the 120 models are provided with thermostatically con- trolled air preheating. With this arrangement the induced air is maintained at a constant, favourable temperature. Air preheating counteracts ice formation in the carburettor and also contributes to a shorter warming up period after starting from cold. -
Page 7: Power Transmission
DESCRIPTION DESCRIPTION Propeller shaft Lighting The propeller shaft, which is the connecting link between the gearbox and the The lighting on the car consists of two headlights (mainbeam and dipped) rear axle, is divided into two sections. The front section is journalled at its rear together with two combined flasher and parking lights. -
Page 8: Body
To prevent the locks from freezing up in Should you lose the car keys, contact balanced and will thus remain in the position your nearest Volvo dealer for new keys cold weather, apply a suitable anti-freeze opened. To the left of the luggage com- and quote the code number of the keys agent. - Page 9 Never modify or repair the belt on your own which is done as follows: Remove the seat but have this done by a Volvo workshop. cushion, also the screw and nut on the seat frame attachment on the floor. Then place...
-
Page 10: Instruments And Controls
DESCRIPTION I nstruments and controls Before you start the car, sit behind the wheel and carefully check through all the instruments and controls. The location of these is shown in the illustration opposite. The instruments and controls arc described in more detail on the following pages with reference to the numbers in the illustration. - Page 11 DESCRIPTION DESCRIPTION Handbrake warning light Temperature gauge This lights red when the handbrake is applied and the ignition is on. The temperature gauge shows the temperature of the coolant and thus indicates The light also functions as a warning light should a failure arise in one of the the working temperature of the engine.
- Page 12 DESCRIPTION Heater and ventilation system Air temp. Mainbeam Air flow Fresh-air fan switch Parking lights Dipped headlights This control is used to regulate FLOOR - - Air to front seat floor Pushed right in - closed (Lighting switch pulled out one (Lighting switch fully out and (Lighting switch out fully and the temperature of the incoming...
-
Page 13: Operating Instructions
500 km (300 miles) and avoid labouring in all gears. Warranty inspection After 2 500 km (1500 miles) running, the car should be taken to a Volvo work- shop for the free warranty inspection. The procedure then carried out also includes an engine oil change. -
Page 14: Gear-Changing
OPERATING INSTRUCTIONS OPERATING INSTRUCTIONS Warming up the engine Recommended speed ranges, km.p.h. (m.p.h.) for the different gears Experience has shown that engines in vehicles which are frequently stopped and started are subject to abnormally rapid wear. The reason for this is that the en- Gearbox Engine 1st gear... -
Page 15: Servicing
The simplest (and in the long run most profitable) way to give the car the servic- i ng it requires is to have all servicing done by a Volvo workshop. You will then have all the work specified in the service book carried out in accordance... -
Page 16: Maintenance Scheme
SERVICING SERVICING In addition to the servicing procedures mentioned in this scheme, you should Maintenance scheme also regularly check the following from the point of view of traffic safety: In the maintenance scheme below the servicing procedures have been given a) Lighting, including brake warning light certain numbers which refer to the detailed descriptions on the following pages. -
Page 17: Lubrication
This can be with new oil of the same type already in the done in connection with the 10 000 km (6 000 miles) inspection at a Volvo engine. - Page 18 SERVICING SERVICING Carburettor(s) Rear axle The old oil is drained off by removing the drain plug on the sump. Draining The oil level in the rear axle should be checked after every 10 000 km (6 000 should take place after driving when the oil is still warm. miles).
-
Page 19: Engine
10 000 km (6 000 miles) changed, the old oil can be sucked up by means of an oil syringe or similar, and preferably by a Volvo workshop. which is inserted down through the filler hole. If the filter is replaced without the oil being changed, 0.5 litre (approx. - Page 20 To drain the coolant, open the tap on the right-hand side of the engine. Then Let your Volvo workshop check the engine valve clearances after every 10 000 disconnect the hose between the lower part of the radiator and the engine.
-
Page 21: Electrical System
1. A battery connection to the wrong terminal will damage the rectifiers. Be- type (see page 54). Consult a Volvo workshop if you intend changing to a fore the connections are made, check the polarity of the battery with a volt- harder or softer type of plug. - Page 22 Check headlight alignment The alignment of the headlights should be checked in a Volvo workshop after • every 10 000 km (6 000 miles). Remember that the section of the road lit up by It is not necessary to remove these screws the headlights can vary depending on the load in the vehicle.
-
Page 23: Power Transmission
The bulbs can now be re- After every 10 000 km (6 000 miles) vehicles should be taken to a Volvo work- Make sure that the glass fits well against the moved by pushing in and twisting anti- shop for a check on the functioning of the brakes. -
Page 24: Wheels And Tyres
Volvo workshop for the wheels to be hub flange. Then lower the car and tighten balanced. Check also that the tread pattern the nuts alternately. -
Page 25: Body
Washing also helps to counteract rusting. During the winter, make sure that all trusted to a Volvo workshop. Minor damage road salt residue is washed off as soon as possible, otherwise corrosion can easily caused by flying stones, etc. -
Page 26: Servicing Before Long-Distance Trip
Wherever you go The Volvo 120 models are anti-rust treated at the factory. you know you have Volvo work- The door sills are made of galvanized sheet metal and do not require any main- shops within reach to take care of your tenance. -
Page 27: Procedure In Cold Weather
Your Volvo dealer can supply you with a suitable anti-freeze for this purpose. - Page 28 FAULT TRACING SPECIFICATIONS The information given below is only intended to serve as a guide in localizing and temporarily correcting minor faults. After having carried out any such measures, have them checked and adjusted by an experienced mechanic. The engine does not start although the starter motor turns it round at normal speed 1 Check that there is fuel in the tank.
- Page 29 SPECIFICATIONS WWW.PlandeGraissage.ORG...
- Page 30 SPECIFICATIONS WWW.PlandeGraissage.ORG...
-
Page 31: Lubricating Chart
Lubricating chart Check the following when filling the tank 1. Check the engine oil level. 2. Check without removing the cap that the level in the brake fluid container is above the "Min" mark. (Right-hand steering: Check also the clutch fluid level.) 3. - Page 32 Note that the electrical equipment can vary for the different models on differ- ent markets. A = White B = Black C = Blue D = Green E= Grey F = Yellow G = Brown H = Red Volvo 121, 122 S WWW.PlandeGraissage.ORG...
- Page 33 ACCESSORIES WWW.PlandeGraissage.ORG...
Need help?
Do you have a question about the 120 and is the answer not in the manual?
Questions and answers