
Related Manuals for Code 3 Pursuit 25 Series


Summary of Contents for Code 3 Pursuit 25 Series
- Page 1 EMERGENCY LIGHTBARS | SIRENS | SPEAKERS | BEACONS | WARNING LIGHTING Installation manual 25 series™ lightbar code3esg.com...
- Page 3 Warnings & Guidance IMPORTANT! Read all instructions before installing and using. Installer: This manual must be delivered to the end user. Failure to install or use this product according to manufacturers recommendations may result in property damage, serious injury, and/or death to those you are seeking to protect! Do not install and/or operate this safety product unless you have read and understand the safety information contained in this manual.
-
Page 4: Product Overview
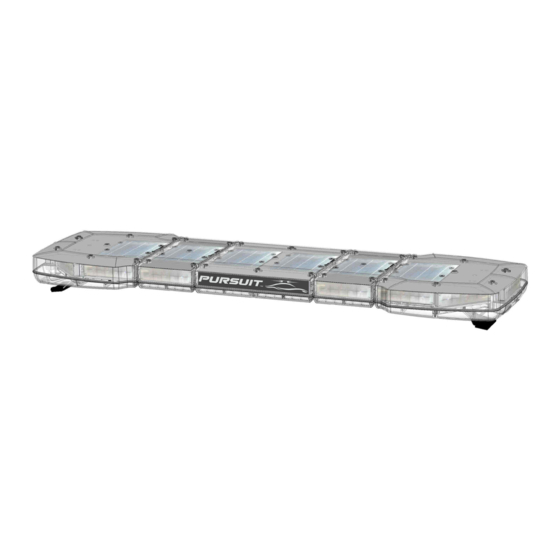
Product Overview The 25 Series (Pursuit™) Lightbar is a versatile and powerful, high output warning device suitable for a range of vehicle types and duties. There are numerous options and lengths available. The lightbar can either be mounted permanently to the vehicle or mounted using the vehicle roof gutters. It also utilises a plug-in wiring harness and access hole to allow easy removal of the lightbar without uninstalling the wiring harness. - Page 5 Mounting Before installation, examine the equipment for transit damage. Do not use damaged or broken parts. Caution: When drilling into any vehicle surface, make sure the area is free from any electrical wires, fuel lines, vehicle upholstery, etc. that could be damaged Before proceeding with installation, plan all wiring and cable routing.
-
Page 6: Component Features
Component Features LED Modules There are different types of mounting brackets to suit different locations in the lightbar. LED modules are not user serviceable. Upper Deck Modules Designed for an uncompromised warning signal, the upper level LED modules combine maximum emitting surface area with a very high output LED optical system to produce an effective output at all angles around the vehicle. - Page 7 Component Features Solar Charger System The solar charger helps keep the vehicle battery fully charged and ready for action. The system is extremely durable, with the PV cells completely integrated and sealed inside the lightbar. The charger module, which mounts near the vehicle battery, is designed for the harsh engine-bay environment.
- Page 8 Wiring The Pursuit lightbar may have been configured for basic operation with a junction box, or else configured as part of a more complex C3-DNA network. Before attempting to connect the lightbar wiring harness, please refer to the C3-DNA Toolbox software connection tables provided with the product in addition to the generic wiring diagram provided in this installation manual.
- Page 9 Key to Wire reference Function Colour Description Power Refer to wiring instructions Ground Refer to wiring instructions CAN-H Refer to wiring instructions CAN-L Refer to wiring instructions No function - do not connect. Reserved for alternative functions. Configurable input that can detect either connection to GND or connection to +ve voltage ±Input range 10-30V +Input...
- Page 10 GENERIC WIRING DIAGRAM PURSUIT LIGHTBAR 25-xxxxx-C SPEAKER-1 SPEAKER-2 (Optional) Compatible Speakers: C3100HD C3900 PURSUIT SIREN CS82-xxxxx NOTES ACCESSORIES Each product must be wired and appropriately fused as Y-SPLITTER close to the battery terminal or power distribution point CZ8014 as possible. Network Data Cable Requirements: Twisted Pair, 30mm Pitch (see C3-DNA wiring section).
- Page 11 MESSAGE DISPLAY CD0012x (INCLUDES MESSAGE CONTROLLER) JUNCTION BOX SWITCH NODE JBOX-xxxxx-C PCM12-xxxxx CONTROLLER EXAMPLES SLIC CR9B CM9B STANDARD MESSAGE DISPLAY ROTARY KNOB INTEGRATED CONTROLLER TOUCHSCREEN CONTROLLER MICROPHONE Other controllers may be available - refer to the website for more details.
- Page 12 Contact the factory for more information about these special cases. C3-DNA Configuration Software C3-DNA devices and systems can be configured using the code 3 DNA System Configuration Toolbox software. For more information, including download links, please scan the QR code for...
-
Page 13: Glossary Of Terms
Glossary of Terms Name Description Level-# System warning level. 1 = lowest level. ALERT Legacy term. Activates Lights and Sirens Legacy term. Primary warning level - highest level of warning light function. Legacy term. Secondary warning level - for lower level of warning lights. White Flash Activates white flash steady output. -
Page 14: Replacement Parts
Replacement Parts CAUTION! Always use approved Pursuit replacement modules and hardware. Description Part No. Lenses Upper End Lens CR2501x Upper Mid Short Lens CR2502x Upper Mid Long Lens CR2503x Lower End Lens (clear only) CR2504C Lower Mid Short Lens (clear only) CR2505C Lower Mid Long Lens (clear only) CR2506C... -
Page 15: Maintenance
Maintenance Occasional cleaning of the lenses will ensure optimum light output. Take care when cleaning lenses – although tough, polycarbonate scratches easily. Clean the lens and base with soap and water or a lens polish using a soft cloth. Do not use solvents as they may damage the polycarbonate. -
Page 16: Warranty
Warranty Manufacturer Limited Warranty and Limitation of Liability: Manufacturer warrants that on the date of purchase, this product will conform to Manufacturer’s specifications for this product (which are available from the Manufacturer upon request). This Limited Warranty extends for sixty (60) months from the date of purchase. DAMAGE TO PARTS OR PRODUCTS RESULTING FROM TAMPERING, ACCIDENT, ABUSE, MISUSE, NEGLIGENCE, UNAPPROVED MODIFICATIONS, FIRE OR OTHER HAZARD;... - Page 17 Notes...
- Page 18 Notes...
- Page 19 Notes...
- Page 20 439 Boundary Road Truganina VIC 3029 Freecall - 1800 815 000 Visit code3esg.com for the entire Code 3 range 920-0408-01 REV C...
Need help?
Do you have a question about the Pursuit 25 Series and is the answer not in the manual?
Questions and answers