
Subscribe to Our Youtube Channel
Related Manuals for Electrolux ZANUSSI ZDC 5370W


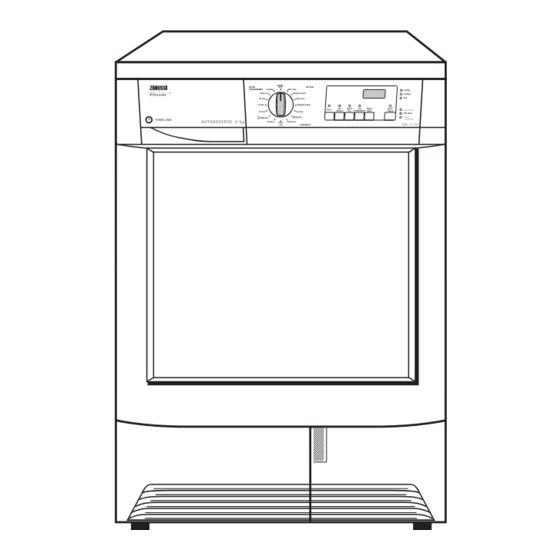
Summary of Contents for Electrolux ZANUSSI ZDC 5370W
- Page 1 TUMBLE DRYER ZDC 5370 W T I M E L I N E 5370W Unpacking: see page 17 INSTRUCTION BOOKLET 125981230...
-
Page 2: Important Safety Information
Important Safety Information It is most important that this instruction book should be retained with the appliance for future reference. Should the appliance be sold or transferred to another owner, or should you move house and leave the appliance, always ensure that the book is supplied with the appliance in order that the new owner can get to know the functioning of the appliance and the relevant warnings. -
Page 3: Table Of Contents
Contents For the User Something Not Working Service and Spare Parts Important Safety Information Customer Care • Installation Guarantee Conditions • Child Safety • For the Installer Your New Tumble Dryer Description of the Appliance Installation Instructions The Control Panel Technical Specifications •... -
Page 4: Your New Tumble Dryer
Your New Tumble Dryer This tumble dryer will give your wash that soft, relaxed feel whatever the weather. Extremely high quality standards both during development and manufacturing guarantee a long service life for your appliance. Maximum economy in the operation of your dryer is achieved through very frugal electricity consumption and short drying times. -
Page 5: The Control Panel
The Control Panel 30 min 60 min 90 min T IM ELIN E 5370W 2 3 4 5 6 7 8 3 No BUZZER Button 1 Programme/Time Selector Dial A buzzer sounds Allows you to select electronically controlled or time •... -
Page 6: Delay Start Button
6 DELAY START button • Duration of selected programme After you have selected the programme, its This button allows you to delay the starting of the duration (in hours and minutes) appears on the programme by 12 hours max. display. It is calculated automatically on the basis This option must be selected after having selected of the maximum load accepted for each type of the programme and before pressing START/PAUSE... -
Page 7: Start/Pause Button
9 Indicator Lights • Incorrect option selection If you select an option that is not compatible with These lights indicate the following functions: the programme you have selected, the display shows Err (error). “DRYING” light This light indicates that the appliance is in the drying phase. -
Page 8: Programme Chart
Programme Chart Automatic drying (electronic programmes) Degree of drying Type of laundry Max-load Programme required Extra dry 6 kg EXTRA DRY Ready to wear READY TO WEAR 6 kg Store dry STORE DRY(*) 6 kg COTTON Slightly damp SLIGHTLY DAMP 6 kg Iron dry IRON DRY(*) -
Page 9: Operating Sequence
Operating Sequence stop automatically at the end of the anti-creasing Before using your tumble dryer for the first time, we recommend to place a few damp cloths inside the phase. appliance and dry for 30 minutes. The END, CLEAN FILTERS and FULL TANK There may be dust inside a brand new tumble dryer. -
Page 10: Hints & Tips On Drying
Hints & Tips on Drying Before placing articles of laundry in your tumble • Always load well spun laundry. The higher the spin dryer, check the care labels to ensure they are speed the lower the electricity consumption and the recommended for tumble drying. -
Page 11: Maintenance And Cleaning
Maintenance and Cleaning You must disconnect the appliance from the After a while, a withish patina due to detergent electricity supply, before you can carry out any residue on laundry forms on the filters. When this cleaning or maintenance work. occurs, clean the filters with warm water using a brush. -
Page 12: Emptying The Water Reservoir
Clean it with a brush and rinse it under the shower if The reservoir must be re-inserted correctly. necessary. If this is not done the pilot light FULL TANK comes on during next drying and the programme stops, leaving the laundry damp. The buzzer will sound. After inserting the reservoir the START/PAUSE button has to be depressed again to allow the programme to continue. -
Page 13: Something Not Working
Your telephone call will be automatically routed to the For general enquiries concerning your Zanussi Service Force Centre covering your post code area. Electrolux appliance or for further information on Zanussi Electrolux products, please contact our For the address of your local Service Force Centre... -
Page 14: Guarantee Conditions
Guarantee Conditions Standard guarantee conditions Exclusions This guarantee does not cover: We, Zanussi Electrolux, undertake that if, within 12 months of the date of the purchase, this ZANUSSI ● Damage or calls resulting from transportation, ELECTROLUX appliance or any part thereof is... -
Page 15: Installation Instructions
Installation Instructions It is dangerous to alter the specifications or attempt to modify this product in any way. Care must be taken to ensure that the appliance does not stand on the electrical supply cable. Any electrical work required to install this appliance should be carried out by a qualified electrician or competent person. -
Page 16: Adjusting The Level Of Conductivity
Adjusting the level of conductivity Water contains, a variable quantity of limestone and Approximative value Display Conductivity degree mineral salts of which quantities vary according to (µS/cm) geographical locations thus varying its conductivity values. C C 0 0 < 300 Relevant variations of the conductivity of the water compared to those prefixed by the factory could C C 0 0... -
Page 17: Unpacking
Unpacking Stacking kit (optional accessory) It should be possible to stack your new dryer on top Warning ! of a front loading washing machine with cover’s Slide out the polythene bag containing the depth between 48 and 60 cm. polystyrene block before using the appliance. Pull off adhesive strips from inside machine on Read carefully the instructions supplied with the kit. - Page 18 Permanent connection Should the plug need to be replaced for any reason, proceed as described below. The wires in the mains lead In the case of permanent connection it is necessary are coloured in accordance with the following code: that you install a double pole switch between the Green and Yellow - Earth appliance and the electricity supply (mains), with a...
- Page 19 From the Electrolux Group. The world’s No. 1 choice The Electrolux Group is the world's largest producer of powered appliances for kitchen, cleaning and outdoor use. More than 55 million Electrolux Group products (such as refrigerators, cookers, washing machines, vacuum cleaners, chain saws and lawn mowers) are sold each year to a value of approx. USD 14 billion in more than 150 countries around the world.
- Page 20 This file has been downloaded from: www.UsersManualGuide.com User Manual and User Guide for many equipments like mobile phones, photo cameras, monther board, monitors, software, tv, dvd, and othes.. Manual users, user manuals, user guide manual, owners manual, instruction manual, manual owner, manual owner's, manual guide, manual operation, operating manual, user's manual, operating instructions, manual operators, manual operator, manual product, documentation manual, user maintenance, brochure, user reference, pdf manual...
Need help?
Do you have a question about the ZANUSSI ZDC 5370W and is the answer not in the manual?
Questions and answers