Table of Contents
Advertisement
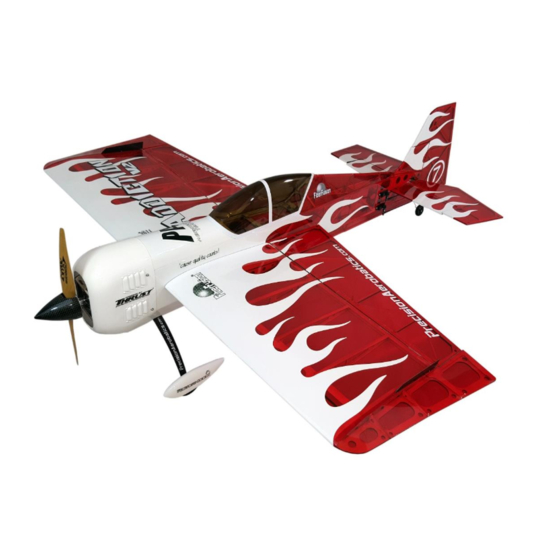
Congratulations on your purchase of Precision Aerobatics Addiction
Be sure you have read and understood this entire manual before you assemble this model
Do not overlook the warnings and instructions enclosed herewith or those provided by other manufacturers, and the official
AMA (Academy of Model Aeronautics) Safety Code (see at the end of this manual). They were designed to assist you in
preventing damage or injury.
The instructions below are our suggestions only on how to assemble this model. There are other ways and methods to do
so.
Precision Aerobatics has no control over the final assembly, the materials and accessories you use when assembling this kit
or the manner in which the assembled model and the installed radio system and electronic parts, are used and maintained.
Thus, no liability is assumed or accepted for any damage resulting from the use of the assembled model aircraft or from this
instruction manual including but not limited to direct, indirect, incidental, special, and consequential damages. In no event
shall Precision Aerobatics' liability exceed the original purchase price of this kit.
BY THE ACT OF ASSEMBLING AND OPERATING THE ASSEMBLED MODEL YOU ASSUME
AND ACCEPT FULL LIABILITY FOR YOUR ACTIONS.
Radio controlled model aircraft that are not properly assembled, operated and maintained can cause serious damage to body
and property. If you are not an experienced pilot and airplane modeller you must use the help of an experienced pilot or
preferably an authorized flight instructor who will assist you with the assembly and flying of this model.
SAFETY NOTES:
1.
Before assembling and flying this model read carefully any instructions and warnings of other manufacturers
for all the products you installed or used on your model (especially radio equipment and power source).
2.
Check thoroughly before every flight that the airplanes components are in good shape and function correctly.
If you find a fault do not fly the model until you have corrected it.
3.
Radio interference caused by unknown sources can occur at any time without notice. In such a case, your
model will be uncontrollable and completely unpredictable. Make sure to perform a range check before every
flight. lf you detect a control problem or interference during a flight, immediately land the model to prevent
a potential accident
4.
Youngsters should only be allowed to assemble and fly these models under the instruction and supervision
of an experienced adult.
5.
Do not operate this model in a confined area.
6.
Do not stand in line with, or in front of a spinning propeller and never touch it with any object.
Precision Aerobatics quality control team checks each plane before it leaves the factory to ensure that each kit is in fine
condition. We have no bearing on the condition of any component parts damaged by use, modification or assembly of this
model. Inspect the components of this kit upon receipt. If you find any parts damaged or missing, contact the hobby shop
who supplied this kit immediately. All warranty claims to be submitted within 30 days of purchase and include the original
dated receipt. This warranty is extended to the original purchaser only. We do not accept the return or replacement of parts
on which assembly work has already begun. Precision Aerobatics reserves the right to change this warranty at anytime
without notice.
20
Precision Aerobatics Team
Warning – This is not a toy!
1
www.PrecisionAerobatics.com
Copyrights ©2007 Precision Aerobatics. All rights reserved
Advertisement
Table of Contents

Related Manuals for Precision Aerobatics ADDICTION


Summary of Contents for Precision Aerobatics ADDICTION
- Page 1 Do not stand in line with, or in front of a spinning propeller and never touch it with any object. Precision Aerobatics quality control team checks each plane before it leaves the factory to ensure that each kit is in fine condition.
-
Page 2: Equipment Selection
• Propeller - VOX 12x5 wood - This prop is a must-have with the Addiction V2 and is provided in our iPAs Pro package, this prop is an excellent match with overall performance for fast aerobatics and 3D. Great flight speed, faster roll rate, tighter tumbles and waterfall. -
Page 3: Pre-Assembly
NOTE: Bottom wing square trims are made of high quality vinyl. Air cooling exit Do not apply heat as you may damage it. Aileron servo opening Stabilizer slot + tail servo openings Landing gear bay www.PrecisionAerobatics.com Copyrights ©2007 Precision Aerobatics. All rights reserved... -
Page 4: Aileron Servo Installation
Expose the slots for the control horns. Since the Addiction V2 has an opaque vinyl trim over one side of the slot, use a heated paperclip or a modelling knife to reveal the slot through the top side of the wing as it is easy to see the slot through the translucent covering. - Page 5 These pushrods have been proven to be extremely reliable under extreme flight loads if made properly. We don’t recommend changing to metal linkages which tend to flex and are heavier, therefore, shift the CG. Note the Z-bends orientation Aileron linkage geometry www.PrecisionAerobatics.com Copyrights ©2007 Precision Aerobatics. All rights reserved...
- Page 6 LED night flying Illuminating your Addiction V2 for night flying is done via main flight battery, therefore, additional battery is not required. Use the PA light harness to switch on the lights. Plug it into the battery balancer plug before takeoff (leave the three LED strip plugs permanently plugged in).
- Page 7 Sealing the elevator hinge gap is an extremely important step and an integral part of the Addiction design. Skipping this step will have a detrimental effect on the flight characteristics! Once the rudder is installed, it must be checked for warp (rear pilot view).
- Page 8 Insulate the cables with a shrinking tube over each of the soldered cables (fit them on before soldering the wires). Tail extension leads Solder and insulate each cable PA Lightweight servo extension www.PrecisionAerobatics.com Copyrights ©2007 Precision Aerobatics. All rights reserved...
- Page 9 Z-bends; the rudder control horn Z-bend inserts from the bottom and the elevator Z-bend inserts from the outside of the horn and servo arm. Verify the gluing integrity of all Z-bends, as you did with the ailerons, prior to final installation. www.PrecisionAerobatics.com Copyrights ©2007 Precision Aerobatics. All rights reserved...
- Page 10 Note: if the LG struts hit the balsa on the sides of the fuselage, use a sharp modeling knife to trim the balsa keeping the gap with the LG to minimum. www.PrecisionAerobatics.com Copyrights ©2007 Precision Aerobatics. All rights reserved...
- Page 11 Thrust 25 setup. I purposely designed the Addiction motorbox as a separate part to the fuselage. The main advantage is after a crash/mishap as the flyer only needs to replace the motorbox instead of the entire fuselage and tail section. That saves a lot of money.
-
Page 12: Motor And Esc Installation
Then add a quarter turn clockwise on the bolts to secure them. Note: The motor can be inserted into the motorbox only through the bottom rear chamber (feed cables first). www.PrecisionAerobatics.com Copyrights ©2007 Precision Aerobatics. All rights reserved... - Page 13 If it doesn’t, power down the ESC and swap the positions of any two motor cables or reprogram your Quantum ESC for reversed rotation. Remove the propeller as a safety precaution before powering up the ESC. www.PrecisionAerobatics.com Copyrights ©2007 Precision Aerobatics. All rights reserved...
-
Page 14: Cowling Attachment
CA. Position them as close as possible to the fuselage minimizing any gap. You may trim them with a modeling knife if needed. LG cuffs – leave minimum gap www.PrecisionAerobatics.com Copyrights ©2007 Precision Aerobatics. All rights reserved... -
Page 15: Propeller And Spinner Installation
It should fit snug APC propellers are not recommended for the Addiction due to the higher amps drawn and vibration which can lead to a motorbox failure or damage to your gear. -
Page 16: Wing Attachment
Center of Gravity (CG) The Addiction V2 was designed with a very narrow CG range to attain the best flight performance. Using the iPAs® setup we have listed; you should end up with a center of gravity very close to the ideal position. Fine adjustments should be made by sliding the battery fore or aft on the battery tray (and even all the way into the cowl). -
Page 17: Transmitter Setup
The Addiction V2 is an excellent high-speed sport and 3D performer; therefore, in order to achieve the best of both worlds we spent many hours testing the CG to find the “sweet spot” that offers a peak in overall performance. We found the "sweet spot"... -
Page 18: Maiden Flight
NOTE: Bottom wing square trims are made of high-quality vinyl. Do not apply heat as you may damage it. As a final touch, decorate your Addiction V2 using the supplied PA decals. You may use the following photos as a guide. - Page 19 Addiction Replacement parts list We believe that you will enjoy your Addiction for a very long time. In the event of inevitable mishaps and broken parts, all you need to do is to order replacement spare parts to restore your Addiction and be back in the air.
- Page 20 The PA 1.5” carbon Fiber spinner is a perfect match to complete the fuselage shape and enhance the aerodynamics of your Addiction. The combination of precision CNC machined Aluminum back plate and our German made precision prop adapter allows true spinning without motor’s performance deterioration.
Need help?
Do you have a question about the ADDICTION and is the answer not in the manual?
Questions and answers