
Related Manuals for Siemens CM978GN 1 Series


Summary of Contents for Siemens CM978GN 1 Series
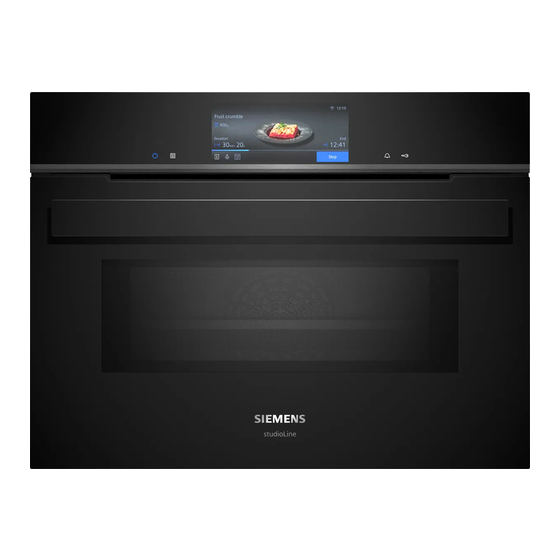
- Page 1 Oven CM978GN.1 User manual and installation instructions Register your product on My Siemens and discover exclusive ser- vices and offers. siemens-home.bsh-group.com/welcome The future moving in. Siemens Home Appliances...
-
Page 2: Table Of Contents
en Safety Futher information and explanations are available online: Table of contents INSTALLATION INSTRUCTIONS ...... 46 31.1 General installation instructions...... 46 INFORMATION FOR USE Safety .............. 2 Preventing material damage ...... 7 1 Safety Environmental protection and saving en- ergy .............. 8 Observe the following safety instructions. Familiarising yourself with your appliance .. 9 1.1 General information Cooking Functions.......... 10... -
Page 3: Safety
Safety en When the cooking compartment is hot, any al- equate experience and/or knowledge, coholic vapours inside may catch fire. The ap- provided that they are supervised or have pliance door may spring open. Hot steam and been instructed on how to use the appliance jets of flame may escape. - Page 4 en Safety WARNING ‒ Risk of electric shock! WARNING ‒ Risk of suffocation! Incorrect repairs are dangerous. Children may put packaging material over ▶ Repairs to the appliance should only be their heads or wrap themselves up in it and suffocate. carried out by trained specialist staff. ▶...
- Page 5 Safety en Using the appliance for anything other than its WARNING ‒ Risk of explosion! intended purpose is dangerous. This is be- Liquids and other food may easily explode cause, for instance, overheated slippers, pil- when in containers that have been tightly lows filled with grain or cereal, sponges and sealed.
- Page 6 en Safety The outside of the appliance gets very hot WARNING ‒ Risk of electric shock! when the cleaning function is in progress. The appliance uses a high voltage. ▶ Never hang combustible objects, e.g. tea ▶ Never remove the casing. towels, on the door handle. WARNING ‒ Risk of serious harm to ▶...
- Page 7 Preventing material damage en 2 Preventing material damage Using oven cleaner in a hot cooking compartment 2.1 General damages the enamel. ATTENTION! ▶ Never use oven cleaner in the cooking compartment Alcoholic vapours may catch fire in the hot cooking when it is still warm. ▶...
- Page 8 en Environmental protection and saving energy Operating the appliance without food in the cooking If you prepare microwave popcorn at a microwave compartment may lead to overloading. power level that is too high, the door pane may crack ▶ Do not switch on the microwave unless there is food due to overloading.
- Page 9 Familiarising yourself with your appliance en 4 Familiarising yourself with your appliance 4.1 Control panel Symbol Meaning The appliance door is locked due to the You can use the control panel to configure all functions cleaning function or childproof lock. of your appliance and to obtain information about the → "Cleaning function 'Pyrolytic active- operating status.
- Page 10 en Cooking Functions Lighting Button Function One or more oven lights illuminate the cooking com- Select the timer. partment. → "Setting the timer", Page 17 When you open the appliance door, the light in the Press and hold for approx. 4 seconds: cooking compartment switches on. If the appliance Activate or deactivate the childproof door remains open for longer than around 18 minutes, lock.
-
Page 11: Cooking Functions
Cooking Functions en 5.1 Types of heating To ensure that you always find the right type of heating When you select a type of heating, the appliance sug- to cook your food, we explain the differences and ap- gests a suitable temperature or setting. You can use plications below. -
Page 12: Accessories
en Accessories 5.2 Temperature Note: Due to thermal inertia, the temperature that is displayed may differ slightly from the actual temperat- With most types of heating , you can read the current ure inside the cooking compartment. temperature in the cooking compartment and the set temperature side-by-side on the display during heating, Residual heat indicator e.g. ... - Page 13 You will find a comprehensive range of products for sure that accessories can be pulled out approximately your appliance in our brochures and online: halfway without tipping. siemens-home.bsh-group.com Turn the accessories so that the notch is at the Accessories vary from one appliance to another. When rear and is facing downwards.
-
Page 14: Basic Operation
en Before using for the first time 7 Before using for the first time 7.2 Cleaning the appliance before using it Configure the settings for initial start-up. Clean the ap- pliance and accessories. for the first time Before using the appliance to cook food for the first 7.1 Performing initial start-up time, you must clean the cooking compartment and ac- After connecting the appliance to the power supply,... -
Page 15: Rapid Heating
Rapid heating en If the operation is ended: 8.7 Displaying information If required, you can select other settings and re- ‒ In most cases, you can call up information about the start the operation. function that you have just started. The appliance auto- When the food is ready, use to switch the ap- ‒... - Page 16 en Time-setting options Set a suitable type of heating and a temperature of a Rapid heating starts. at least 100 °C. a Once rapid heating is complete, a signal tone Rapid heating automatically switches off as of a set sounds. "Off" appears for "Rapid heating" ...
-
Page 17: Microwave
Microwave en Note: For operating modes that always require a a The timer remains visible on the display if the appli- cooking time, the appliance resets the time at which ance is switched off. the cooking time ends to the next possible time. a When the appliance is switched on, the display Press "Start"... - Page 18 en Microwave 11.3 Setting the microwave WARNING ‒ Risk of burns! The accessible parts of the appliance become hot dur- Note: ing operation. Note the correct way to operate the microwave: ▶ Never touch these hot parts. ¡ → "Safety", Page 2 ▶ Keep children at a safe distance. ¡...
- Page 19 Ventilation function "Crisp Finish" en 11.4 Setting added microwave Use "Start" to start the operation. a The appliance starts to heat and the time counts Note: down. Note the correct way to operate the microwave: a Once the cooking time has elapsed, a signal tone ¡...
- Page 20 en Meat probe 13.2 Inserting the meat probe Poultry Insert the meat probe into the thickest part of the breast, pushing it in as far as Use the meat probe supplied or order a suitable meat possible. The meat probe can be inser- probe from our customer service.
-
Page 21: Meat Probe
Meat probe en 13.5 Core temperatures of different foods a The adjustment values and how long the appliance has already been in operation are shown on the dis- This is where you can find the suggested core temper- play. If the appliance is connected to Home Con- atures for different foods. -
Page 22: Dishes
en Dishes 14 Dishes The "Dishes" operating mode helps you to use your ap- Cooking methods pliance to prepare different meals by selecting the op- For some dishes, you can select a preferred cooking timum settings automatically. method. Select a cooking method with the following value for 14.1 Cookware for dishes conventional cooking: ¡... - Page 23 Dishes en The initial remaining time appears on the display after Category Food approx. 1 minute. The remaining time is continually re- Side dishes, Vegetables calculated and updated. vegetables Potatoes Rice 14.3 Overview of the dishes Cereals Defrosting Bread, bread rolls You can find out which individual dishes are available food Cakes to you on the appliance when you call up the operating...
-
Page 24: Favourites
en Favourites 15 Favourites In the "Favourites", you can save your settings and use Note: these again. Pay attention to the specifications for the various operating modes: Note: Depending on the appliance type/software ¡ status, you must first download this function to your ap- ¡... -
Page 25: Home Connect
Home Connect en Display Selection Personalisa- Selection tion Clock ¡ Digital + date Operation after ¡ Main menu ¡ Digital switch-on ¡ Analogue + date ¡ Types of heating ¡ Microwave ¡ Analogue ¡ Dishes Alignment ¡ Align the display horizontally and ¡... - Page 26 en Home Connect Notes Download the Home Connect app. ¡ Please note the safety precautions in this instruction manual and make sure that they are also observed when operating the appliance via the Home Con- nect app. → "Safety", Page 2 ¡ Operating the appliance on the appliance itself al- ways takes priority.
- Page 27 Cleaning and servicing en 18.3 Operating the appliance with the stalling it via the Home Connect app if you are in your WLAN home network (Wi-Fi). The Home Connect app Home Connect app will inform you once installation is successful. You can use the Home Connect app to set and start Notes the appliance remotely.
- Page 28 en Cleaning and servicing Using oven cleaner in a hot cooking compartment If different cleaning agents are mixed together, there damages the enamel. may be a chemical reaction between these. ▶ ▶ Never use oven cleaner in the cooking compartment Do not mix cleaning agents. ▶...
- Page 29 Cleaning function "Pyrolytic activeClean" en Area Suitable cleaning agents Information Shelf supports ¡ Hot soapy water Soak any heavily soiled areas and use a brush or steel wool. Note: To clean thoroughly, detach the shelf supports. → "Rails", Page 33 Pull-out system ¡ Hot soapy water Use a brush to remove heavy soiling.
- Page 30 en Cleaning aid "humidClean" 20.2 Setting the cleaning function Press "Start". a A notification stating that you should carry out the Ventilate the kitchen while the cleaning function is run- necessary preparatory work for the cleaning func- ning. tion appears on the display. Confirm the message.
-
Page 31: Drying Function
Drying function en Press "Start". 21.2 Cleaning the cooking compartment a A notification stating that you should carry out the after using the cleaning aid necessary preparatory work for the cleaning aid ap- ATTENTION! pears on the display. Confirm the notification. The prolonged presence of moisture in the cooking a The cleaning aid starts and the cooking time counts compartment leads to corrosion. -
Page 32: Appliance Door
en Appliance door Remove the door cover and carefully close the Press the intermediate pane against the appliance appliance door. with one hand while pushing the left- and right-hand retainers upwards. Do not detach the retainers . Remove the intermediate pane. 23.2 Removing the door panes WARNING ‒ Risk of serious harm to health! WARNING ‒ Risk of injury! -
Page 33: Rails
Rails en Push the left- and right-hand retainer downwards Push the front pane in at the bottom until you until the intermediate pane is clamped . hear it click into place. Open the appliance door slightly and remove the tea towel. Screw both screws back in on the left and right of the appliance door. -
Page 34: Troubleshooting
en Troubleshooting Hook the front retainers in at the bottom and 24.3 Attaching the rails straighten them . Set the rear rail at an angle, hooking it into the re- tainers at the top and bottom . Pull the rail forwards ... - Page 35 Troubleshooting en Fault Cause and troubleshooting The operation does Different causes are possible. not start or is inter- ▶ Check the notifications that appear on the display. rupted. → "Displaying information", Page 15 Malfunction ▶ Call the after-sales service. → "Customer Service", Page 36 Appliance does not Demo mode is switched on.
-
Page 36: Disposal
▶ Next time, set lower or higher values. Tip: A lot of other information about the food preparation and corresponding adjustment values can be found in the Home Connect app or on our website siemens-home.bsh- group.com . 26 Disposal 26.1 Disposing of old appliance... -
Page 37: Declaration Of Conformity
A detailed Declaration of Conformity can be found on- A detailed RED Declaration of Conformity can be found line at siemens-home.bsh-group.com/uk/ among the online at siemens-home.bsh-group.com among the ad- additional documents on the product page for your ditional documents on the product page for your appli- appliance. - Page 38 en How it works ¡ Follow the manufacturer's instructions for your roast- ATTENTION! ing dishes. When the cooking compartment is hot, any water in- side it will create steam. The change in temperature Roasting in uncovered cookware may cause damage. ¡ Use a deep roasting dish. ▶...
- Page 39 How it works en ¡ The food transfers heat to the cookware. The cook- ¡ Use salt and seasoning sparingly. When cooking ware may become very hot. food using the microwave mode, most of the food's ¡ The main part of the instruction manual contains in- natural flavour will be retained.
- Page 40 en How it works Food Accessories/cook- Shelf pos- Type of Temperature in Microwave Cooking ware ition heating °C/grill setting power setting time in → Page 11 in W mins Biscuits, 2 levels Universal pan 130-150 20-35 Baking tray 1. 210-220 1. 10-15 Bread, 750 g Universal pan 2.
- Page 41 How it works en Food Accessories/cook- Shelf pos- Type of Temperature in Microwave Cooking ware ition heating °C/grill setting power setting time in → Page 11 in W mins Fillet of beef, medium, Uncovered cook- 210-220 40-50 1 kg ware Pot-roasted beef, 1.5 kg Covered cookware 200-220 130-140 Pot-roasted beef, 1.5 kg...
- Page 42 en How it works Do not use porcelain or deep plates. Remove the popcorn bag after 1½ minutes and Place the popcorn bag onto the cookware in ac- shake it to ensure that the popcorn does not burn. cordance with the instructions on the packaging. Place the popcorn bag back into the oven and Use the recommended settings when configuring leave it to continue popping.
- Page 43 How it works en Food Accessory/ Height Searing Type of Temperat- Cooking time cookware time in heating ure in °C crowave in mins mins → Page 11 power setting in Veal medallions, Uncovered 40-60 4 cm thick cookware Saddle of lamb, Uncovered 30-45 boned, 200 g each cookware Preheat the appliance.
- Page 44 en How it works ATTENTION! WARNING ‒ Risk of scalding! Metal touching the wall of the cooking compartment There is a possibility of delayed boiling when a liquid is will cause sparks, which may damage the appliance or heated. This means that the liquid reaches the boiling the inner door pane.
- Page 45 How it works en 30.8 Test dishes The information in this section is provided for test institutes to facilitate testing of the appliance in accordance with EN 60350-1 or IEC 60350-1 and EN 60705 or IEC 60705. Baking ¡ The setting values apply to food that is placed into a ¡...
-
Page 46: 31.1 General Installation Instructions
en Installation instructions Recommended settings for cooking food using the microwave Food Accessory/cook- Shelf pos- Type of Temperature in Microwave Cooking ware ition heating °C power setting time in → Page 11 in W mins Custard Uncovered cook- 1. 360 1. 20 ware 2. - Page 47 Installation instructions en ATTENTION! Carrying the appliance by the door handle could break it. The door handle cannot sup- port the weight of the appliance. ▶ Do not carry or hold the appliance by the door handle. 31.2 Appliance dimensions You will find the dimensions of the appliance here ¡...
- Page 48 en Installation instructions 31.4 Installation underneath a hob If the appliance is installed under a hob, the following The minimum worktop thickness a is based on the minimum dimensions must be adhered to (including required minimum clearance . substructure, if applicable). Hob type a raised in mm a flush in mm...
- Page 49 Installation instructions en Electrically connecting an appliance without a 31.6 Corner installation protective contact plug Observe the installation dimensions and the installation Note: Only licensed specialists may connect the appli- instructions when installing in a corner. ance. Damage caused by incorrect connection is not covered under the warranty.
- Page 50 en Installation instructions 31.9 For handleless kitchens with vertical bar handle strips: Attach a suitable filling piece in order to cover any sharp edges and to guarantee a safe installation. Pre-drill aluminium profiles to establish a screw con- nection. Secure the appliance using a suitable screw. 31.10 Removing the appliance Disconnect the appliance from the power supply.
- Page 52 Valid within Great Britain: Imported to Great Britain by BSH Home Appliances Ltd. Grand Union House Old Wolverton Road Wolverton, Milton Keynes MK12 5PT United Kingdom Manufactured by BSH Hausgeräte GmbH under the trademark licence of Siemens AG *9001673599* 9001673599 (030321)
Need help?
Do you have a question about the CM978GN 1 Series and is the answer not in the manual?
Questions and answers