
Related Manuals for Siemens CM616GB 1 Series


Summary of Contents for Siemens CM616GB 1 Series
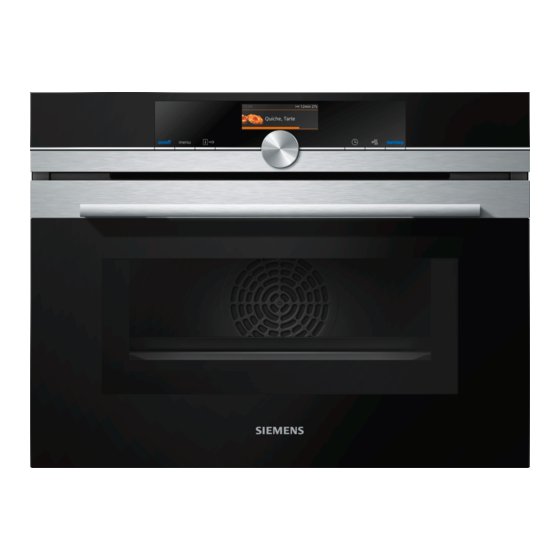
- Page 1 Oven CM616GB.1 User manual and installation instructions Register your product on My Siemens and discover exclusive ser- vices and offers. siemens-home.bsh-group.com/welcome The future moving in. Siemens Home Appliances...
-
Page 2: Table Of Contents
en Safety ¡ Keep the instruction manual and the Table of contents product information safe for future refer- ence or for the next owner. ¡ Do not connect the appliance if it has been USER MANUAL damaged in transit. Safety .............. 2 1.2 Intended use Preventing material damage ....... -
Page 3: Safety
Safety en Hot steam may escape when you open the 1.4 Safe use appliance door. Steam may not be visible, de- Always place accessories in the cooking com- pending on the temperature. partment the right way round. ▶ Open the appliance door carefully. → "Accessories", Page 11 ▶... - Page 4 en Safety If the appliance or the power cord is dam- Food and its packaging and containers may aged, this is dangerous. catch fire. ▶ Never operate a damaged appliance. ▶ Never heat food in heat-retaining pack- ▶ Never operate an appliance with a cracked aging.
- Page 5 Safety en Airtight packaging may burst when food is WARNING ‒ Risk of injury! heated. Unsuitable cookware may crack. Porcelain or ▶ Always follow the instructions on the pack- ceramic cookware can have small perfora- aging. tions in the handles and lid. These perfora- ▶...
-
Page 6: Preventing Material Damage
en Preventing material damage 2 Preventing material damage Sitting or placing objects on the appliance door may 2.1 General damage it. ATTENTION! Do not place or hang objects on the appliance door. ▶ Objects on the cooking compartment floor at over Do not place cookware or accessories on the appli- ▶... -
Page 7: Environmental Protection And Saving En- Ergy
Environmental protection and saving energy en 3 Environmental protection and saving energy 3.1 Disposing of packaging The packaging materials are environmentally compat- ible and can be recycled. Sort the individual components by type and dispose ▶ of them separately. 3.2 Saving energy If you follow these instructions, your appliance will use less power. -
Page 8: Familiarising Yourself With Your Appliance
en Familiarising yourself with your appliance 4 Familiarising yourself with your appliance 4.1 Control panel Buttons The buttons on the left- and right-hand side of You can use the control panel to configure all functions the control panel have a pressure point. Press of your appliance and to obtain information about the a button to execute its function. -
Page 9: Operating Modes
Operating modes en If you have set a cooking time and the cooking time is You can remove the rails, e.g. for cleaning. deleted, the countdown time takes over from the time → "Rails", Page 24 that has already elapsed from the cooking time. You can therefore always check how long the operation has already been running. - Page 10 en Operating modes 5.1 Types of heating To ensure that you always use the right type of heating When you select a type of heating, the appliance sug- to cook your food, we explain the differences and ap- gests a suitable temperature or setting. You can use plications below.
-
Page 11: Accessories
Accessories en 5.2 Microwave power settings This is where you can find an overview of the different microwave power settings and when to use them. The microwave power settings are levels and do not always correspond to the exact wattage that the appliance uses. Microwave power in Maximum cooking watts... - Page 12 You will find a comprehensive range of products for your appliance in our brochures and online: www.siemens-home.bsh-group.com Accessories vary from one appliance to another. When purchasing accessories, always quote the exact product number (E no.) of your appliance.
-
Page 13: Basic Operation
Change any further settings depending on the selec- button lights up blue. ‒ tion. a The Siemens logo appears in the display. A type of Press to start. heating and a temperature are then displayed. 8.6 Setting the type of heating and the 8.2 Switching off the appliance... - Page 14 en Time-setting options 9.1 Setting rapid heating a The symbol appears on the left of the display next to the temperature. To ensure an even cooking result, do not place the a The progress line begins to fill up. food in the cooking compartment until rapid heating a When rapid heating has come to an end, a signal has come to an end.
-
Page 15: Microwave
Microwave en Press . a Once the cooking time has elapsed, an audible sig- Use the rotary selector to reset the cooking time to nal sounds. A notification appears in the status bar. zero. Once the cooking time has elapsed: To continue without setting a cooking time, press Press to silence the audible signal manually. - Page 16 en Microwave ¡ To prevent condensation, when the microwave out- Cookware and accessories with MicroCombi By combining the microwave and a type of heating, put is 600 watts (max), the appliance automatically metal cookware and accessories are also possible. switches on a heating element. The cooking com- partment and the accessories become hot.
- Page 17 Dishes en Once the cooking time has elapsed: 11.3 Microwave combination Press to silence the audible signal manu- ‒ To reduce the cooking time, you can use certain types ally. of heating in combination with microwave mode. If necessary, set another combination. ‒...
- Page 18 en Dishes In order to obtain an optimal cooking result, you must 12.4 Adjusting the dish also set the weight. Unless otherwise indicated, set the Note: Once it has started, you can no longer change or total weight for your dish. You can set the weight only interrupt the dish or the settings.
-
Page 19: Dishes
Childproof lock en 13 Childproof lock You can secure your appliance to prevent children a A confirmation notification appears on the display. from accidentally switching it on or changing the set- a The appears in the status bar when the appliance tings. -
Page 20: Sabbath Mode
en Cleaning and servicing 15.2 Changing the basic settings Basic setting Selection Night-time dimming Switched off Press . Switched on Press . Brand logo Display a The operating modes menu opens. Do not display Select the "Settings" operating mode. a The first basic setting appears. Dry microwave Switched on Press... -
Page 21: Cleaning And Servicing
Cleaning and servicing en Appliance door Area Suitable cleaning agents Information Door panels ¡ Hot soapy water Do not use a glass scraper or a stainless steel wool. Tip: Remove the door panels in order to clean them thoroughly. → "Appliance door", Page 23 Door cover ¡... - Page 22 en Cleaning assistance 17 Cleaning assistance The cleaning assistance is a quick alternative for occa- Press to start. sionally cleaning the cooking compartment. The clean- a The appliance starts to heat and the time starts to ing assistance softens dirt by vaporising the soapy wa- count down.
- Page 23 Appliance door en 19 Appliance door To clean the appliance door thoroughly, you can disas- WARNING ‒ Risk of serious harm to health! semble the appliance door. If the screws are undone, the safety of the appliance can no longer be guaranteed. Microwave energy 19.1 Removing the door cover may escape.
- Page 24 en Rails Put the door cover in position and push down on it Close the appliance door. until you hear it click into place. Note: Do not use the cooking compartment again until the door panes have been correctly fitted. 20 Rails To thoroughly clean the rails and the cooking compart- 20.2 Fitting the retainers ment, or to replace the rails, you can remove the rails.
-
Page 25: Troubleshooting
Troubleshooting en Hook the rear retainers with the hook into the top ¡ The rails fit both the left- and right-hand sides. hole and push them into the bottom hole . Set the rear rail at an angle, hooking it into the re- tainers at the top and bottom ... -
Page 26: Disposal
Next time, set lower or higher values. ▶ Tip: A lot of information about the food preparation and corresponding setting values can be found on our website www.siemens-home.bsh-group.com . 22 Disposal Find out here how to dispose of old appliances cor- This appliance is labelled in accord- rectly. -
Page 27: Customer Service
Customer Service en 23 Customer Service If you have any queries on use, are unable to rectify 23.1 Product number (E-Nr.) and faults on the appliance yourself or if your appliance production number (FD) needs to be repaired, contact Customer Service. You can find the product number (E-Nr.) and the pro- Detailed information on the warranty period and terms duction number (FD) on the appliance's rating plate. - Page 28 en How it works ¡ Add up to ½ litre of water to the universal pan, de- 24.4 Microwave cooking pending on the size and type of food that you want If you use the microwave mode, you can reduce the to roast. cooking time considerably.
- Page 29 How it works en 24.7 List of foods Recommended settings for a variety of foods, sorted into food categories. Recommended settings for various types of food Food Accessory/cook- Shelf pos- Heating Temperature in Microwave Cooking ware ition function °C power setting time in → Page 9 in W mins...
- Page 30 en How it works Food Accessory/cook- Shelf pos- Heating Temperature in Microwave Cooking ware ition function °C power setting time in → Page 9 in W mins Lasagne, frozen, 400 g Uncovered cook- 200 - 210 20 - 25 ware Potato gratin, raw in- Ovenproof dish 170 - 180 50 - 65...
- Page 31 How it works en Food Accessory/cook- Shelf pos- Heating Temperature in Microwave Cooking ware ition function °C power setting time in → Page 9 in W mins Millet, whole, 250 g, + Covered cookware 1. 600 1. 8 - 10 600 ml water 2. 180 2.
- Page 32 en How it works Requirement: The cooking compartment must be cold. 24.8 Special cooking methods and other applications Use fresh, clean, hygienic meat without bones. Place the cookware onto the wire rack at level 1 in Information and recommended settings for special the cooking compartment. cooking methods and other applications, e.g.
- Page 33 How it works en Food Accessory/cook- Shelf pos- Heating Temperature in Microwave Cooking ware ition function °C power setting time in → Page 9 in W mins Minced meat, mixed, Uncovered cook- 1. 180 1. 5 500 g ware 2. 90 2. 10 - 15 Chicken, whole, 1.2 kg Uncovered cook- 1.
- Page 34 en How it works Food Accessory/cook- Shelf pos- Heating Temperature in Microwave Cooking ware ition function °C power setting time in → Page 9 in W mins Plated meal, 1 portion Covered cookware 4 - 8 Chilled Bakes, 400 g, e.g. Uncovered cook- 180 - 200 20 -25 lasagne, potato gratin ware...
- Page 35 Installation instructions en Food Accessory/cookware Shelf posi- Heating Temperature in °C Cooking time tion function in mins → Page 9 Hot water sponge cake Springform cake tin, 160–170 25–35 diameter 26 cm Hot water sponge cake Springform cake tin, 160–170 30–45 diameter 26 cm Preheat the appliance for five minutes.
-
Page 36: 25.1 General Installation Instructions
en Installation instructions 25.1 General installation instructions Follow these instructions before you start with the installation of the appliance. ¡ The installation cabinet must not have a back panel behind the appliance. There ¡ Wear protective gloves so that you do not should be a gap of at least 35 mm cut yourself. - Page 37 Installation instructions en ¡ To ventilate the appliance, the intermediate floor 25.3 Installation below a worktop must have a ventilation cut-out. Observe the installation dimensions and the installation ¡ The worktop must be secured to the built-in unit. instructions when installing below a worktop. ¡...
- Page 38 en Installation instructions panel or fit a ventilation grille. Ensure that the air ex- ¡ The power cable must only be replaced with a cable change is guaranteed in accordance with the dia- from the original manufacturer. This is available from gram.
- Page 39 Installation instructions en Screw the appliance into place. For handleless kitchens with vertical bar handle strips: Attach a suitable filling piece in order to cover ‒ any sharp edges and to guarantee a safe install- ation. Pre-drill aluminium profiles to establish a screw ‒...
- Page 40 Valid within Great Britain: Imported to Great Britain by BSH Home Appliances Ltd. Grand Union House Old Wolverton Road Wolverton, Milton Keynes MK12 5PT United Kingdom Manufactured by BSH Hausgeräte GmbH under the trademark licence of Siemens AG *9001680360* 9001680360 (010831)
Need help?
Do you have a question about the CM616GB 1 Series and is the answer not in the manual?
Questions and answers