
Related Manuals for Siemens CM976GK 1 Series


Summary of Contents for Siemens CM976GK 1 Series
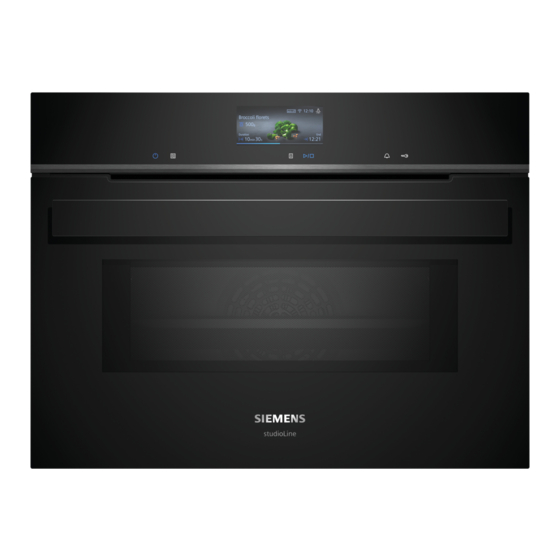
- Page 1 Oven CM976GK.1 User manual and installation instructions Register your product on My Siemens and discover exclusive ser- vices and offers. siemens-home.bsh-group.com/welcome The future moving in. Siemens Home Appliances...
-
Page 2: Table Of Contents
en Safety Futher information and explanations are available on- line: How it works............ 34 Table of contents INSTALLATION INSTRUCTIONS ....... 43 30.1 General installation instructions....... 43 INFORMATION FOR USE Safety .............. 2 1 Safety Preventing material damage ....... 7 Environmental protection and saving en- Observe the following safety instructions. -
Page 3: Safety
Safety en 1.3 Restriction on user group Accessories and cookware get very hot. ▶ Always use oven gloves to remove ac- This appliance may be used by children aged cessories or cookware from the cooking 8 or over and by people who have reduced compartment. -
Page 4: Preventing Material Damage
en Safety Components inside the appliance door may WARNING ‒ Risk of suffocation! have sharp edges. Children may put packaging material over ▶ Wear protective gloves. their heads or wrap themselves up in it and Alcoholic vapours may catch fire in the hot suffocate. - Page 5 Safety en Using the appliance for anything other than its WARNING ‒ Risk of explosion! intended purpose is dangerous. This is be- Liquids and other food may easily explode cause, for instance, overheated slippers, pil- when in containers that have been tightly lows filled with grain or cereal, sponges and sealed.
- Page 6 en Safety The outside of the appliance gets very hot WARNING ‒ Risk of electric shock! when the cleaning function is in progress. The appliance uses a high voltage. ▶ Never hang combustible objects, e.g. tea ▶ Never remove the casing. towels, on the door handle. ▶...
- Page 7 Preventing material damage en 2 Preventing material damage If the seal is very dirty, the appliance door will no 2.1 General longer close properly during operation. This may dam- ATTENTION! age the front of adjacent kitchen units. ▶ Alcoholic vapours may catch fire in the hot cooking Keep the seal clean at all times.
-
Page 8: Environmental Protection And Saving En- Ergy
en Environmental protection and saving energy 3 Environmental protection and saving energy 3.1 Disposing of packaging If the cooking time is relatively long, you can switch the appliance off 10 minutes before the cooking time The packaging materials are environmentally compat- ends. ible and can be recycled. ¡... - Page 9 Familiarising yourself with your appliance en 4.3 Buttons Symbol Meaning Time, e.g. Display of the current time-setting op- You can use the buttons to directly select various func- "12min10s" tions. tions. → "Time-setting options", Page 15 Button Function Timer is activated. → "Setting the timer", Page 16 Switch the appliance on or off.
-
Page 10: Operating Modes
en Operating modes Cooling fan To ensure that the appliance cools down more quickly after operation, the cooling fan continues to run for a The cooling fan switches on and off depending on the certain period afterwards. appliance's temperature. The hot air escapes above the door. - Page 11 Operating modes en Symbol Type of heating Temperature What it's used for and how it works range Possible additional functions Grill, large area Grill settings: Grill flat items such as steak and sausages, or make toast. Grat- 1 = low inate food. 2 = medium The entire area below the grill element becomes hot.
-
Page 12: Accessories
en Accessories 6 Accessories Use original accessories. These have been made espe- The accessories supplied may differ depending on the cially for your appliance. appliance model. Note: Accessories may become deformed if they get hot. Deformation has no effect on function. As the ac- cessory cools down, it will regain its original shape. -
Page 13: Basic Operation
Before using for the first time en Push the accessory all the way in, making sure that siemens-home.bsh-group.com it does not touch the appliance door. Accessories vary from one appliance to another. When purchasing accessories, always quote the exact Note: Take any accessories that you will not be using product number (E no.) of your appliance. - Page 14 en Basic operation 8.3 Starting the operation When the food is ready, use to switch the appli- ance off. You must start each operation. Note: The most suitable type of heating for your food ATTENTION! can be found in the type of heating description. If there is water on the cooking compartment floor Changing the type of heating when operating the appliance at temperatures above...
-
Page 15: Rapid Heating
Rapid heating en Use "End time" to set the time at which the opera- a Once the start time has been reached, the appli- tion should end. ance starts heating and the cooking time starts → "Setting the end time", Page 16 counting down. → "Time-setting options", Page 15 When the operation has ended, remove the food Place the food in the cooking compartment before... -
Page 16: Microwave
en Microwave 10.2 Setting the end time Press "Apply". You can delay the time at which the cooking time for 10.3 Setting the timer the operation is due to end by up to 24 hours. The timer runs independently during the operation. You Requirements ¡... - Page 17 Microwave en Cookware that is not microwave-safe 11.2 Setting options with the microwave Note: Observe the specifications for preventing mater- You can use the microwave on its own or in combina- ial damage. tion with a different operating mode. → "Microwave", Page 7 Microwave-only operation ¡...
- Page 18 en Ventilation function "Crisp Finish" Set the cooking time using or , or via the adjust- Change the cooking time using or , or via the ment bar. Or enter the cooking time directly via the adjustment bar.
- Page 19 Dishes en a For "Crisp Finish" , "Off" appears on the display. a The operation continues without the ventilation func- tion. 13 Dishes The "Dishes" operating mode helps you to use your ap- You can adjust the preset temperature and the cooking pliance to prepare different meals by selecting the op- time.
- Page 20 en Favourites Adjust the settings if required. Category Food You can adjust only certain settings depending on Fish Fish, whole the dish. Fish fillet → "Setting options for the dishes", Page 19 Frozen Pizza For information about the accessory and shelf posi- products Bread rolls tion, for example, press ...
-
Page 21: Dishes
Childproof lock en 15 Childproof lock You can secure your appliance to prevent children a The control panel is locked. The appliance can only from accidentally switching it on or changing the set- be switched off using . tings. a When the appliance is switched on, ... -
Page 22: Home Connect
en Home Connect 16.2 Changing the basic settings Personalisa- Selection tion Press in the status bar. Childproof ¡ Button lock only Press the required basic setting area. lock ¡ Door lock + keylock Press the required basic setting. ¡ Keylock only Press to select the required basic setting. - Page 23 Home Connect en Basic setting Possible settings Explanation Home Connect as- Start the assistant You can connect your appliance to the Home Connect app via sistant Disconnect the Home Connect assistant. Note: If you are using the Home Connect assistant for the first time, only the "Start assistant"...
-
Page 24: Appliance Door
en Cleaning and servicing 17.6 Data protection ¡ The current software and hardware version of your appliance. Please see the information on data protection. ¡ Status of any previous reset to factory settings. The first time your appliance is registered on a home This initial registration prepares the Home Connect network connected to the Internet, your appliance will functions for use and is only required when you want to... - Page 25 Cleaning and servicing en Area Suitable cleaning agents Information Stainless steel in- ¡ Stainless steel cleaner Discolouration can be removed using stainless steel cleaner. terior door frame Do not use stainless steel care products. Door handle ¡ Hot soapy water To avoid permanent stains, immediately remove any descaling agent that gets onto the surface.
- Page 26 en Cleaning function "Pyrolytic activeClean" 19 Cleaning function "Pyrolytic activeClean" 19.2 Setting the cleaning function With the "Pyrolytic activeClean" cleaning function, the cooking compartment is cleaned virtually automatically. Ventilate the kitchen while the cleaning function is run- Use this cleaning function to clean the cooking com- ning.
- Page 27 Cleaning aid "humidClean" en Cancelling the cleaning function While the cleaning function is running, the rails may become discoloured. This discolouration does not You can no longer stop or change the cleaning func- compromise the functionality of the appliance. tion once it has started. Remove white residues with lemon juice.
- Page 28 en Drying 21 Drying To prevent residual moisture, dry the cooking compart- To use the "Drying" function, set "Drying". ‒ → "Setting the drying process", Page 28 ment following microwave-only operation. ATTENTION! Setting the drying process If there is water on the cooking compartment floor Requirement: → "Drying the cooking compartment", when operating the appliance at temperatures above Page 28...
- Page 29 Appliance door en Press the intermediate pane against the appliance Insert the intermediate pane into the retainer at with one hand while pushing the left- and right-hand the bottom and push it in firmly at the top. retainers ...
-
Page 30: Troubleshooting
en Rails 23 Rails To thoroughly clean the rails and the cooking compart- Hook the front retainers in at the bottom and ment, or to replace the rails, you can remove the rails. straighten them . 23.1 Detaching the rails WARNING ‒ Risk of burns! The shelf supports get very hot ▶... -
Page 31: Customer Service
Troubleshooting en WARNING ‒ Risk of electric shock! Incorrect repairs are dangerous. ▶ Repairs to the appliance should only be carried out by trained specialist staff. ▶ Only use genuine spare parts when repairing the appliance. ▶ If the power cord of this appliance is damaged, it must be replaced by the manufacturer, the manufac- turer's Customer Service or a similarly qualified per- son in order to prevent any risk. - Page 32 ▶ Next time, set lower or higher values. Tip: A lot of other information about the food preparation and corresponding adjustment values can be found in the Home Connect app or on our website siemens-home.bsh- group.com . 25 Disposal 25.1 Disposing of old appliance...
-
Page 33: Information Regarding Free And Open
A detailed Declaration of Conformity can be found on- A detailed RED Declaration of Conformity can be found line at siemens-home.bsh-group.com/uk/ among the online at siemens-home.bsh-group.com among the ad- additional documents on the product page for your ditional documents on the product page for your appli- appliance. - Page 34 ▶ found in the Home Connect app or on our website Never place cookware containing water on the siemens-home.bsh-group.com . cooking compartment floor. Shelf positions 29.1 General cooking tips You will obtain the best results if you use the following Take note of the following information when cooking all shelf positions.
-
Page 35: How It Works
How it works en General information about roasting in cookware 29.4 Microwave cooking ¡ Use heat-resistant, ovenproof cookware. If you cook food using the microwave mode, you can ¡ Place the cookware on the wire rack. reduce the cooking time considerably. ¡ Glass cookware is best. ¡... - Page 36 en How it works 29.7 List of foods Recommended settings for a variety of foods, sorted into food categories. Recommended settings for various types of food Food Accessory/cook- Shelf pos- Heating Temperature in Microwave Cooking ware ition function °C power setting time in in W mins → Page 10...
- Page 37 How it works en Food Accessory/cook- Shelf pos- Heating Temperature in Microwave Cooking ware ition function °C power setting time in → Page 10 in W mins Tarte flambée Universal pan 260-280 10-20 Bake, savoury, cooked Ovenproof dish 200-220 35-55 ingredients Bake, savoury, cooked...
- Page 38 en How it works Food Accessory/cook- Shelf pos- Heating Temperature in Microwave Cooking ware ition function °C power setting time in → Page 10 in W mins Long-grain rice, 250 g,+ Covered cookware 1. 600 1. 7-9 2. 180 2. 13-16 500 ml water Millet, whole, 250 g, + Covered cookware ...
- Page 39 How it works en Tips for slow cooking Issue Here you will find tips for achieving good results when You want to slow ¡ Place the cold duck breast slow cooking food. cook a duck breast. into a pan. ¡ Sear the skin side first. ¡...
- Page 40 en How it works Food Accessory/cook- Shelf pos- Heating Temperature in Microwave Cooking ware ition function °C power setting time in → Page 10 in W mins Chicken, whole, 1.3 kg Uncovered cook- 1. 180 1. 10 2. 90 2. 10-20 ware Meat, whole, e.g.
- Page 41 How it works en Food Accessory/cook- Shelf pos- Heating Temperature in Microwave Cooking ware ition function °C power setting time in → Page 10 in W mins Soup, stew, chilled, Covered cookware 400 ml Beilagen, z. B. Nudeln, Covered cookware 5-10 Klöße, Kartoffeln, Reis, gekühlt Tellergericht, gefroren, 1...
- Page 42 en How it works Food Accessory/cook- Shelf pos- Heating Temperature in Microwave Cooking ware ition function °C power setting time in → Page 10 in W mins Hot water sponge cake Springform cake 160-170 25-35 tin, diameter 26 cm Hot water sponge cake Springform cake ...
-
Page 43: Installation Instructions
Installation instructions en 30 Installation instructions Observe this information when installing the appliance. 30.1 General installation instructions Follow these instructions before you start with the installation of the appliance. ¡ The installation cabinet must not have a back panel behind the appliance. There ¡... - Page 44 en Installation instructions 30.3 Installation below a worktop ¡ To ventilate the appliance, the intermediate floor must have a ventilation cut-out. Observe the installation dimensions and the installation ¡ The worktop must be secured to the fitted unit. instructions when installing below a worktop. ¡...
- Page 45 Installation instructions en 30.5 Installation in a tall unit ¡ To ensure that the appliance door can be opened, you must take the minimum dimensions into consid- Observe the installation dimensions and the installation eration when installing in a corner. The dimension ...
- Page 46 en Installation instructions 30.8 Installing the appliance Slide the appliance in fully and centre it. Screw the appliance into place. For handleless kitchens with vertical bar handle strips: Attach a suitable filling piece in order to cover ‒ any sharp edges and to guarantee a safe install- ation.
- Page 48 Valid within Great Britain: Imported to Great Britain by BSH Home Appliances Ltd. Grand Union House Old Wolverton Road Wolverton, Milton Keynes MK12 5PT United Kingdom Manufactured by BSH Hausgeräte GmbH under the trademark licence of Siemens AG *9001673574* 9001673574 (020915)
Need help?
Do you have a question about the CM976GK 1 Series and is the answer not in the manual?
Questions and answers