
Subscribe to Our Youtube Channel
Related Manuals for Siemens CM978GQ 1 Series


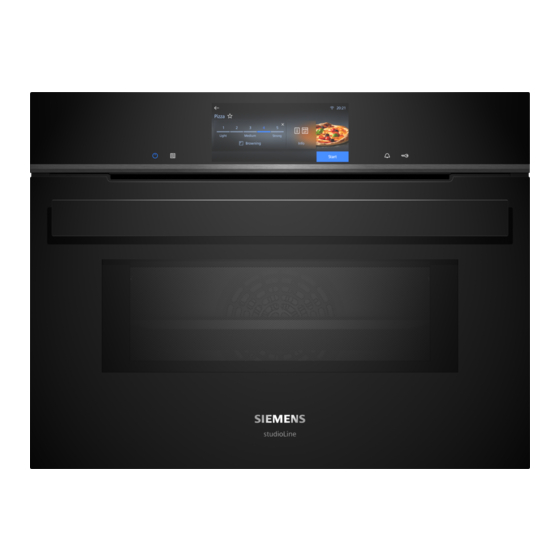
Summary of Contents for Siemens CM978GQ 1 Series
- Page 1 Oven CM978GQ.1 User manual and installation instructions Register your product on My Siemens and discover exclusive ser- vices and offers. siemens-home.bsh-group.com/welcome The future moving in. Siemens Home Appliances...
-
Page 2: Table Of Contents
en Safety Table of contents 1 Safety INFORMATION FOR USE Observe the following safety instructions. 1.1 General information Safety .............. 2 ¡ Read this instruction manual carefully. Preventing material damage ...... 6 ¡ Keep the instruction manual and the Environmental protection and saving en- product information safe for future refer- ergy .............. 7 ence or for the next owner. -
Page 3: Safety
Safety en 1.4 Safe use The telescopic shelves become hot when the appliance is in use. Always place accessories in the cooking com- ▶ Allow hot telescopic shelves to cool down partment the right way round. before touching them. → "Accessories", Page 12 ▶ Only touch hot telescopic shelves with WARNING ‒ Risk of fire! oven gloves. - Page 4 en Safety If the insulation of the power cord is dam- 1.5 Microwave aged, this is dangerous. CAREFULLY READ THE IMPORTANT SAFETY ▶ Never let the power cord come into contact INSTRUCTIONS AND KEEP THEM SAFE FOR with hot appliance parts or heat sources. FUTURE USE ▶...
- Page 5 Safety en sausages, may burst. Before heating, prick WARNING ‒ Risk of scalding! the peel or skin. There is a possibility of delayed boiling when Heat is not distributed evenly through baby a liquid is heated. This means that the liquid food. reaches the boiling temperature without the ▶...
-
Page 6: Preventing Material Damage
en Preventing material damage Never operate the appliance if the cooking If the door seal is damaged, a large amount compartment door or the door seal is dam- of heat is generated around the door. ▶ Do not scrub or remove the seal. aged. -
Page 7: Environmental Protection And Saving En- Ergy
Environmental protection and saving energy en ▶ Do not use stainless steel wool. Using silicone moulds or any film, covers or accessor- ▶ Do not use cleaning agents or descalers containing ies that contain silicone could damage the baking acids. sensor. Damage may occur even if the baking sensor ▶... -
Page 8: Familiarising Yourself With Your Appliance
en Familiarising yourself with your appliance 3.2 Saving energy If the cooking time is relatively long, you can switch the appliance off 10 minutes before the cooking time If you follow these instructions, your appliance will use ends. less power. ¡ There will be enough residual heat to finish cooking Only preheat the appliance if the recipe or the recom- the dish. - Page 9 Familiarising yourself with your appliance en 4.4 Cooking compartment Symbol Meaning Wi-Fi signal strength for Home Connect. Various functions in the cooking compartment provide The more lines of the symbol are filled, support when operating your appliance. the better the signal. Shelf supports If the symbol is struck through , there is no Wi-Fi signal.
-
Page 10: Microwave
en Cooking Functions Appliance door To ensure that the appliance cools down more quickly after operation, the cooling fan continues to run for a If you open the appliance door during operation, the certain period afterwards. operation stops. If you close the appliance door, opera- tion resumes automatically. - Page 11 Cooking Functions en Symbol Type of heating Temperature What it's used for and how it works range Possible additional functions Circulated air grilling 30 - 300 °C Roast poultry, whole fish or larger pieces of meat. The grill element and the fan switch on and off alternately. The fan circulates the hot air around the food.
- Page 12 en Accessories Note: The maximum microwave output setting "Boost" is not designed for heating food. To protect the appli- ance, the microwave output is gradually reduced to 600 watts during the first few minutes. Maximum output is made available again after a cooling period. 6 ...
- Page 13 You will find a comprehensive range of products for your appliance in our brochures and online: siemens-home.bsh-group.com Accessories vary from one appliance to another. When purchasing accessories, always quote the exact product number (E no.) of your appliance.
- Page 14 en Basic operation Once the appliance has cooled down, clean the Clean the accessories thoroughly using a detergent smooth surfaces in the cooking compartment with a solution and a dish cloth or soft brush. detergent solution and a dish cloth. 8 Basic operation 8.1 Switching on the appliance Tip: You can save your settings as "Favourites"...
- Page 15 Rapid heating en 8.8 Sabbath-compliant use → "Time-setting options", Page 15 Use "End time" to set the time at which the opera- If you want to operate your appliance so that it is Sab- tion should end. bath-compliant, use the time-setting options and → "Setting the end time", Page 16 change the basic setting for the lighting.
- Page 16 en Time-setting options If required, you can select other settings and re- Press "Stop" ‒ start the operation. Press "End time" When the food is ready, use to switch the ap- Change the time using the adjustment line or enter ‒ pliance off.
- Page 17 Microwave en 11 Microwave You can use the microwave to cook, heat up, bake or ATTENTION! defrost food very quickly. Operating the appliance without food in the cooking compartment may lead to overloading. 11.1 Cookware and accessories with ▶ Do not switch on the microwave unless there is food inside.
- Page 18 en Microwave You can combine the microwave with the following Note: If you open the appliance door during operation, functions: the operation stops. If you close the appliance door, ¡ Types of heating → Page 14 you must continue the operation. If you have changed the basic setting for this, make sure that the microwave –...
- Page 19 Ventilation function "Crisp Finish" en 12 Ventilation function "Crisp Finish" 12.2 Setting the ventilation function The ventilation function "Crisp Finish" extracts mois- ture from the cooking compartment so that your meal You can activate the ventilation function at any time, will be more crispy. even after the start of the operation.
- Page 20 en Meat probe 13.3 Setting the meat probe Thick Insert the meat probe diagonally into the pieces meat from above, pushing it in as far as You can set a core temperature of between 30 °C and of meat possible. 99 °C. Requirements ¡ The food with the meat probe is in the cooking com- partment.
- Page 21 Dishes en Press "Stop". Pork Core temperature Press . in °C Press the type of heating that you want to use. Fillet of pork, medium rare 62 - 70 Reset the operation and use "Start" to start. Pork loin, well done 72 - 80 13.4 Remaining time forecast for the Beef...
- Page 22 en Dishes To achieve an optimal cooking result, you must also ¡ Depending on the appliance type/software status, set the weight, thickness or the cooking level. You can you must first download this function to your appli- set the weight only in the intended range. ance.
- Page 23 Favourites en 14.4 Setting a dish Category Food Individual Bread rolls (crispy bread rolls) Press "Dishes". browning Pizza Press the required category. Lasagne, deep Press the required food. Lasagne, shallow Press the required dish. Note: This only includes dishes for Tip: For some dishes, you can select a preferred cooking with individual browning.
- Page 24 en Childproof lock 15.2 Selecting favourites 15.3 Changing favourites If you have saved favourites, you can use these to set You can change your saved favourites at any time. the operation. Press "Favourites". Press "Favourites". Press the required favourites. Press the required favourites. Next to the title of the favourite, press ...
-
Page 25: Dishes
Home Connect en Device Set- Selection Personalisa- Selection tings tion Fan run-on ¡ Minimum Microwave ¡ On time baking tray ¡ Recommended ¡ off ¡ Long Dishes ¡ All ¡ Very long ¡ No pork Lighting ¡ On when cooking and opening ¡... - Page 26 en Home Connect 18.1 Setting up Home Connect Open the Home Connect app and scan the follow- ing QR code. Requirements ¡ The appliance is connected to the power supply and is switched on. ¡ You have a mobile device with a current version of the iOS or Android operating system, e.g.
- Page 27 Cleaning and servicing en ¡ When you start the oven using the controls on 18.5 Remote diagnostics the appliance itself, the remote start function is Customer Service can use Remote Diagnostics to ac- activated automatically. You can use the cess your appliance if you contact them, have your ap- Home Connect app to adjust the settings or start pliance connected to the Home Connect server and if a new programme.
-
Page 28: Appliance Door
en Cleaning and servicing Appliance front Surface Suitable cleaning agents Information Stainless steel ¡ Hot soapy water To prevent corrosion, remove any patches of limescale, grease, starch or albumin (e.g. egg white) from stainless steel surfaces im- ¡ Special stainless steel mediately. - Page 29 Cleaning function "Pyrolytic activeClean" en Area Suitable cleaning agents Information Meat probe ¡ Hot soapy water Use a brush to remove heavy soiling. Do not clean in the dishwasher. Camera lens ¡ Hot soapy water Do not use cleaning agents or descalers containing acids. Follow the instructions on cleaning the camera lens.
- Page 30 en Cleaning function "Pyrolytic activeClean" Remove coarse dirt from the cooking compartment The duration cannot be changed. and from the shelf supports. You can delay the time at which the operation Use a detergent solution and a soft cloth to clean should be ready.
- Page 31 Cleaning aid "humidClean" en 21 Cleaning aid "humidClean" The cleaning aid "humidClean" is a quick alternative Confirm the notification. for occasionally cleaning the cooking compartment. a The cleaning aid starts and the cooking time counts The cleaning aid softens dirt by vaporising the soapy down.
- Page 32 en Appliance door 23 Appliance door To clean the appliance door thoroughly, you can disas- Place the front pane down on a flat surface with the semble the appliance door. door handle facing down. Press the intermediate pane against the appliance with one hand while pushing the left- and right-hand 23.1 Removing the door cover retainers...
-
Page 33: Rails
Rails en Turn the intermediate pane until the arrow is in Push the front pane to the appliance until the left- the top right. and right-hand hook is opposite the support . Insert the intermediate pane into the retainer Push the front pane in at the bottom until you the bottom... - Page 34 en Troubleshooting 24.2 Fitting the retainers Hook the rear retainers with the hook into the top hole and push them into the bottom hole . The retainers may fall out when you detach the rails. Note: The retainers at the front differ from those at the rear. 24.3 Attaching the rails Set the rear rail at an angle, hooking it into the re- tainers at the top and bottom...
-
Page 35: Troubleshooting
Troubleshooting en Fault Cause and troubleshooting The appliance is not Electronics fault working. Disconnect the appliance from the power supply for at least 30 seconds by switching off the fuse. Reset the basic settings to the factory settings. → "Basic settings", Page 24 "Sprache Deutsch"... - Page 36 ▶ Next time, set lower or higher values. Tip: A lot of other information about the food preparation and corresponding adjustment values can be found in the Home Connect app or on our website siemens-home.bsh- group.com . Camera lens is dirty. ▶...
-
Page 37: Information Regarding Free And Open
A detailed Declaration of Conformity can be found on- A detailed RED Declaration of Conformity can be found line at siemens-home.bsh-group.com/uk/ among the online at siemens-home.bsh-group.com among the ad- additional documents on the product page for your ditional documents on the product page for your appli- appliance. - Page 38 en How it works ¡ The setting values apply to food placed in the cook- Notes ing compartment while the cooking compartment is ¡ Items that are placed in the appliance on baking still cold. If you want to preheat anyway, do not trays or in baking tins/dishes at the same time will place accessories into the cooking compartment un- not necessarily be ready at the same time.
-
Page 39: How It Works
How it works en Grilling You can find more microwave recipes here: Grill food if you want it to be crispy. ¡ → "Defrosting", Page 43 ATTENTION! ¡ → "Warming up food using the microwave mode", Acidic food may damage the grid Page 44 ▶ Do not place acidic food, such as fruit or food with an acidic marinade directly on the pan support. - Page 40 en How it works 30.6 List of foods Recommended settings for a variety of foods, sorted into food categories. Recommended settings for various types of food Food Accessories/cook- Shelf pos- Type of Temperature in Microwave Cooking ware ition heating °C/grill setting power setting time in in W mins...
- Page 41 How it works en Food Accessories/cook- Shelf pos- Type of Temperature in Microwave Cooking ware ition heating °C/grill setting power setting time in → Page 10 in W mins Lasagne, frozen, Uncovered cook- 200-210 20-25 350-450 g, 3 cm deep ware Lasagne, frozen, Uncovered cook- 200-210 35-45 600-1000 g, 4-5 cm ware...
- Page 42 en How it works Food Accessories/cook- Shelf pos- Type of Temperature in Microwave Cooking ware ition heating °C/grill setting power setting time in → Page 10 in W mins Long-grain rice, 250 g + Covered cookware 1. 600 1. 7-9 2. 180 2. 13-16 500 ml water Millet, whole, 250 g, + Covered cookware 1.
- Page 43 How it works en 30.7 Special cooking methods and other Immediately place the meat into the pre-warmed cookware in the cooking compartment. applications To ensure that the temperature in the cooking com- Information and recommended settings for special partment remains constant, keep the cooking com- cooking methods and other applications, e.g.
- Page 44 en How it works Recommended settings for defrosting food Food Accessory/cook- Shelf pos- Type of Temperature in Microwave Cooking ware ition heating °C power setting time in → Page 10 in W mins Bread, 500 g Uncovered cook- 1. 180 1. 3 ware 2. 90 2.
- Page 45 How it works en Food Accessory/cook- Shelf pos- Type of Temperature in Microwave Cooking ware ition heating °C power setting time in → Page 10 in W mins Baby food, heating up, Uncovered cook- e.g. baby bottle, 150 ml ware Vegetables, chilled, Covered cookware 250 g Vegetables, frozen, Covered cookware...
- Page 46 en How it works Recommended settings for baking Food Accessory/cook- Shelf pos- Type of Temperature in Microwave Cooking ware ition heating °C power setting time in → Page 10 in W mins Shortbread Baking tray 150-160 20-30 Shortbread Baking tray 140-150 25-35 Small cakes Baking tray 25-35 Small cakes...
-
Page 47: Installation Instructions
Installation instructions en Recommended settings for cooking in combination with the microwave Food Accessory/cook- Shelf pos- Type of Temperature in Microwave Cooking ware ition heating °C power setting time in → Page 10 in W mins Potato gratin Uncovered cook- 150-170 25-30 ware Cakes Uncovered cook- 190-210... - Page 48 en Installation instructions 31.3 Installation below a worktop WARNING ‒ Risk of fire! It is dangerous to use an extended power Observe the installation dimensions and the installation instructions when installing below a worktop. cord and non-approved adapters. ▶ Do not use multiple socket strips. ▶...
- Page 49 Installation instructions en Hob type a raised in mm a flush in mm b in mm Induction hob Full-surface induction hob Gas hob Electric hob Observe different national installation instructions for the hob. 31.5 Installation in a tall unit 31.6 Corner installation Observe the installation dimensions and the installation Observe the installation dimensions and the installation instructions when installing in a tall unit.
- Page 50 en Installation instructions When the appliance is installed, the mains plug of 31.9 For handleless kitchens with vertical the power cord must be freely accessible. If free ac- bar handle strips: cess is not possible, an isolating switch must be in- Attach a suitable filling piece in order to cover any tegrated into the permanent electrical installation ac- sharp edges and to guarantee a safe installation.
- Page 52 Valid within Great Britain: Imported to Great Britain by BSH Home Appliances Ltd. Grand Union House Old Wolverton Road Wolverton, Milton Keynes MK12 5PT United Kingdom Manufactured by BSH Hausgeräte GmbH under the trademark licence of Siemens AG *9001673600* 9001673600 (030320)
Need help?
Do you have a question about the CM978GQ 1 Series and is the answer not in the manual?
Questions and answers