Table of Contents
Advertisement
Quick Links
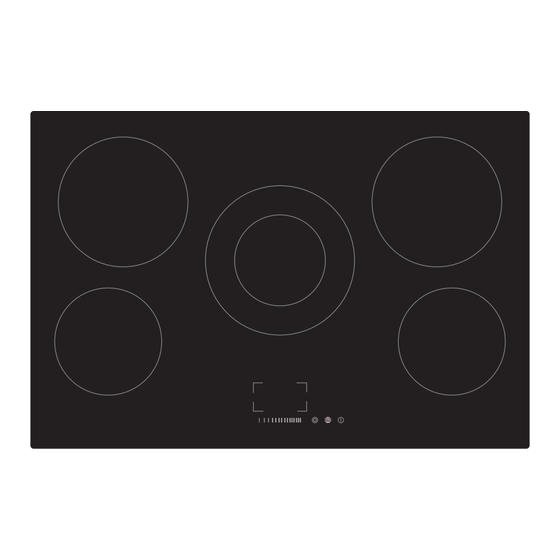
77cm Ceramic Hob - Touch Control
MCH77
Please read these instructions carefully before attempting to install or use this appliance.
We recommend that you keep these instructions in a safe place for future reference.
THE PERFECT BALANCE OF FUNCTION AND STYLE
LAUNDRY - DISHWASHING - COOKING - COOLING
Installation and Operating Instructions
Advertisement
Table of Contents

Subscribe to Our Youtube Channel
Related Manuals for montpellier MCH77


Summary of Contents for montpellier MCH77
- Page 1 LAUNDRY - DISHWASHING - COOKING - COOLING Installation and Operating Instructions 77cm Ceramic Hob - Touch Control MCH77 Please read these instructions carefully before attempting to install or use this appliance. We recommend that you keep these instructions in a safe place for future reference.
- Page 2 Welcome Thank you for choosing this Montpellier appliance. Our appliances have been designed to provide you with the best combination of style, reliability and performance to give you years of trouble-free use. You may be familiar with a similar product, but please take time to read these instructions carefully before installing or using your appliance to ensure you get the most from your purchase.
-
Page 3: Table Of Contents
THANK YOU LETTER Thank you for choosing Montpellier! Before using your new Montpellier product, please read this manual thoroughly to ensure that you know how to operate the features and functions that your new appliance offers in a safe way. -
Page 4: Safety Instructions
SAFETY INSTRUCTIONS Intended Use The following safety guidelines are intended to prevent unforeseen risks or damage from unsafe or incorrect operation of the appliance. Please check the packaging and appliance on arrival to make sure everything is intact to ensure safe operation. If you find any damage, please contact the retailer or dealer. - Page 5 • Children shall not play with the appliance. Cleaning and user maintenance shall not be made by children without supervision. • If the supply cord is damaged, it must be replaced by the manufacturer, its service agent or similarly qualified persons in order to avoid a hazard. •...
- Page 6 Cut Hazard • The razor-sharp blade of a cooktop scraper is exposed when the safety cover is retracted. Use with extreme care and always store safely and out of reach of children. • Failure to use caution could result in injury or cuts. Important safety instructions •...
-
Page 7: Specifications
SPECIFICATIONS MCH77 Cooking Hob Cooking Zones 5 Zones Supply Voltage 220-240V~ 50Hz or 60Hz Installed Electric Power 7400 - 9000W Product Size L×W×H(mm) 770 x 520 x 55 Building-in Dimensions A°B (mm) 750 x 495 Weight and Dimensions are approximate. Because we continually strive to improve our... -
Page 8: Product Installation
PRODUCT INSTALLATION Installation Area Cut out the work surface according to the sizes shown in the drawing. For the purpose of installation and use, a minimum of 5cm space shall be preserved around the hole. Be sure the thickness of the work surface is at least 30mm. Please select heat- resistant and insulated work surface material (Wood and similar fibrous or hygroscopic material shall not be used as work surface material unless impregnated) to avoid the electrical shock and larger deformation caused by the heat radiation from the hotplate. - Page 9 Under any circumstances, make sure the ceramic cooker hob is well ventilated and the air inlet and outlet are not blocked. Ensure the ceramic cooker hob is in good work state. As shown below. Note: The safety distance between the hotplate and the hood/cupboard above the hotplate should be at least 650mm (refer to the installation instructions for hoods as the measurements may vary).
- Page 10 Before installing the hob, make sure that The work surface is square and level, and no structural members interfere with space • requirements. The work surface is made of a heat-resistant and insulated material. • If the hob is installed above an oven, the oven has a built-in cooling fan. •...
- Page 11 Before Locating the Fixing Brackets The unit should be placed on a stable, smooth surface (use the packaging). Do not apply force onto the controls protruding from the hob. Fix the hob on the work surface by screw four brackets on the bottom of hob (see picture) after installation.
- Page 12 Connecting the Hob to the Mains Power Supply The power supply should be connected in compliance with the relevant standard, or a single-pole circuit breaker. The method of connection is shown below. Earth - L1 & L2 - Yellow/ Black & Blue Green Brown...
-
Page 13: Product Overview
PRODUCT OVERVIEW Top View Max. 000/ 00W zone Max. Max. 00 W zone 00 W zone Glass Plate Control Panel Control Panel NOTE All the pictures in this manual are for explanation purpose only. Any discrepancy between the real object and the illustration in the drawing shall be subject to the real subject. -
Page 14: Operation Instructions
OPERATION INSTRUCTIONS Touch Controls • The controls respond to touch, so you don’t need to apply any pressure. • Use the ball of your finger, not its tip. • You will hear a beep each time a touch is registered. •... - Page 15 How to Use 1 Start Cooking After power on, the buzzer beeps once, all the indicators light up for 1 second then go out, indicating that the ceramic hob has entered the state of standby mode. Touch the ON/OFF control. all the indicators show “-”...
- Page 16 2 Finish cooking Touching the heating zone selection control that you wish to switch off. Turn the cooking zone off by touching the slider to ” l ”. Make sure the display shows ”0” Turn the whole cooktop off by touching the ON/OFF control.
- Page 17 4 Using the Double zone function • The function only work in 3# cooking zone • The dual cooking zone has two cooking areas that you can use a central section and an outer section. You can use the central section (A) independently or both sections (B) at once.
- Page 18 5 Timer control You can use the timer in two different ways: • You can use it as a minute minder. In this case, the timer will not turn any cooking zone off when the set time is up. • You can set it to turn one or more cooking zones off after the set time is up. •...
- Page 19 Setting the timer to turn a cooking zone off Setting each zone Touching the heating zone selection control that you want to set the timer for. Touch timer control , the “10” will show in the timer display. and the “0” flashes. Set the time by touching the slider control.
-
Page 20: Quick Start Guide
QUICK START GUIDE Take care when frying as the oil and fat heat up very quickly, particularly if you’re using Power Boost. At extremely high temperatures oil and fat will ignite spontaneously and this presents a serious fire risk. Cooking Tips •... - Page 21 For Stir-frying 1. Choose a compatible flat-based wok or a large frying pan. 2. Have all the ingredients and equipment ready. Stir-frying should be quick. If cooking large quantities, cook the food in several smaller batches. 3. Preheat the pan briefly and add two tablespoons of oil. 4.
-
Page 22: Cleaning And Maintenance
CLEANING AND MAINTENANCE What? How? Important! 1. Switch the power to the • When the power to the cooktop is Everyday soiling cooktop off. switched off, there will be no ‘hot on glass surface’ indication but the cooking (fingerprints, 2. Apply a cooktop cleaner while zone may still be hot! Take marks, stains the glass is still warm (but not... -
Page 23: Troubleshooting
TROUBLESHOOTING Operation of your appliance can lead to errors and malfunctions. The following tables contain possible causes and notes for resolving an error message or malfunction. It is recommended to read the tables carefully below in order to save your time and money that may cost for calling to the service center. -
Page 24: Disposal And Recycling
DISPOSAL AND RECYCLING Important Instructions for Environment This appliance is labeled in compliance with European directive 2012/19/EU for Waste Electrical and Electronic Equipment (WEEE). By ensuring that this appliance is disposed of correctly, you will help prevent any possible damage to the environment and to human health, which might otherwise be caused if it were disposed of in the wrong way. -
Page 25: Here For You
Your 2 year Manufacturer's guarantee THIS DOES NOT AFFECT YOUR STATUTORY RIGHTS. Your new Montpellier appliance carries a free guarantee which protects you against the cost of repairs during the first 24 months from date of purchase provided that: Any claim is accompanied by evidence of the model reference, model serial number and proof of purchase, such as a Sales Receipt, showing that the appliance was purchased within the 24 months prior to the date of claim. - Page 28 Montpellier Domestic Appliances Ltd. Unit 1, Tewkesbury Retail Park, Northway Lane, Tewkesbury, Gloucestershire GL20 8JU www.montpellier-appliances.com The symbol on the product or on its packaging indicates that this product may not be treated as household waste. Instead it shall be handed over to the applicable collection point for the recycling of electrical and electronic equipment. By ensuring this product is disposed of correctly, you will help prevent potential negative consequences for the environment and human health, which could otherwise be caused by inappropriate waste handling of this product.
Need help?
Do you have a question about the MCH77 and is the answer not in the manual?
Questions and answers