
Related Manuals for Hall Technologies HT-HIVE-KP8

Summary of Contents for Hall Technologies HT-HIVE-KP8
- Page 1 Hall Technologies • 1234 Lakeshore Dr Suite #150 Coppell, TX 75019 • halltechav.com HT-HIVE-KP8 All-In-One 8 Button User Interface and IP Controller USER MANUAL February 1, 2024 A Member of the Hive AV Family Hall Technologies 2/1/2024 Page 1 of 28...
-
Page 2: Table Of Contents
Schedule Tab ..........................11 Network Settings Tab ........................11 System Settings Tab ........................11 Time Settings Tab .......................... 16 Telnet Commands (Port 23) ........................17 Firmware Upgrade ............................ 18 Troubleshooting ............................18 Specifications ............................18 Hall Technologies 2/1/2024 Page 2 of 28... -
Page 3: Introduction
• Time and date scheduling with customizable daylight-saving time • Up to 48 hours of power-loss backup for maintaining internal clock calendar • Firmware can be updated via WebGUI or USB Flash memory Hall Technologies 2/1/2024 Page 3 of 28... -
Page 4: Package Contents
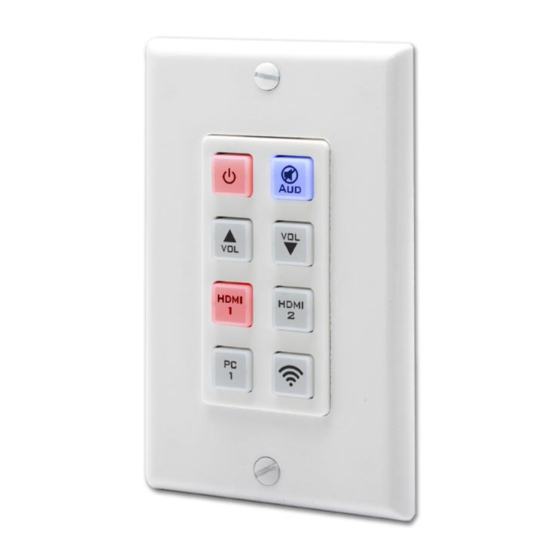
Package Contents HT-HIVE-KP8 (1) Model HIVE-KP8 Keypad (1) 5VDC, 2.6A Universal Power Supply (1) USB Type A to Mini USB OTG connector (1) Pre-printed button labels (28 labels) (1) Blank button labels (28 labels) (1) User’s Manual Hall Technologies 2/1/2024... -
Page 5: Configuration And Operation
HIVE KP8 AND HIVE NODES By itself, the HT-HIVE-KP8 is capable of IP control of a variety of devices such as our HT-CAM-1080PTZ, our HT-ODYSSEY and most displays and projectors. When used with our Hive Nodes it is capable of IR, RS-232 and Relay control for various devices such as our AMP-7040 as well as motorized screens and lifts. - Page 6 Configuration and Operation HIVE KP8 AND VERSA-4K As mentioned before, HT-HIVE-KP8 is capable of IP control of a variety of devices but when integrated with our AVoIP solution, Versa-4k, the Hive KP8 can control AV switching of the encoders and decoders and it can use Versa, just like a Hive-Node to control devices over IR or RS-232.
- Page 7 48V network switch / router without the need for the 5V DC power supply to be connected. Relay Out Connect to a device that supports DC 0~30V/5A relay trigger. Hall Technologies 2/1/2024 Page 7 of 28...
- Page 8 5. Double click on any device to view or modify its parameters. 6. Click the “Save” and then “Reboot” buttons after making changes. 7. Allow up to 60 seconds for the keypad to fully bootup after rebooting. Hall Technologies 2/1/2024 Page 8 of 28...
- Page 9 8. For example, you can assign a new Static IP address or set it to DHCP if you want the compatible LAN network to assign the address. 9. A hyperlink to the attached HIVE-KP8 is available to launch the webGUI in a compatible browser. Hall Technologies 2/1/2024 Page 9 of 28...
- Page 10 The page might take several seconds to load when first connecting. Most browsers are supported but it works best in Firefox. Default Login and Password Username: admin Password: admin Hall Technologies 2/1/2024 Page 10 of 28...
- Page 11 2. Activities – Take the added devices and map them to buttons 3. Settings – Make and final configurations and maybe do a back up of the system HIVE TOUCH WITH HIVE AV APP HIVE TOUCH WITH HIVE AV APP Hall Technologies 2/1/2024 Page 11 of 28...
- Page 12 About 20 default commands are available, but if you need to you can add more from the API. A full list is in the Telnet Commands section, later in this manual. Hall Technologies 2/1/2024 Page 12 of 28...
- Page 13 IP addresses. If you want to and new device, you can either connect TCP or UDP and will need the device IP address and the port for the API connection. Hall Technologies 2/1/2024 Page 13 of 28...
- Page 14 Versa-4k IR port or from our Hive-Node-IR. IR commands can either be learned using the Hive Node IR and the Node Learner utility or by going to the IR database at: https://irdb.globalcache.com/ Simple copy and paste the commands in as is. No HEX switch is required. Hall Technologies 2/1/2024 Page 14 of 28...
- Page 15 Telnet API at the end of this manual. To add new commands not Device connection needs to be set up. Simple select Add and under Type be sure to associate it with SysCMD. Hall Technologies 2/1/2024 Page 15 of 28...
- Page 16 3. Button Settings – This tab will set the button to either repeat or toggle between the commands in the previous tabs 4. Schedule – This allows you to set up scheduled triggering of macros set up for the buttons Hall Technologies 2/1/2024 Page 16 of 28...
- Page 17 4. The commands occur in order, and you can add delays or move the command order. 5. Press Add to add new commands or delete remove any. Hall Technologies 2/1/2024 Page 17 of 28...
- Page 18 Also, this is the tab where you would set the button to toggle between the two macros set in Buttons 1 and 2. Hall Technologies 2/1/2024 Page 18 of 28...
- Page 19 You can associate the trigger to either Buttons 1 or Buttons 2 macros. Setting it to Buttons 2 will allow you to create a macro that is only sent out by the Scheduled trigger event. Hall Technologies 2/1/2024 Page 19 of 28...
- Page 20 Web Page, Network Tab under Settings. Here you can set the IP address statically or have it assigned one by DHCP. The Network Reset button will set it back to the default of 192.168.1.150. Hall Technologies 2/1/2024 Page 20 of 28...
- Page 21 USB, there is a pin hole. Stick a paper clip in the whole while the unit is powered on, and it will reset. • Reboot – This is a simple way to reboot the unit if it is not operating properly. Hall Technologies 2/1/2024 Page 21 of 28...
- Page 22 Here you can set the system time and date. The unit has an internal battery so this should be retained if the power goes out. It is important to set this correctly if you are using the Schedule feature under ACTIVITIES. Hall Technologies 2/1/2024 Page 22 of 28...
- Page 23 IP Address is static 192.168.1.150 o Username: admin o Password: admin • Product Page – you can find the discovery Utility and additional documentation on the product page where you downloaded this manual. Hall Technologies 2/1/2024 Page 23 of 28...
-
Page 24: Telnet Commands (Port 23)
Show installed firmware version. <CR><LF> Note there is a single leading (There is a leading space) space character in the response. FADEFAULT Set the device to factory defaults ETH_FADEFAULT Set IP settings to factory default Hall Technologies 2/1/2024 Page 24 of 28... - Page 25 The response also occurs if a button is pressed. where x = the macro commands MACRO STOP MACRO STOP<CR><LF> Stop all the running macros MACRO STOP N MACRO STOP N<CR><LF> Stop the specified macro. N=1~32 Hall Technologies 2/1/2024 Page 25 of 28...
- Page 26 N3={Name} (Up to 24 characters) DEVICE DELETE N Delete the TCP/TELNET device in where Slot N N=1~16 (Device Slot) DEVICE N N1 Enable or Disable TCP/TELNET where device in Slot N N=ENABLE, DISABLE N1=1~16 (Device Slot) Hall Technologies 2/1/2024 Page 26 of 28...
-
Page 27: Specifications
3.3 W Enclosure Material Housing: Metal Bezel: Plastic Dimensions Model 2.75”(70mm) W x 1.40”(36mm) D x 4.5”(114mm) H (case) Shipping 10”(254mm) x 8”(203mm) x 4”(102mm) Weight Device: 500g (1.1 lbs.) Shipping: 770g (1.7 lbs.) Hall Technologies 2/1/2024 Page 27 of 28... - Page 28 © Copyright 2022. Hall Technologies All rights reserved. 1234 Lakeshore Drive, Suite #150, Coppell, TX 75019 halltechav.com / support@halltechav.com (714)641-6607 Hall Technologies 2/1/2024 Page 28 of 28...
Need help?
Do you have a question about the HT-HIVE-KP8 and is the answer not in the manual?
Questions and answers