Table of Contents
Advertisement
Quick Links
Advertisement
Table of Contents

Related Manuals for Laser PJT-BYCBL-040


Summary of Contents for Laser PJT-BYCBL-040
- Page 1 User Manual Laser Backyard Cinema Bundle PJT-BYCBL-040...
-
Page 2: What's In The Box
WHAT’S IN THE BOX SELF-INFLATABLE SCREEN • Inflatable screen with built-in blower • Detachable white movie screen • Carry Bag • 6 x tie down ropes • 6 x tether stakes PROJECTOR • Projector • Remote • AC Power Adapter •... - Page 3 LASER BACKYARD CINEMA BUNDLE Additional items you may need for setting up: 2x AAA batteries for the projector remote control Power extension cord with double adaptor HDMI cable 3RCA to 3.5mm AV cable (optional to connect with devices without an HDMI...
- Page 4 LASER BACKYARD CINEMA BUNDLE continued... For best use, please note the following: When setting up the screen and projector outdoors, please be aware of wind conditions and obstructions. The projector works best in dark conditions, so other light sources from street lighting, backyard lights, and mobile devices may impact the clarity of the projected image.
- Page 5 LASER BACKYARD CINEMA BUNDLE continued... SETTING UP Select an area large enough to erect the projector screen. Unpack the projector frame and lay it out on the ground with the front of the screen facing upwards, and without blocking the air pump.
- Page 6 LASER BACKYARD CINEMA BUNDLE continued... Attach the white movie screen to the frame. Connect the air pump to power and inflate the screen. Secure the inflated screen to the ground using supplied stakes and ropes. Unpack the projector and connect it to power.
- Page 7 Turn on Bluetooth on the projector by going to Menu > Option > Bluetooth. Wait for a list of nearby BT devices to appear. Select, PJT-BYCBL-040-C and click OK to connect. Audio played on the projector can now be heard through the...
-
Page 8: Product Care
SELF-INFLATABLE SCREEN PRODUCT CARE • Before using and reusing, inspect the product carefully. • Do not mount or place near gas or electric heaters, fireplaces, candles, or other similar sources of heat. • Unplug the product when not in use. Store neatly in a cool, dry location protected from sunlight. - Page 9 SELF-INFLATABLE SCREEN continued... • Protect the electric fan and power cord from direct exposure to water. This precaution will reduce the risk of electrical shock. • When the temperature is below 10°F (-14°C), the motor may temporarily stop running. The motor will begin functioning again in higher temperatures.
- Page 10 SELF-INFLATABLE SCREEN continued... supervision or instruction concerning use of the appliance by a person responsible for their safety. Children should be supervised to ensure that they do not play with the appliance. • If the power cord is damaged, it must be replaced by the manufacturer, its service agent, or similarly qualified persons in order to avoid a hazard.
- Page 11 SELF-INFLATABLE SCREEN continued... HOW TO INFLATE Step 1: Remove contents from packaging and lay out the screen in a clear, flat area. Ensure that the inflatable frame is lying so that the white movie screen is facing up. Step 2: Find the air blower and place it away from anything that may obstruct its fan.
- Page 12 SELF-INFLATABLE SCREEN continued... Step 3: Plug the power cord into a power outlet to inflate the screen. This process may take a few minutes. Make sure the air intake is clear of fabric or other obstructions, and the zipper is fully closed. Step 4: Stand the item upright, ensuring that fans are away from obstructions.
- Page 13 SELF-INFLATABLE SCREEN continued... HOW TO DEFLATE Step 1: Switch off power to the air blower and open zipper to release air. Step 2: Flatten the screen with white movie screen cloth facing up to avoid dirtying the screen. Step 3: Fold in half 3 times vertically. Step 4: Place in carry bag.
-
Page 14: Safety Precautions
PROJECTOR SAFETY PRECAUTIONS • Read this manual thoroughly before you start using the Projector. • This device should only be opened or repaired by qualified personnel. • The safety precautions reduce the risk of fire, electric shock, or injury when correctly complied to. - Page 15 PROJECTOR continued... • Do not place the projector in the following conditions: • On an unstable cart, stand, or table. • On high furniture without securing both the furniture and the device to a stable support. • In direct sunlight, near heaters or heat radiating appliances.
- Page 16 PROJECTOR continued... • DO NOT look into the lens while the projector is on. Serious damage to your eye could result. • Handle the power adaptor carefully. • Do not use any power adaptor other than the one supplied. • Do not place the power cable under the projector or any heavy object.
- Page 17 PROJECTOR continued... INSTALLING YOUR PROJECTOR • Remove the lens cover • Close the lens cover before using when not using l s b l s b DISTANCE FROM THE PROJECTOR AND SCREEN...
-
Page 18: Vertical Adjustment
PROJECTOR continued... To reduce image distortion, it is recommended to move the projector as close to centre of screen. If you cannot install the projector squarely facing the screen, correct any resulting keystone distortion using the keystone adjustment control. VERTICAL ADJUSTMENT Please follow the below diagram for vertical adjustment. - Page 19 PROJECTOR continued... ADJUST FOCUS AND KEYSTONE Adjust the focus by turning the knob while observing the image near the center of the screen. Optimal focus is obtained when the image is visible and sharp. Depending on the projected screen size, the focus near the screen edges may be less sharp than the screen center.
-
Page 20: Remote Control
PROJECTOR continued... REMOTE CONTROL MENU POWER ON HOME MENU NAVIGATOR BUTTONS MUTE VOLUME- VOLUME+ FLIP RETURN FLIP PLAY/PAUSE Power: Press to power ON. Return/Exit: Press to exit the projector menu. Press twice to power OFF. Flip: Press to flip display image Mute: Press to mute volume. - Page 21 PROJECTOR continued... INSTALL/REMOVE BATTERIES FOR REMOTE CONTROL Remove the battery compartment cover on the back of your remote by carefully sliding to open. The battery cover can then be lifted away. Fit the correct batteries (2x AAA, not included), referring to the polarity markings. Finally, replace the cover.
- Page 22 PROJECTOR continued... PROJECTOR DIAGRAM 9 10 11 12 13 14 15 2 5 4 1 1. POWER 12. HDMI Port 1 Button 2. RETURN 13. HDMI Port 2 Button 3. NAVIGATION 14. USB Port 4. MENU 15. POWER INPUT Button 5.
- Page 23 PROJECTOR continued... Arrows/OK Press to navigate on screen menus and make selections Back Power Press to return to Press to power on a previous page or the projector. Press setting in the twice to power off on-screen menus the unit Source Menu Press to change...
- Page 24 PROJECTOR continued... TURN ON/TURN OFF THE PROJECTOR TURN ON Plug the projector into a • power source. Indicator light: Red Press the power button. • Indicator light: White The projector will turn on • after 5 seconds. TURN OFF Press the power button twice. •...
-
Page 25: Connecting Hdmi
PROJECTOR continued... CONNECTING HDMI Turn off the unit before connecting the HDMI cable. After connecting, press the power button to turn on unit and power indicator will light GREEN Press the button to switch to HDMI mode and the video of HDMI device will show on the projector screen. - Page 26 PROJECTOR CONTINUED... CONNECTING AV Turn off the unit before connecting the AV cable. Use AV cable to connect as shown in the below illustration. After connecting, press the button to turn on unit and power indicator will light GREEN. Press the button to switch to AV mode and the video of AV device will show on projector screen.
-
Page 27: Connecting Audio Output
PROJECTOR CONTINUED... CONNECTING AUDIO OUTPUT (AUX OUT/LINE OUT/EARPHONES) Turn off the projector before connecting the cables. Use audio cable to connect follow below figure. After connecting the AUX cable, turn on both units. Audio from your external device should now be heard from the projector speaker. - Page 28 PROJECTOR continued... CONNECT A USB/MICRO SD DEVICE Turn off the unit before connecting a USB flash drive or MicroSD card. After connecting, press the power button to turn on the unit and the power indicator light will be lit GREEN. Press the button to enter and use/ Navigator buttons to select the MEDIA...
- Page 29 PROJECTOR continued... Press button to fast search forward and rewind. Press button to search next or previous title. During playback, press the button to pause and press again to resume. OUTPUTTING SOUND VIA BLUETOOTH This projector allows you to output all sound to a connected Bluetooth speaker or audio device.
- Page 30 PROJECTOR continued... NOTE: Bluetooth range is approximately 10 meters so please make sure your speaker is within this range when scanning.
- Page 31 PROJECTOR continued... MENU SETTINGS: PICTURE Press button to enter projector menu. Press again to previous status. PICTURE Picture Mode Standard Use the buttons Contrast AUDIO Brightness Color OPTION to navigate the menu. Tint TIME Sharpness ColorT emperature Medium Noise Reduction Middle SelectM enuA...
- Page 32 PROJECTOR continued... MENU SETTINGS: AUDIO Press button to enter projector menu. Press again to previous status. PICTURE Sound Mode Standard Treble Use the buttons AUDIO Bass Auto Volume OPTION to navigate the menu. TIME Select Menu Adjust Sound Mode - Select Standard, Movie, Music, Sports,or User (custom).
- Page 33 PROJECTOR continued... MENU SETTINGS: OPTION Press button to enter projector menu. Press again to previous status. PICTURE OSD Language English Use the buttons Aspect Ratio 16:9 AUDIO Bluetooth Projection mode Front OPTION to navigate the menu. Reset TIME Info Select Menu Adjust OSD Language - Select different language,...
- Page 34 Aspect Ratio - Select 16:9, 4:3 Bluetooth - Turn Bluetooth ON or OFF Projection mode - Select Front, Rear, Front Ceiling, Rear Ceiling Reset - Select Y to reset the projector settings. Info - Display the unit information as below INFO: LASER SW VER: V1.0...
- Page 35 PROJECTOR continued... MENU SETTINGS: TIME Press button to enter projector menu. Press again to previous status. PICTURE Clock OffT ime Use the buttons SOUND On Time Sleep Timer OPTION Auto Sleep to navigate the menu. TIME Select Menu Adjust Clock - Select clock to Day, Month, Year, Hour, Minutes.
-
Page 36: Specifications
PROJECTOR continued... SPECIFICATIONS Light Source Type Display Native Resolution 1920 x 1080 1080p, 1080i, 720p, 576i, HDMI Input Supported 480p, and 480i Operating 72W; Standby Power Consumption 0.8W Power adaptor - input AC 100-240V 50/60Hz Power adaptor - output DC 30V 2.4A Supports USB flash drives up to 1TB USB Port... -
Page 37: Troubleshooting
TROUBLESHOOTING NO IMAGE IS PROJECTED OR A “NO SIGNAL” MESSAGE IS DISPLAYED Check the power light next to the power button is on and green. If it’s red, then press the power button to take the device out of standby. If there is no light then check the projector is plugged into the mains, and that the socket is switced on. - Page 38 TROUBLESHOOTING continued... THE LAMP (BULB) SWITCHES OFF AFTER A PERIOD OF TIME. IS THE WARNING LIGHT INDICATOR RED? IF SO, THE PROJECTOR IS OVERHEATING WHICH TURNS THE LIGHT OFF AUTOMATICALLY. Leave the projector to cool for a few minutes. Once cooled, check nothing is blocking the vents.
- Page 39 TROUBLESHOOTING continued... SPOTS ON THE SCREEN Using a screen cleaner solution and micro fibre cloth to clean the lens. THE IMAGE BRIGHTNESS HAS FADED Check the picture settings in the menu or the ambient light in the room. Adjust as required.
- Page 40 • The default source mode is Bluetooth. If not, press the Mode/Power button to set the mode to Bluetooth. • On your connecting device, search for and select “PJT-BYCBL-040-C”. • You may receive a prompt to confirm the connection on your connecting device. Smart Device...
- Page 41 SOUNDBAR continued... CONNECTION METHOD: AUX • Connect the 3.5mm Audio cable (not supplied) to the AUX input port on the soundbar. The soundbar will automatically switch to AUX mode. • Connect the other end to the AUX/ Headphone output on your audio device. AUX AC110-240V~ OPTICAL 50/60Hz...
-
Page 42: Basic Operation
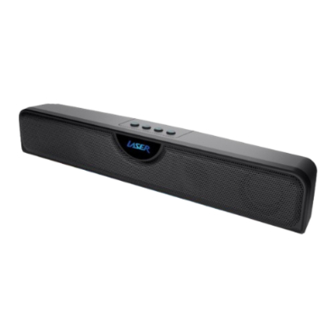
SOUNDBAR continued... BASIC OPERATION Connect the audio cable(s) between the soundbar and the projector or other device. Connect the mini soundbar to power using the supplied USB-A to USB-C power cable. We recommend that you use a 5V, 1A USB adaptor, however you can use the USB port on the projector as well. - Page 43 SOUNDBAR continued... TROUBLESHOOTING NO SOUND COMING FROM THE SOUNDBAR Check your soundbar is set to the correct • input mode. Check the soundbar connection to the source • device (e.g. DVD Player). Please refer to the soundbar connection methods in this manual for tips on connecting.
- Page 44 Place the soundbar and device close to each • other, wait approx. 1-2 minutes for your device’s Bluetooth list to update then search for and select PJT-BYCBL-040-C. Make sure the soundbar is not already paired • to another device. Ensure the external Bluetooth device is playing •...
- Page 45 SOUNDBAR continued... SPECIFICATIONS Soundbar Rated Power Power Input DC 5V, 1A Bluetooth Version Bluetooth Name PJT-BYCBL-040-C Bluetooth Range 10 meters Soundbar Dimensions (L)38.5 * (W)5.5 * (H)6.5cm Battery Capacity 1,500mAh...
- Page 46 Thank you for your purchase! Laser Corporation is 100% Australian owned & operated. To get the most out of your product please read the user manual carefully and keep for future use. For specific information relating to your product such as Spare Parts, FAQs, Warranty claims, and...
- Page 47 Visit our website www.laserco.com.au Check us out at www.youtube.com/lasercoau...
Need help?
Do you have a question about the PJT-BYCBL-040 and is the answer not in the manual?
Questions and answers