Table of Contents
Advertisement
Quick Links
Advertisement
Table of Contents

Related Manuals for Laser SPK-LED690BLK


Summary of Contents for Laser SPK-LED690BLK
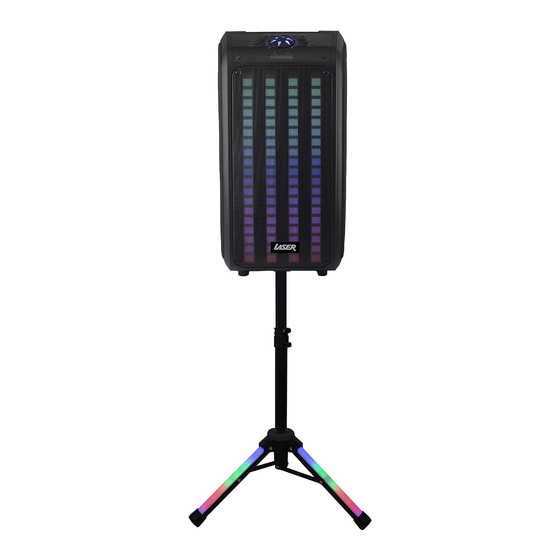
- Page 1 User Manual Backpack LED RGB Party Speaker with Tripod SPK-LED690BLK...
-
Page 2: What's In The Box
WHAT’S IN THE BOX LED RGB Speaker • Remote Control • Charging Cable • Tripod with LED lights • Wired Microphone • User Manual •... -
Page 3: Specifications
SPECIFICATIONS SPEAKER: Speakers: 6.5 inch x 2 Up to 3 hours Play time: (50% volume) Input: DC 5V 1A Approximately 4 Charging Time: -6 hours TRIPOD: Input: DC 5V 1A Battery Runtime: Up to 3 hours Approximately Charging Time: 2.5 hours... - Page 4 TIPS FOR SAFE CHARGING Avoid overcharging. Disconnect chargers and devices after the battery reaches a full charge. Leaving devices on a charger too long can cause them to overheat and can reduce battery life. Pick the right charger. Only use the charger and cable that came with your device.
- Page 5 TIPS FOR SAFE CHARGING continued Avoid extreme environments. Do not recharge your devices in environments where extreme temperatures can occur. On particularly hot days do not charge in places such as the inside of a car, or an unairconditioned room. If it’s possible, try and wait till the evening when temperatures are a bit cooler.
-
Page 6: Product Diagram
PRODUCT DIAGRAM CONTROL PANEL: LED Mode Mic In Mode/ VOL+ Prev/Rec (Record feature n/a) (AUX, Bluetooth”, FM Radio) Next/Microphone Priority Input (5V) Repeat/VOL- Charger LED Power/ Master Volume LED SW (Lights On/Off) Control Dial (-/+) Micro SD Card Pause/Play/ True Wireless Stereo AUX In... - Page 7 PRODUCT DIAGRAM continued Do not adjust more than 30cm in height for safety Tighten knob to secure extension Safety pin must pole be inserted after extension Tighten knob to secure lower extension pole...
-
Page 8: Tripod Assembly
TRIPOD ASSEMBLY Loosen knob unfold all three legs from the • tripod and place on a level surface. Then tighten the knob to secure the tripod base after adjusting to your desired height. Insert extension pole into lower pole. Do not •... - Page 9 TRIPOD CONTROLS Press the ON/OFF button to turn on or turn off the LEDs. Press the lighting mode button to switch the LED mode. CHARGING THE TRIPOD AND SPEAKER USB-C to USB-A charging cable included • A 1A wall charger (not included) with a USB-A •...
-
Page 10: Remote Control
REMOTE CONTROL Put 2 x AAA batteries (not included) into the remote control. Point the remote directly from the front of the speaker for proper use. ON/OFF Switch mode: BT/ AUX FM/USB/ Press to stop playing music, Micro SD Card then press play to return to the first song. -
Page 11: Aux Mode
The Speaker will automatically enter pairing • mode Open the Bluetooth settings on your device, • then search for and select “SPK-LED690BLK” AUX MODE: Plug your 3.5mm audio cable (not included) • into the 3.5mm socket located at the top of the... -
Page 12: Sd Card Mode
OPERATING INSTRUCTIONS continued SD CARD MODE: Insert a micro SD card into the SD card slot • The Speaker will automatically enter SD Card • mode and start playing the files Maximum micro SD card size is 32GB • USB MODE: Insert a USB drive into the USB Port •... -
Page 13: Repeat Mode
OPERATING INSTRUCTIONS continued REPEAT MODE: Short press the Repeat button to repeat the • current track in USB or SD Card mode Press again to repeat all tracks on the USB or • SD Card LED MODE: Press the LED SW button to turn on the •... -
Page 14: Tws Mode
Press and hold the TWS button on both • speakers. A tone will be heard when successfully paired. Search for and select “SPK-LED690BLK” • under the Bluetooth settings of a device you are connecting to e.g., smartphone. Once paired, any music played will come out •... -
Page 15: Troubleshooting
BLUETOOTH: Place the Speaker next to the smart device • you are pairing to e.g., Smartphone. If the Bluetooth name “SPK-LED690BLK” does • not appear on the list of available devices, then try refreshing the list or searching again. Allow up to 1 minute for the device to appear •... - Page 16 Thank you for your purchase! Laser Corporation is 100% Australian owned & operated. To get the most out of your product please read the user manual carefully and keep for future use. For specific information relating to your product such as Spare Parts, FAQs, Warranty claims, and...
- Page 17 Visit our website www.laserco.com.au Check us out at www.youtube.com/lasercoau...
Need help?
Do you have a question about the SPK-LED690BLK and is the answer not in the manual?
Questions and answers