Table of Contents
Advertisement
Advertisement
Table of Contents

Related Manuals for SanDisk G-RAID MIRROR


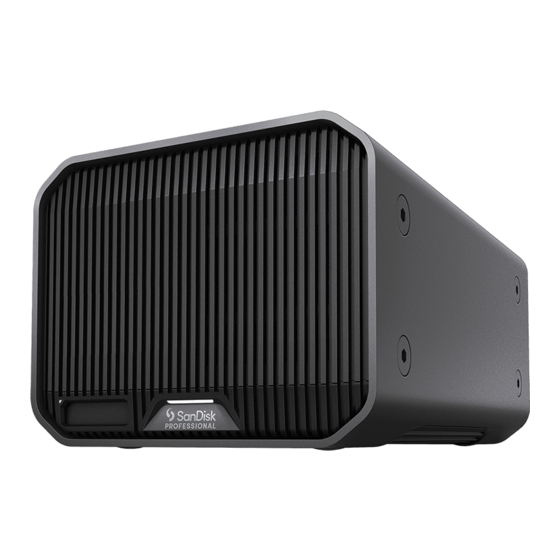
Summary of Contents for SanDisk G-RAID MIRROR
- Page 1 G-RAID MIRROR ® User Manual...
-
Page 2: Accessing Support
ACCESSING SUPPORT For online technical support visit ▪ https://www.westerndigital.com/support To speak with technical support visit: ▪ https://www.westerndigital.com/support/international-phone-numbers... -
Page 3: Table Of Contents
RAID Setup..........................7 RAID Mode Setting........................ 8 RAID Configurations......................8 Changing RAID Configuration..................... 9 Initialize G-RAID MIRROR for macOS................. 9 Reformatting the G-RAID MIRROR..................10 Inserting a PRO-BLADE SSD MAG..................10 PRO-BLADE SSD MAG LED Behavior................10 Safely Disconnecting the Device ..................11 Drive Replacement...................... - Page 4 Safety Compliance - US and Canada................17 Regulatory Compliance - CE....................17 Regulatory Compliance - Austria..................17 Regulatory Compliance - Japan..................18 Regulatory Compliance - Korea..................18 Regulatory Compliance - China..................18 Regulatory Compliance - Taiwan..................18 Index......................20 SanDisk Professional User Manual...
-
Page 5: Welcome To G-Raid Mirror
3 interface for faster transfers, image editing, workload management, and daisy-chaining for up to five (5) additional devices. PAIRS GREAT WITH IPAD* G-RAID MIRROR works great with compatible iPad* tablets that have a USB Type-C ™ port to enable efficient creative workflows when using your... -
Page 6: Handling Precautions
▪ Do not remove, damage, or cover any device labels. ▪ Ensure the SanDisk Professional device does not exceed maximum operating temperature. ▪ Exercise caution when handling a SanDisk Professional device as the SanDisk Professional device may have heated up. SanDisk Professional... -
Page 7: Technical Specifications
® FRONT FEATURES Reference illustration 2.1 below. G-RAID MIRROR System LED—The System LED can be dimmed or brightened with the rear LED Dimmer Button and provides the activity status for the G-RAID MIRROR device. 2. PRO-BLADE SSD Mag Slot LED—This LED indicates the PRO-BLADE SSD Mag slot activity. -
Page 8: Side Anchors
6. Thunderbolt 3 Ports —these two ports support Thunderbolt 3 and USB-C ™ Gen 2. Use the port on the right-hand side to connect the G-RAID MIRROR to the host computer system. Use the port on the left-hand side to daisy-chain another Thunderbolt 3 device. - Page 9 Technical Specifications SanDisk Professional User Manual...
-
Page 10: Main Activities
Use the included data cable and connect one end to the Thunderbolt 3 / USB Type-C port on the rear of the G-RAID MIRROR device—the port with the laptop icon. 2. Connect the other end of the data cable to your computer system (host). -
Page 11: Drive Led Status
Replacement). The LED lights are located on the right-hand side of the drive trays. They include blue, red, and white colored lights to indicate the status. Reference the table below to see the G-RAID MIRROR Drive LED Status with the corresponding System LED status. -
Page 12: Raid Mode Setting
Not Assigned - does not affect the current RAID setting RAID Configurations The G-RAID MIRROR supports RAID 0, RAID 1, and JBOD. The default or pre-configured setting is RAID 1. Warning! Changing the RAID configuration will result in data loss. -
Page 13: Changing Raid Configuration
Applications/Utilities/Disk Utility. The window below will appear. Your G-RAID MIRROR will be displayed in the left-hand column. 2. Select the G-RAID MIRROR by clicking its drive icon in the left-side column. Information about the device will be displayed at the bottom of the window. -
Page 14: Reformatting The G-Raid Mirror
MIRROR should now be erased. Reformatting the G-RAID MIRROR G-RAID MIRROR is set up at the factory for use with macOS systems but can be reformatted for use with Windows 10 and higher. Caution: Reformatting the device will erase all of its contents. If you have saved files on the device, back them up to another file storage location before reformatting it. -
Page 15: Safely Disconnecting The Device
MIRROR but operating above recommended temperatures. SAFELY DISCONNECTING THE DEVICE A great feature of G-RAID MIRROR is its ability to be connected and disconnected while your computer is running. The macOS and Windows operating systems have a means for safely disconnecting and removing the device without turning off the system: ▪... -
Page 16: Drive Replacement
▪ rebuild process. Sleep settings on the computer must be turned off. ▪ Do not change or add new files to the G-RAID MIRROR device during the rebuild process. ▪ Drive Replacement G-RAID MIRROR drive replacement. Open and remove the front cover on the G-RAID MIRROR by pressing on the raised 3-dot locations highlighted in illustration 3.1... - Page 17 4. Attached the drive tray to the replacement drive, making sure to carefully align the four mounting points on the drive with the four mounting receivers on the drive tray. 5. Insert the newly assembled drive tray and drive into the G-RAID MIRROR. 6. The hardware replacement process is now complete. SanDisk Professional...
-
Page 18: Raid 1 Rebuild
After following the steps in the Drive Replacement process, continue here for rebuilding the RAID 1 array. When the replacement drive is first inserted into the G-RAID MIRROR, the replacement drive RAID LED status may be red. However, shortly after this, the... -
Page 19: Compliance And Warranty Information
LIMITED WARRANTY - EXCEPT AUSTRALIA Warranty Information This SanDisk Professional device is covered by a 5-year limited warranty (or 5-year warranty in regions not recognizing “limited”) from the date of purchase, subject to the applicable warranty terms and conditions, as defined in www.sandisk.com/wug. -
Page 20: Regulatory Compliance
Before you return the product you must first obtain a Return Material Authorization (RMA) number. Please either: 1. Contact SanDisk Professional at 1 800 262 504 (M-F | 9 am – 6 pm New South Wales Time) or email SanDisk Professional (support@sandiskprofessional.com) and provide proof of purchase... -
Page 21: Regulatory Compliance - Canada
Richtlinie 2014/30/EU zur elektromagnetischen Verträglichkeit, der Niederspannungsrichtlinie (2014/35/EU) und der Richtlinie 2011/65/EU zur Beschränkung der Verwendung von gefährlichen Stoffen sowie der Abänderung durch die Richtlinie (EU) 2015/863. Den vollständigen Text der EU-Konformitätserklärung finden Sie unter der folgenden Internetadresse: http://www.wdc.com/products/EUDoC. Geprüfte Sicherheit SanDisk Professional User Manual... -
Page 22: Regulatory Compliance - Japan
Schalldruckpegel beträgt 70 db(A) oder weniger gemäß EN ISO 7779, falls nicht anders gekennzeichnet oder spezifiziert. Regulatory Compliance - Japan 添付の電源コードは、本製品専用です。 接地接続は必ず,電源プラグを電源につなぐ前に行って下さい。 また,接地接続を外す場合は,必ず電源プラグを電源から切り離してから行 って下さい。 Regulatory Compliance - Korea Regulatory Compliance - China Regulatory Compliance - Taiwan 此裝置已通過測試且符合 CNS 15936 (EMC) 和 CNS 15598-1 (Safety) 規定。 SanDisk Professional User Manual... - Page 23 Compliance and Warranty Information SanDisk Professional User Manual...
-
Page 24: Index
PRO-BLADE SSD Mag Slot Box contents RAID 1 Rebuild RAID Configurations RAID Mode Setting RAID Mode Switches RAID Settings Connecting the G-RAID MIRROR RAID Setup Rear Connectivity Rear Ports Reformatting for Windows Regulatory Compliance - Austria Dip-Switches Regulatory Compliance - Canada... - Page 25 © 2023 Western Digital Corporation or its affiliates. All rights reserved. Western Digital Technologies, Inc. is the seller of record and licensee in the Americas of SanDisk ® products. Western Digital 951 SanDisk Drive Milpitas, California 95035 U.S.A.
Need help?
Do you have a question about the G-RAID MIRROR and is the answer not in the manual?
Questions and answers